Creating an XPage
This lesson teaches you how to create a basic XPage.
About this task
- Forms are used by XPages to define what data is stored in a document, not how it is displayed. This definition is like the use of hidden fields on display forms to organize and calculate data. The Site form contains data fields for the creation of documents, and some explanatory text. Users never see this, so the layout does not matter.
- Views are used by XPages to define collections of documents and their ordering. Much as you might use a view purely to index some data so that it can be addressed programmatically, the SiteList view serves as an index to your data documents. It lists the contents of all the documents sorted by site name. Views are a powerful way to organize documents, and it is common to have several views showing different subsets and sort orders.
Make sure that the application is expanded and do the following steps:
Procedure
- Double-click XPages.
This action displays a list of XPage elements in the middle pane.
- Click New XPage.
- Name your new XPage
SiteList. (The.xspextension is assumed and added automatically.)You can use spaces in the name but names are usually clearer when you do not.
- Click OK.An empty XPage design element is created in the middle pane.
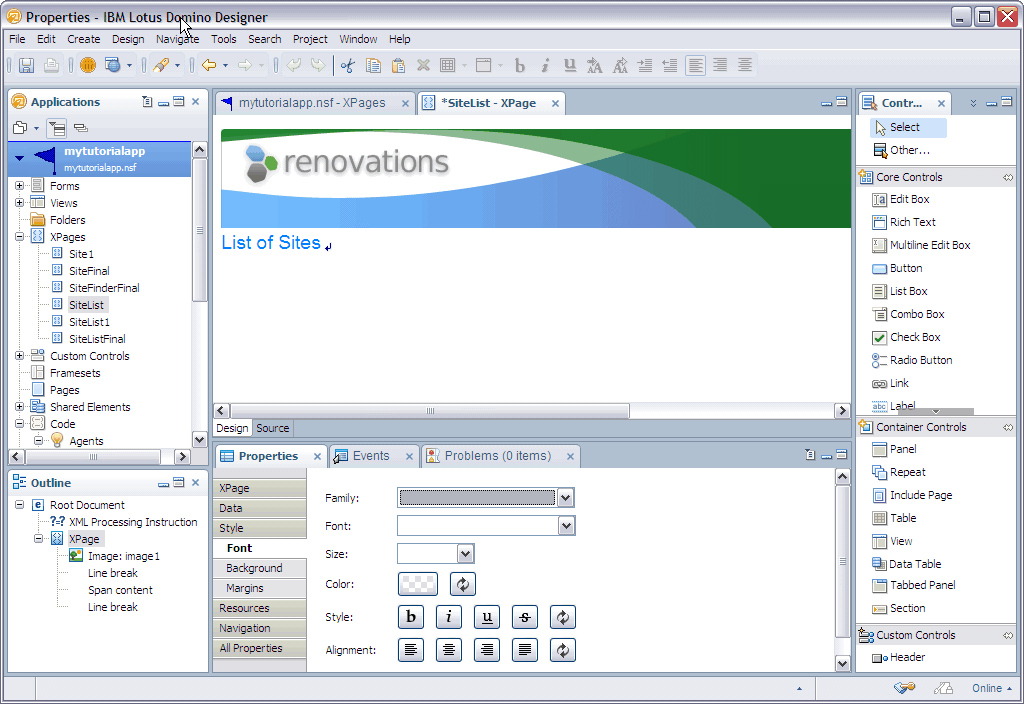
- Put header graphics on the page:
- Select xpTitlebarLeft_ren.gif.
The Select Image window looks like this screen capture.

The images that you see in the screen capture were preloaded. Each image that you see on the list is a resource in the current database. The Add button allows you to import additional images (and there are other ways to import images).
After you click OK, the image should display as a header.
- Select xpTitlebarLeft_ren.gif.
- Click in the empty space to the right of the header image, or press the Right arrow to move in that direction. You might have to scroll in that direction if the space is not visible. Press Enter so that the cursor goes to the next line.
- Enter some header text:
- On the XPage, click the empty line below the header.
- Type List of Sites and press Enter.
- Highlight the line of text.
- In the bottom pane, click Font and change the fonts as you want to, for example, to bold 14 blue.
Later you will add a stylesheet and apply it to this text as an alternate way to control formatting.
Results
Experienced Web developers might want to use elements
that structure the document, such as H1 and H2.
The design user interface does not support this structure, but the
source user interface allows you to enter XML as you want. Click the Source tab
to see and edit the page as XML. Click the Design tab
to return to the tutorial.