Adding a view control

An XPage view control is used to display information from a defined view. The control that you create in this lesson lets you display data from the SiteList view.

About this task

Make sure that the SiteList XPage is open in the center pane and do the following steps:

Procedure

  1. From Container Controls, select and drag View onto the XPage.
  2. In the Select Data Source for View window:
    1. Leave Show data from set to Domino view.
    2. Leave Application set to Current.

      You can select any Domino® application, but the view control does not work unless that application is available on the runtime server.

    3. In the View drop-down list, select SiteList.
    4. Accept view1 as the data source name.

      This name can be used in server-side JavaScript code.

    5. In the list of columns at the end, leave SiteName, StreetAddress, City, and SiteType selected.

    The window looks like this screen capture.


    Select Data Source for View window
  3. Click OK.

    A table representing the view displays. The four columns represent the view columns, and two rows represent the column titles and the column contents. The first row contains a pager control that lets the user navigate through the data in the view.

  4. Adjust the view control:
    1. To resize the columns, select both rows in one column by clicking the cell in the first row and pressing the Shift key while clicking the second cell, and then drag a handle on either cell.
    2. Select the entire header row by clicking on the first cell and pressing the Shift key while clicking on the remaining cells in the row. Press Ctrl+B or use the font properties to make these cells bold.
  5. Allow users to open a document when clicking it in the first column of the view control:
    1. Click inside the left cell at the end (SiteName).
    2. On the Properties tab in the bottom pane, click Display.
    3. Select Show values in this column as links.

    The page looks like this screen capture.
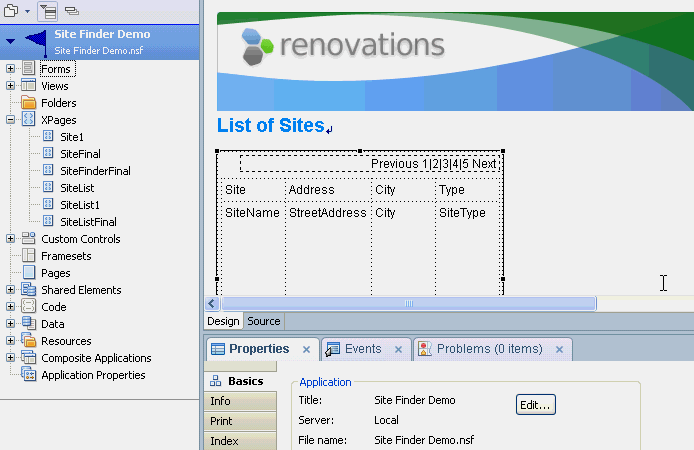

    SiteList XPage with view control
  6. Link the view control to the editing page.
    1. Click the view control so that the entire view is in focus.
    2. On the Properties tab in the bottom pane, click View.
    3. From the At runtime, open selected document using drop-down list at the end, select Site1.
  7. Save and preview the page.
    1. Click the actual XPage itself so that focus is on the page itself.

      Another way to put focus on the page is to click Outline > Root Document > XPage in the side pane. This action puts focus on the page itself. You can put focus on specific design elements on the page by clicking the corresponding element in the outline.

    2. Press Ctrl+S to save the page.
    3. Click Design > Preview in Web Browser > Default System Web Browser or the browser of your choice.
      Click a document in the list. It opens with the Site XPage. You can make changes to the document from this window and click Submit to save them. Submitting the page does not move you away from that page, and you can continue to edit and save the same document.
      There are several ways to save changes and refresh the browser:
      • The Submit button that you use in this tutorial updates the data sources and refreshes the page.
      • The Button button permits you to attach simple actions or JavaScript to an onclick event. Use this event to update the data sources and redirect the user to another page.
      • Page events permit you to attach simple actions or JavaScript to a postSaveDocument event. You can put a Submit button on the page and in the postSaveDocument event redirect users to another page.

      Your XPage is like SiteList1, which you can open for comparison.

  8. Close the browser.