Create Fixlet or Task
The Create Fixlet and Create Task dialogs are similar and allow you to create or customize a Fixlet or Task.
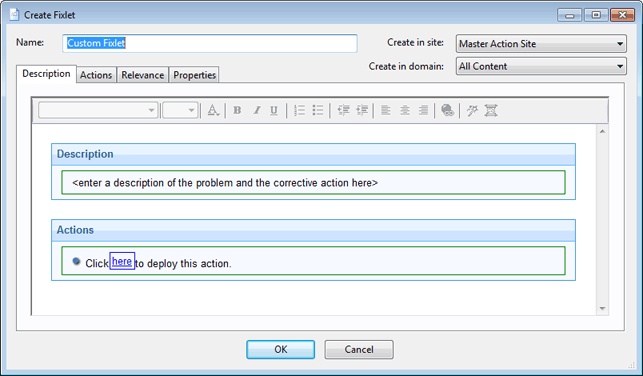
There are several tabs to help you define or edit your Fixlet or Task.
- Description: Enter your descriptive text in this box. You can use the text manipulation toolbar at the top of the dialog to enhance the formatting.
- Actions: Define your action in this dialog. Use the buttons at the right to add, delete,
or change the position of the action. Below that is an area to customize the properties of the
action. Choose the Script Type from the drop-down menu. Below that is a text box where you
can enter a new action script or modify the original. There are three check boxes you can use to
modify the action:
- This action is the default action Click this box to create a default action.
- Include action settings locks Click the Edit box to the right of this check box to customize the action setting locks, including start time, end time, day exclusions, and more. This panel also includes failure and reapplication behaviors.
- Include custom success criteria Allows you to specify the conditions that define the success of the action.
- Relevance: Leave the default of applying to All computers, or click a different button and enter a condition or a relevance statement in the dialog below. This is how you target your Fixlet or Task to relevant computers.
- Properties: Set the properties of your Fixlet or Task, including the category, download size, date, severity, and more. You can also include the SANS (SysAdmin, Audit, Network, Security) or CVE (Common Vulnerabilities and Exposures) ID numbers.
You can create a custom Fixlet or Task by selecting Tools > Create New Fixlet or Task, or you can edit an existing Fixlet or Task by right-clicking it from the List Panel and then selecting Create Custom Copy from the context menu.