Creando un procesador NiFi personalizado
Después de crear un procesador NiFi personalizado, puede verificar que funciona utilizando un conjunto simple de pasos.
Procedure
-
Cree una clase en src/test/java y declare un campo con el tipo de datos org.apache.nifi.util.TestRunner.
public class MyProcessorTest { private TestRunner testRunner; -
Cree un método init() anotado con la anotación @Before de JUnit e inicialice el TestRunner.
@Before public void init() { testRunner = TestRunners.newTestRunner(MyProcessor.class); } -
Cree otro método y anote el método con el nombre de @Test de JUnit. Además, obtenga una carga útil JSON que representará la entrada al procesador.
@Test public void testResponse() throws Exception { final Path JSON_SNIPPET = Paths.get("src/test/resources/common/MyProcessor/scroll_input.json"); final Path JSON_SNIPPET1 = Paths.get("src/test/resources/common/MyProcessor/scroll_input_zero_doc.json"); -
En el mismo método, establezca todos los atributos necesarios en el ejecutor de pruebas tal como se muestra a continuación:
testRunner.setProperty(MyProcessor.SCROLL_DURATION, "1m"); Map<String, String> attributes = new HashMap<String, String>(); attributes.put(PARAM_DOT_STOREID, "1"); attributes.put(CONNECTOR_DOT_NAME, "auth.reindex"); attributes.put(ENVIRONMENT_DOT_NAME, "auth"); testRunner.enqueue(JSON_SNIPPET, attributes); testRunner.run(); attributes.put("index.scroll.uri", "_search/scroll"); testRunner.enqueue(JSON_SNIPPET1, attributes); testRunner.run(); -
En el mismo método, establezca también el número esperado de FlowFiles transferidos a las respectivas relaciones de la siguiente manera:
Relationship expectedRel = MyProcessor.RELATIONSHIP_SUCCESS; testRunner.assertTransferCount(expectedRel, 1); expectedRel = MyProcessor.RELATIONSHIP_FAILURE; testRunner.assertTransferCount(expectedRel, 0); -
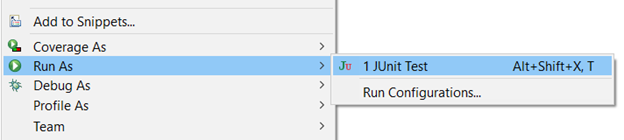
Ejecute esta clase como prueba JUnit. El resultado de la ejecución aparece bajo la vista JUnit.