Lab Exercise 1 – Create Organization
In this lab exercise, the process of creating an organization and configuring various parameters for BigFix Runbook AI is detailed. The prerequisites include information about the module to be configured, authentication type, and existing ITSM and runbook automation tools. The conclusion states that this exercise provides a foundation for further configurations.
Scenario
Based on the analysis done earlier for identifying automation opportunities, you have identified that significant number of incidents can be automated. An organization has asked for configuration of BigFix Runbook AI for resolving Incidents. Currently they are using Service Now as the ITSM tool and BigFix as the runbook automation tool.
In this lab, we will showcase the detailed procedure for creating an organization and configuring various necessary parameters.
Prerequisites
Information of the module which needs to be configured – Incident / Service Request Tasks / Change Request Tasks. In this exercise, we will consider Incident Management module.
Information about authentication type of An organization. In this exercise, we will consider Form based authentication
Information about existing IT Service Management and Runbook Automation tools present in Organization’s environment.
Access to Super Admin credentials.
Solution
- Open BigFix Runbook AI Web URL and login with Super Admin credentials.
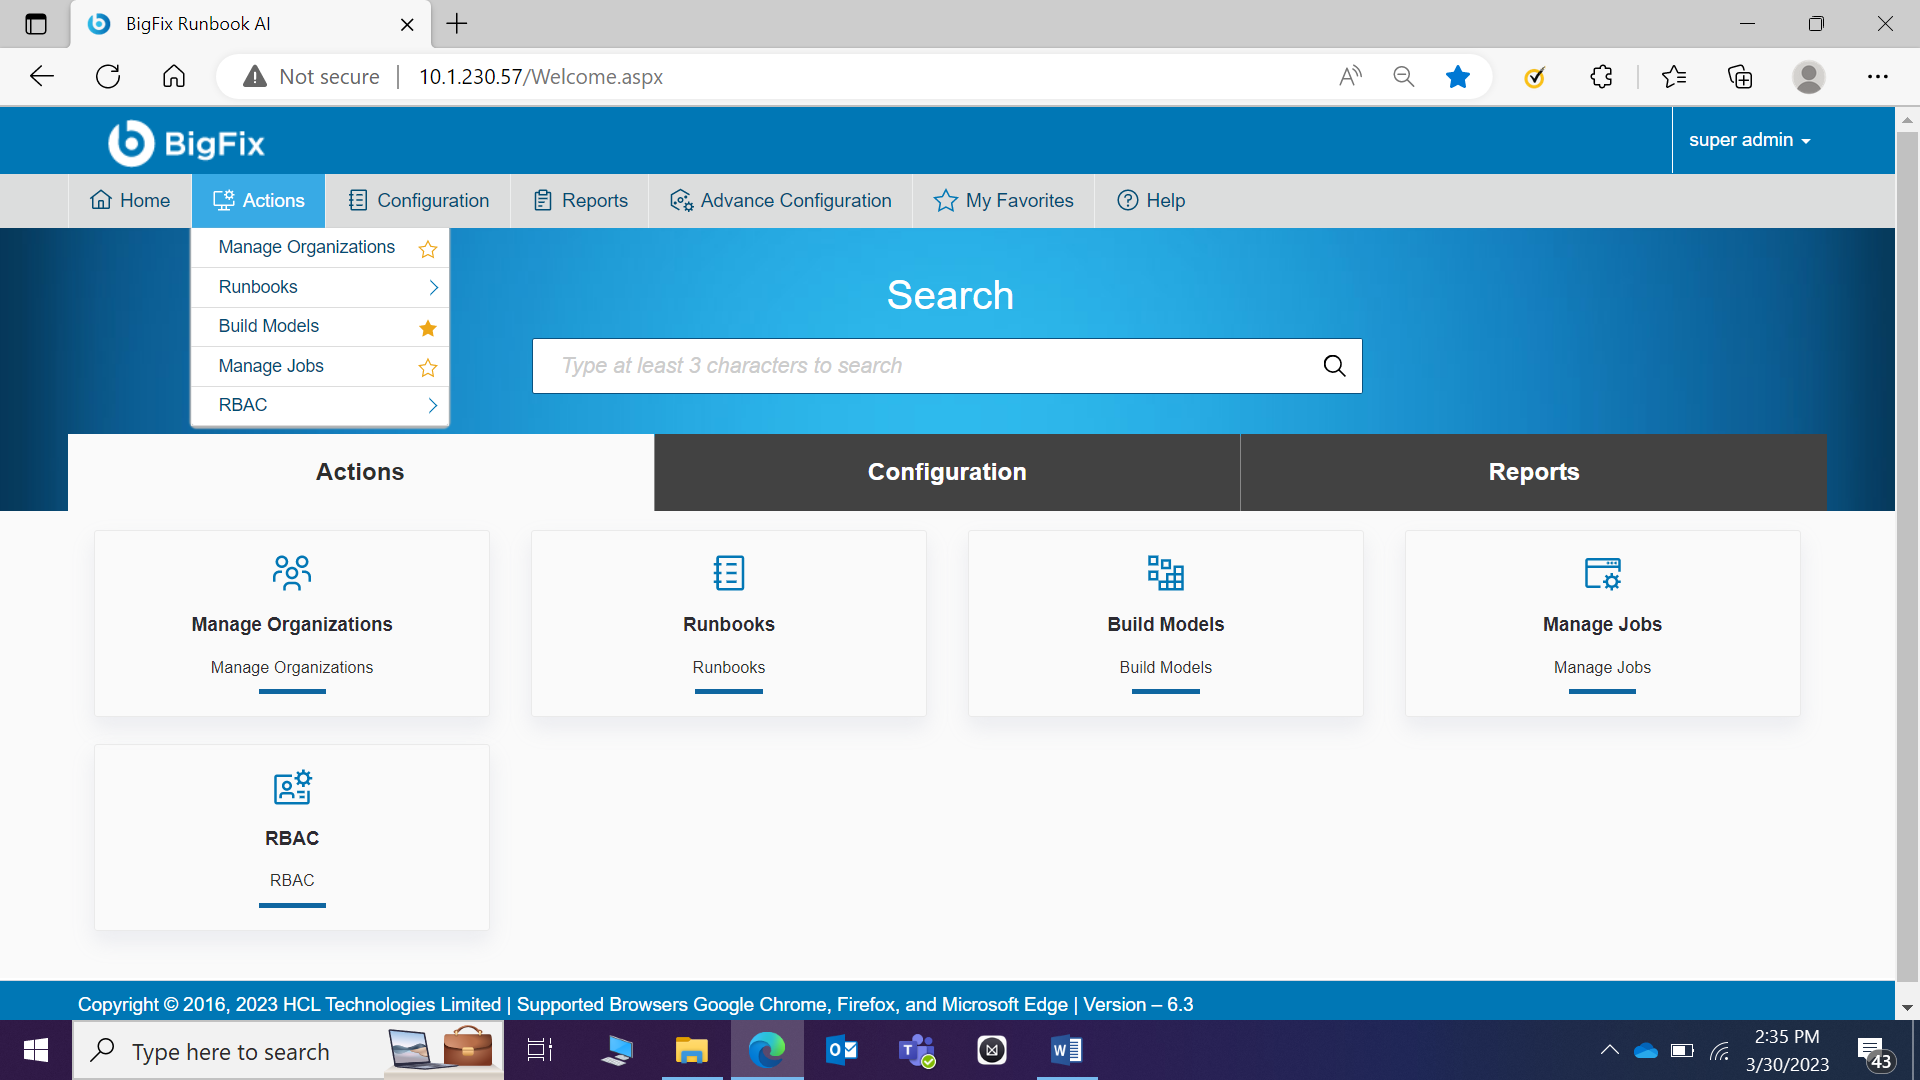
- Go to Actions Manage Organizations menu and click Create Organization.
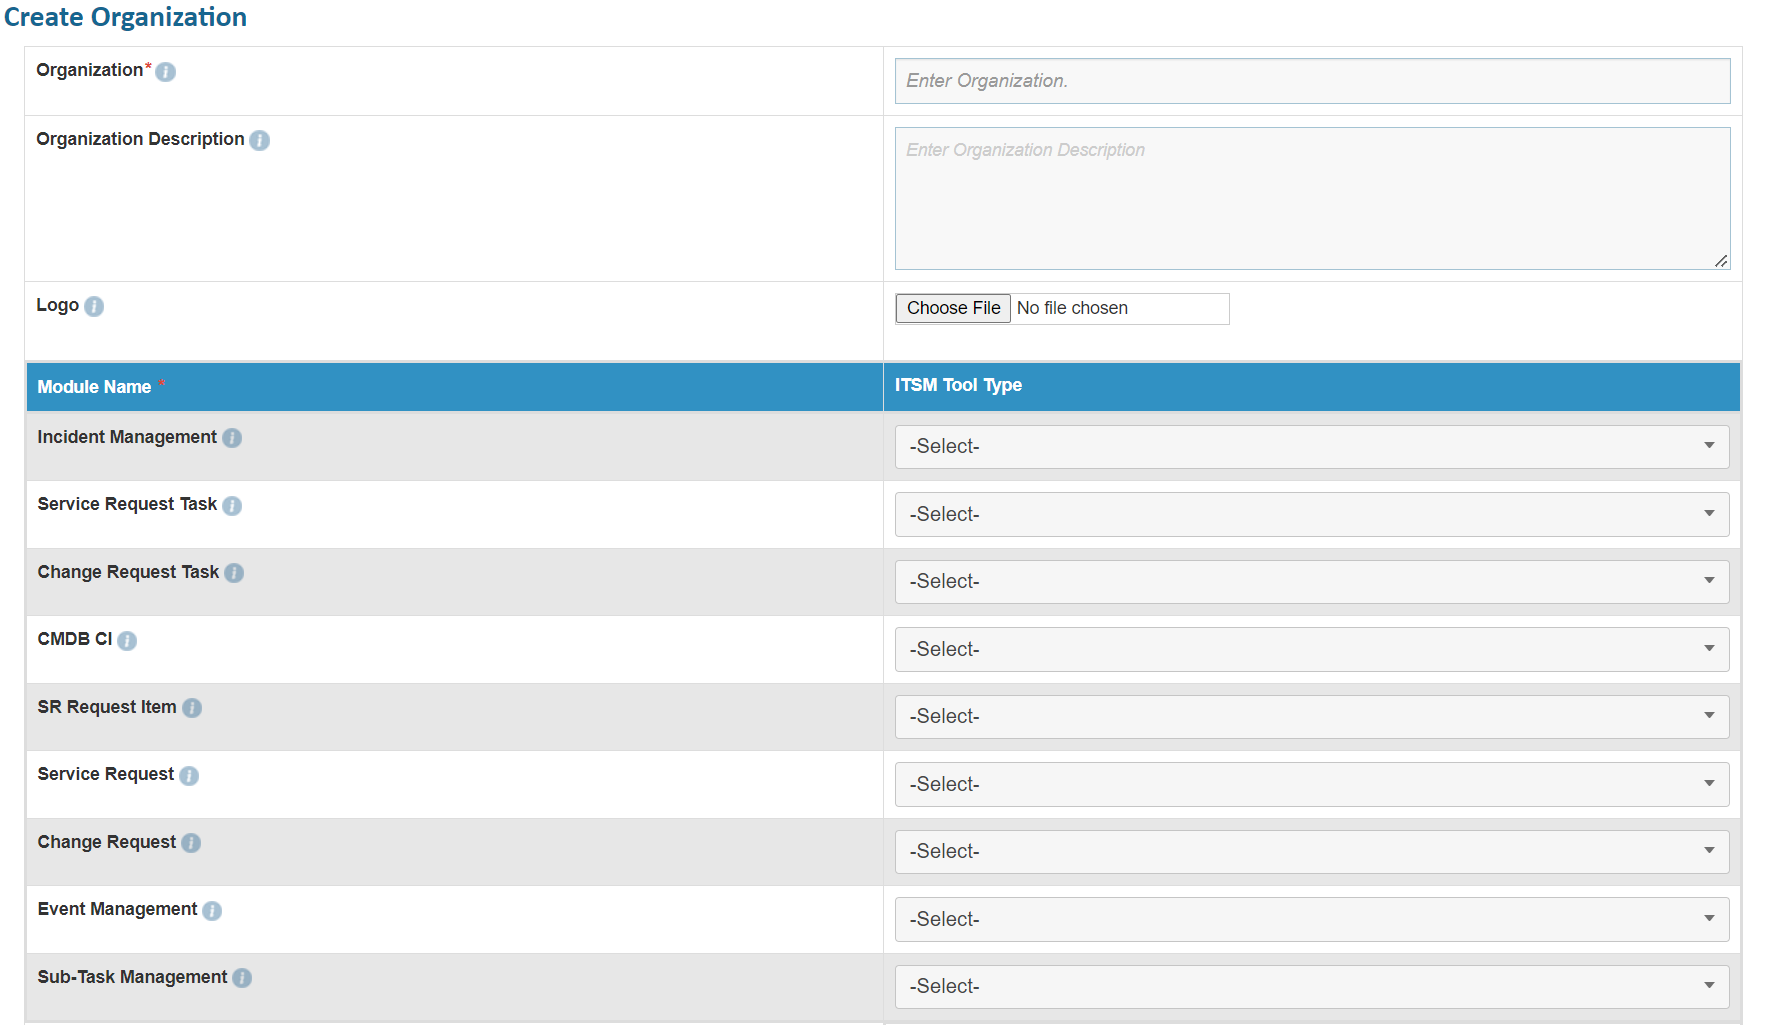
The Create Organization form appears.
- Enter the Organization Name as BigFixRunbookAI.
- Enter the Organization Description.
- Click Choose File to upload the organization’s Logo.
- Select Service Now against Incident Management module.
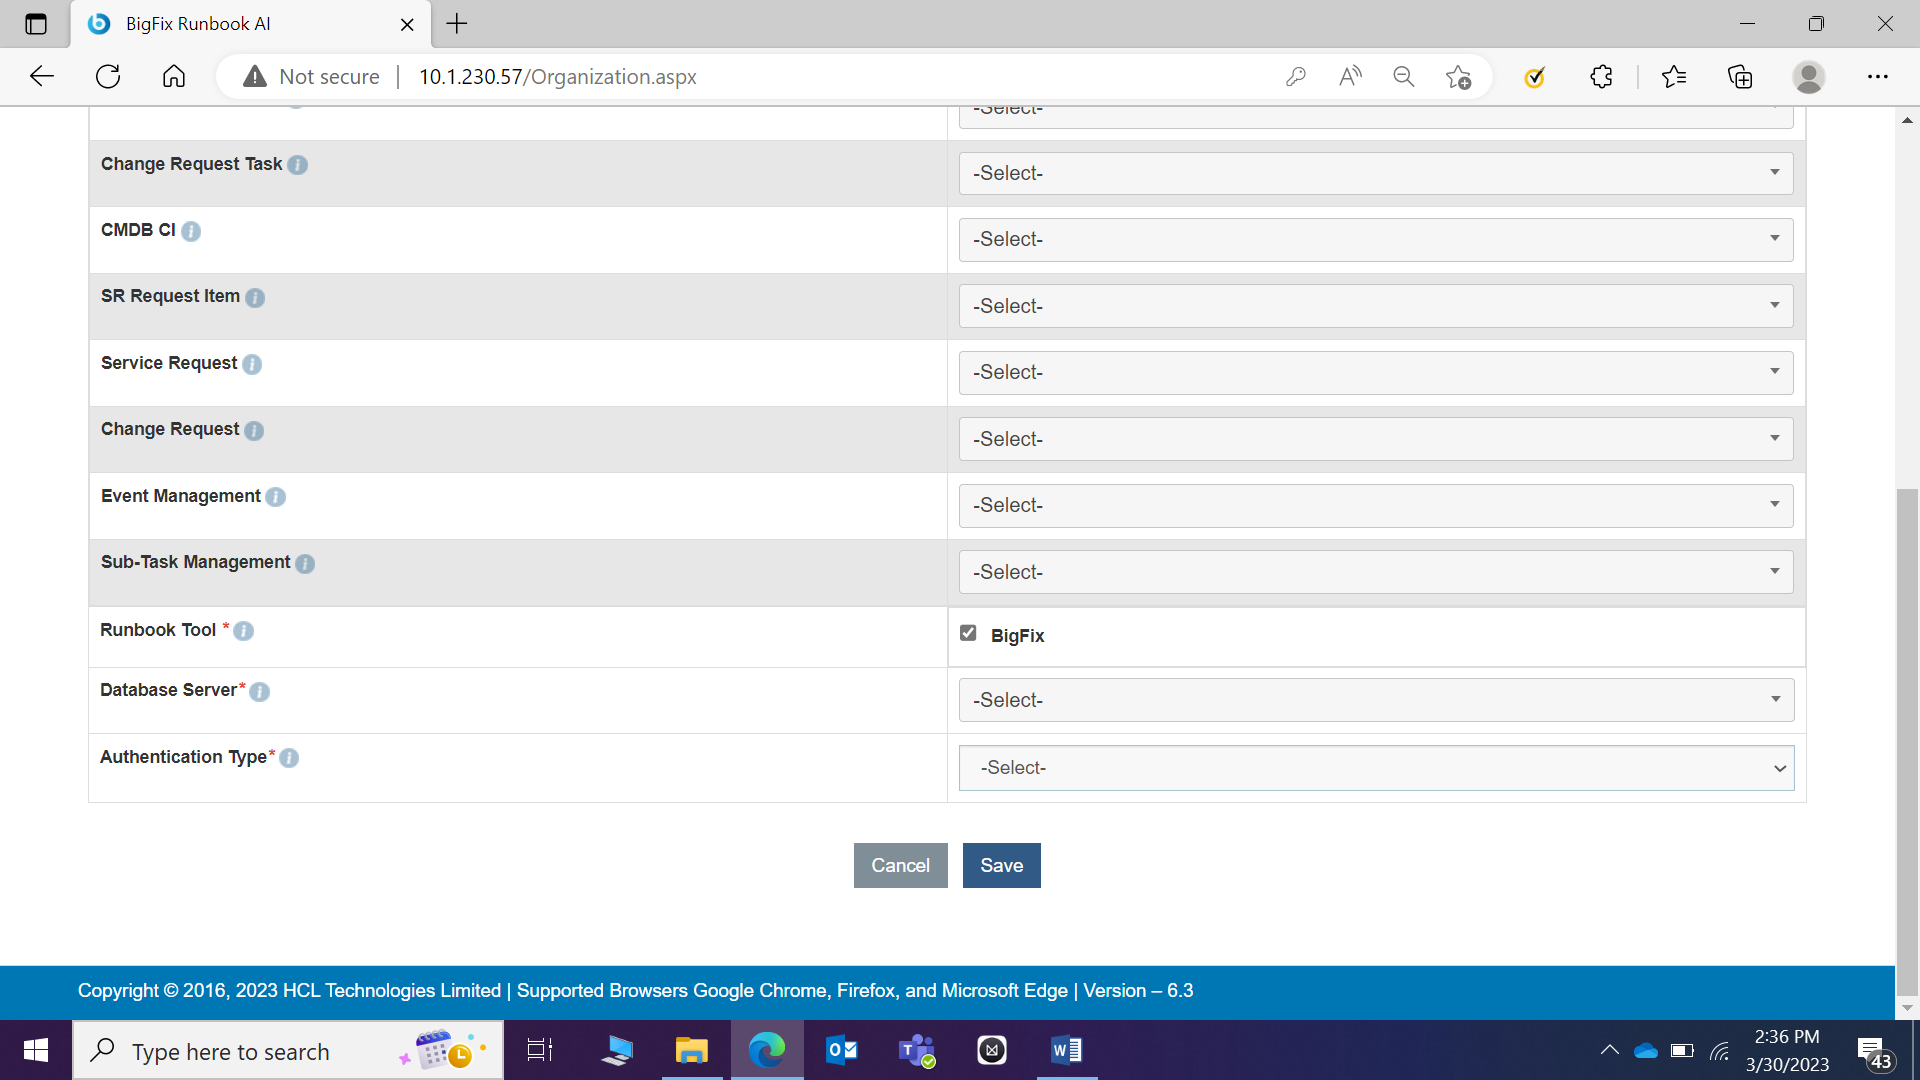
- Select BigFix as the Runbook Tool.
- Select Database Server available from the dropdown.
- Select the Authentication Type as Form Based.
- Click Save once all the information is populated. The organization will be created.
- To view the newly created organization and its details, go to Actions and click Manage Organizations menu option.
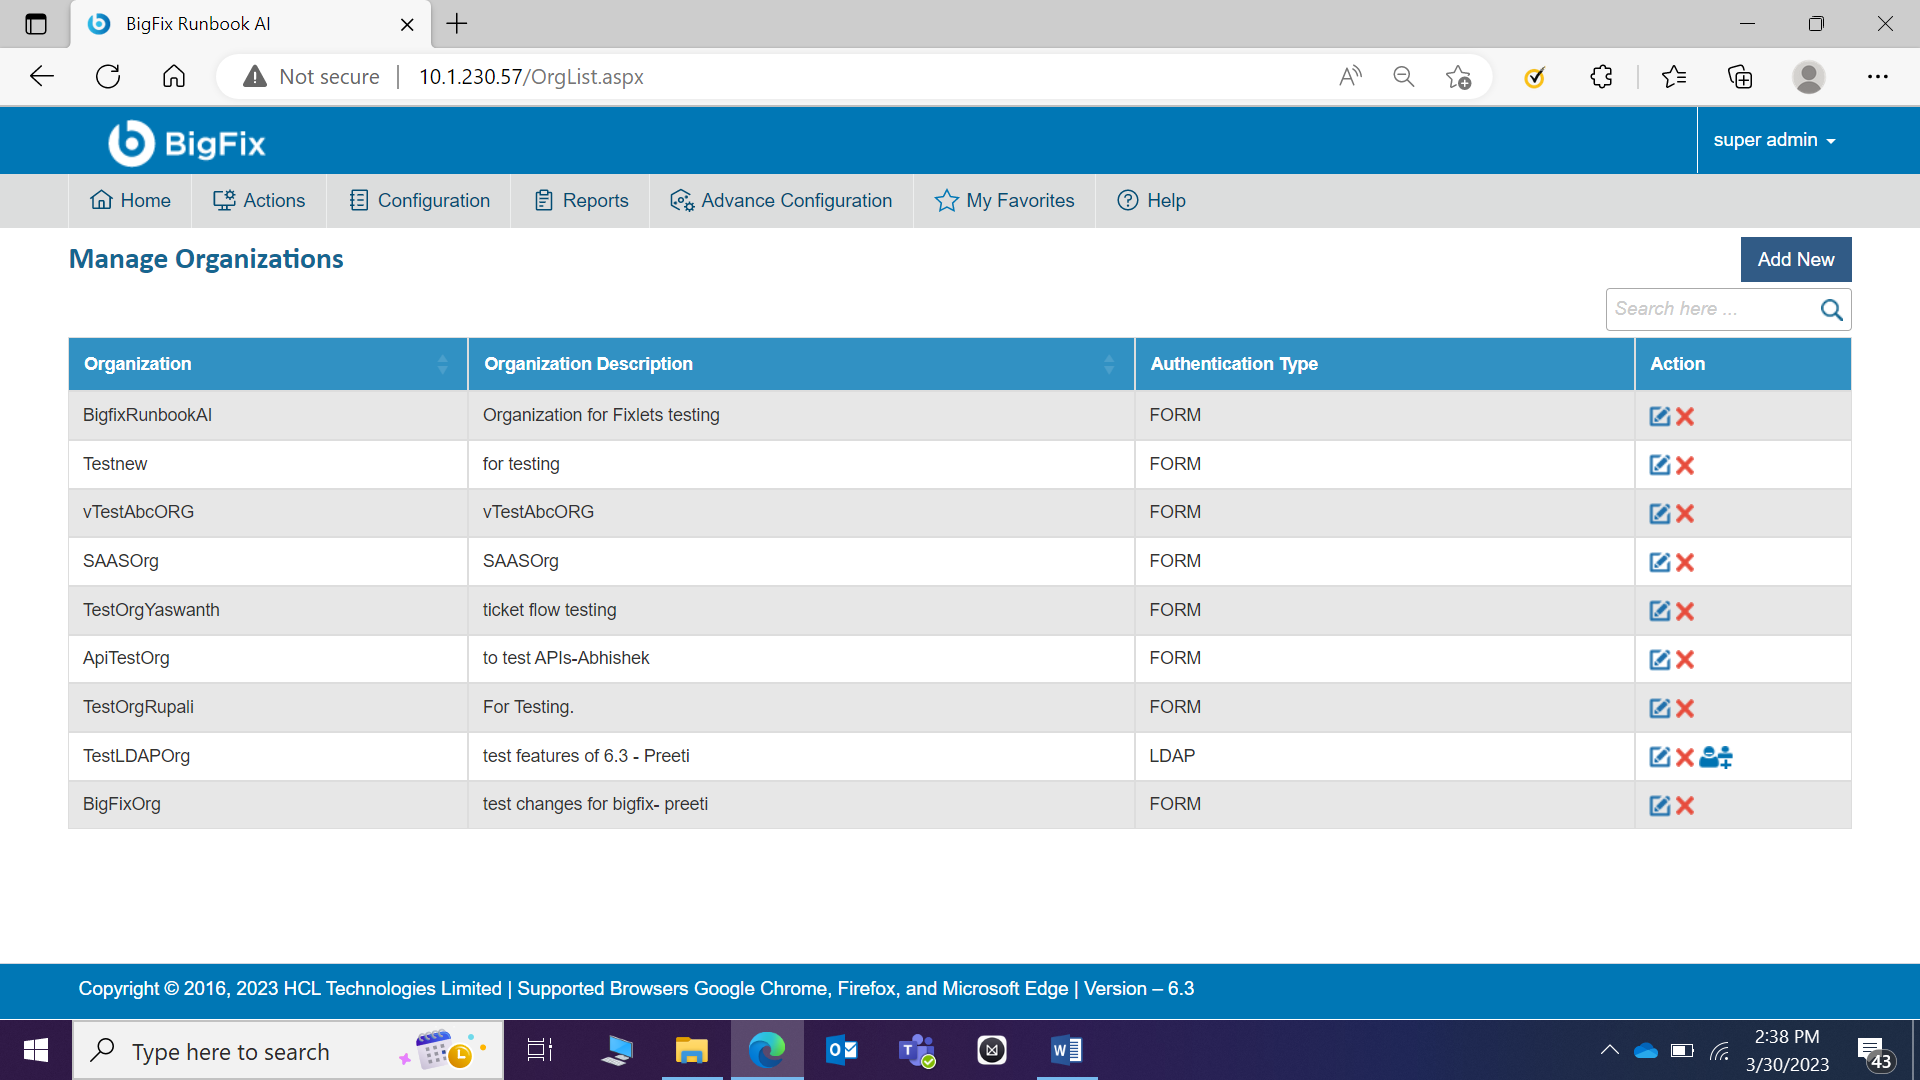
- A list of available organization with the newly created organization will be visible in the list. You can edit the information or delete the organization by clicking on the respective icons under Action section.
Conclusion
After the completion of this exercise, you should have a good understanding of creating a new organization with the required parameters. This forms the foundation for performing the configurations covered in further exercises.
The next step is to configure the data sources for sourcing the ticket related information which will be covered in the next exercise.