Take action
Use the Take Action dialog to run deploy a Fixlet, a task or a baseline.
The Take Action dialog is similar to the Take Multiple Actions dialog, but issues only a single action.
You can access this dialog in one of these ways:
- Right-click a relevant Fixlet message or a task and choose Take Default Action from the pop-up menu.
- Click a relevant Fixlet message or task and select Take Default Action in the Work Area toolbar.
- Click a relevant Fixlet message or task and select the Description tab. Scroll down to see the suggested actions. Click the link related to the action that you want to run.
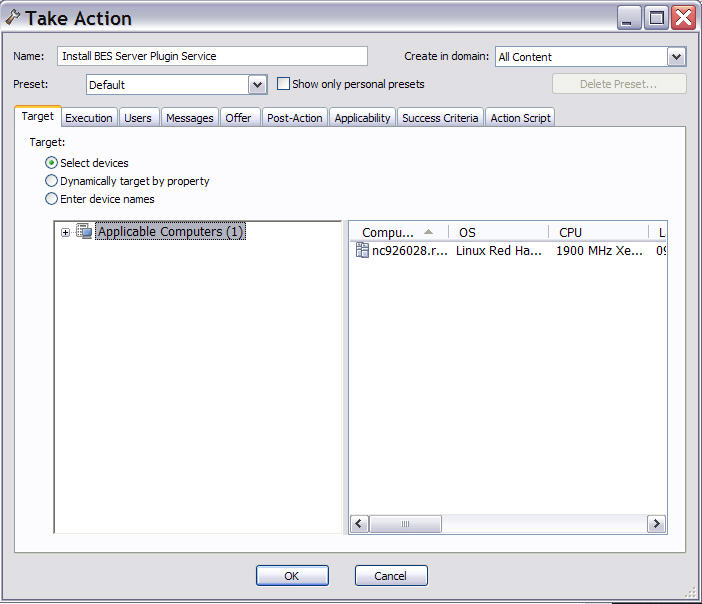
Using the input fields and tabs contained in the dialog you can specify exactly how the selected
action is to be deployed to the computers in your network. These are the fields and the tabs
contained in the dialog:
- Name
- Is the name of the action.
- Create in domain
- Represents the domain where you want to store your custom action. All Content is the top-level domain, and it includes objects from all domains.
- Preset
- Specifies a preset customized action. There are two built-in presets available, Default and Policy. Select Policy if you want to set no expiration date for the action. You can also save your current input as a preset, private or public, for later use.
- Target tab
- Contains the list of targets for the action. You can select the targets of the action from the provided list, or use properties to filter a list or specify a list of target computers. If you click Select devices you must select the specific targets in the list. For more information about this tab, see Action: Target.
- Execution tab
- Contains the time constraints and retry behavior for the action run and failure. For more information about this tab, see Execution Tab.
- Users tab
- Contains the settings to run the action based on which and if specific users are logged on the computer. For more information about this tab, see Users Tab.
- Messages tab
- Contains messages to display before or while the action runs. For more information about this tab, see Messages tab.
- Offer tab
- Specifies whether or not to advertise the existence of programs or patches that your networked Clients can choose to use. This grants extra control to your users to customize their setup. For more information about this tab, see Offer tab.
- Post-action tab
- Lists the activities that must be done to complete the action, including restart or shutdown. For more information about this tab, see Post-Action tab.
- Applicability tab
- Contains the relevance clause that determines the applicability of the action. For more information about this tab, see Applicability tab.
- Success criteria tab
- Specifies what is intended as successful outcome for the action. This tab lets you use different criteria to determine when a problem has been fixed. For more information about this tab, see Success Criteria tab.
- Action script tab
- Contains a script describing the action to run. The script is written using the action language. An operator needs Custom Authoring permissions to edit the action script. For more information about this tab, see Action Script Tab
When you decide to run the action, click OK and enter your password. A progress dialog is displayed to keep you informed about the deployment of the action. You can also monitor how the action is being processed following the instructions provided in Monitoring an action taken.