
SKU List
The SKU List widget is used to display a list of SKUs on a product page. You can view in a table the full set of SKUs associated with a product, and scan the attributes quickly to pick the right combination. You can specify the quantity of each SKU and then add those SKUs to their cart or current order, or to a requisition list.
You can use this widget only with the Product page and B2B Product page templates.
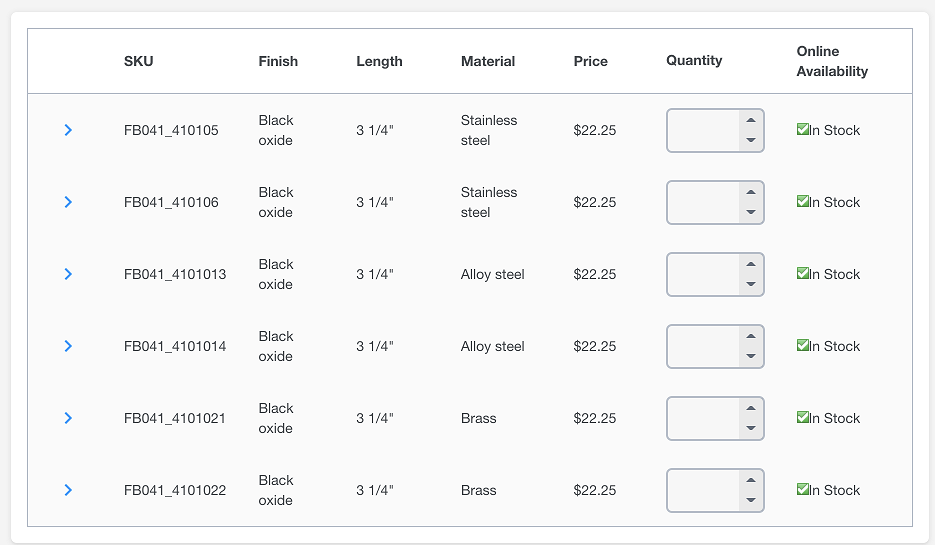
Example of widget content
In this example of the SKU List widget in a product page layout:
- Each SKU for the product is represented in a row of the table. The following columns are always displayed: SKU, Quantity, Online Availability, and In-Store Availability. The additional columns in between contain the defining attributes and the optional Compare column.
- If there is not enough horizontal space to include all the defining attributes in table columns at a certain page resolution, the additional defining attributes and optional Compare column will overflow into this gray-shaded section. To view and hide the section, customers can toggle the arrow to the left of the SKU row. In this example, the In-Store Availability column is hidden in this way.
Note: If a product has only one SKU, the SKU List widget is still rendered on
the page with a single row. The link in the SKU column
opens the SKU details page.
Prerequisites for using this widget
For the SKU List widget to show multiple rows of SKUs, the products in your catalog
must have defining attributes that are assigned to them. Complete these steps in the
Catalogs tool:
- Set up the defining attributes in the attribute dictionary with the Displayable check box selected. For more information, see Creating attributes in the attribute dictionary.
- Assign the defining attributes to products. For more information, see Assigning defining attributes from the attribute dictionary.
Widget properties and content
You can drag and drop the widget in the layout template you have
selected.
- Double click on the widget you have dropped inside the template and you will be able to modify the widget property. This widget has no configurable properties other than the widget name.
- Click Save. The widget properties are saved successfully.