Using the Management Center
The starting point for all Management Center tasks is to open the tooling. Afterward, you can use several methods to complete a task: by selecting menu options, by clicking toolbar buttons, by right-clicking and selecting menus, or by keyboard shortcuts.
About this task
Procedure
- Open the Management Center.
-
Use one of the following methods to complete your tasks the way you work
best: by menu, toolbar, right-clicking, or by keyboard shortcut.
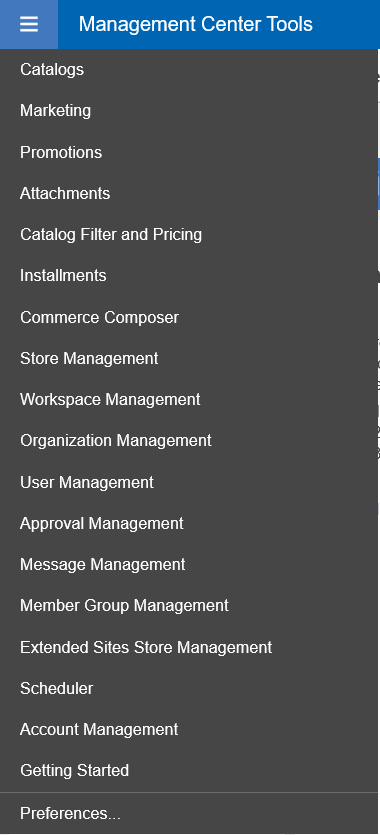
Option Description Select from a menu The Management Center Tools menu contains options for common tasks. For example, to change your application preferences, from the Management Center Tools menu, select Preferences:


Click a toolbar button The Management Center toolbar contains buttons for common tasks. For example, to save your work, click the save button from the toolbar: 
Right-click and select from a menu In some cases, you can perform context-sensitive tasks by right-clicking an area and selecting from the menu that displays. For example, from the catalog explorer view, show a list of categories, then right-click the list and select Open. 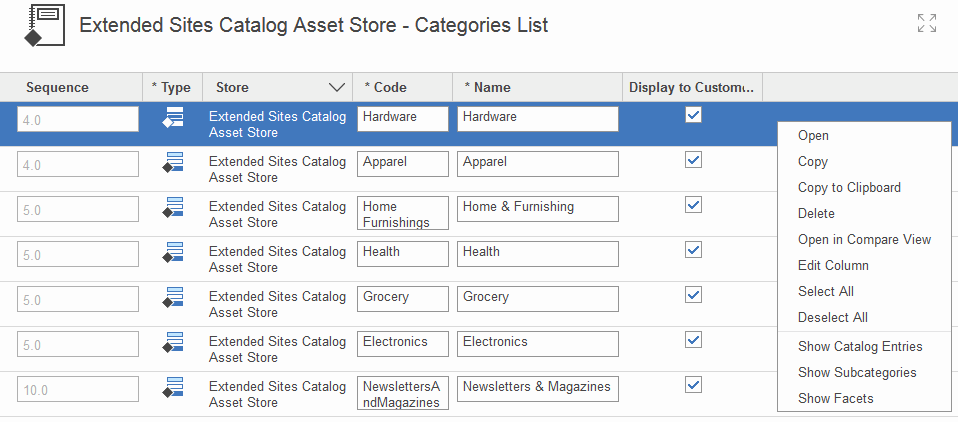
The Category properties view displays. Once you open the properties for the category, you can view or update the category information.
Type a keyboard shortcut To quickly perform an action, you can use a combination of keyboard strokes. Navigate using the explorer view Expand and collapse the explorer tree within the Management Center to work with various objects. In addition, the explorer view lists all active work or items you have currently open. You can return to a list of search results, if you navigate away from the list. Drag elements Quickly drag elements from one area to another. For example, in the Catalogs tool, drag a product from a search results list into the catalog you are building. Likewise, when you use the activity builder in the Marketing tool, drag elements from a toolbar to a flow connector. You can drag objects to and from various places within the Management Center. Visual indicators denote whether you can drag the element: an + icon indicates that you can drag the element, and an X icon indicates that you cannot move the element. Format rich text Edit text by using formatting such as font type, style, color; text alignment and indentation; and bulleted lists. The rich text editor is embedded into the Management Center properties view. You can enter formatted text within the Management Center, and display the same text on your storefront. Toggle between rich text format and HTML Edit text in the rich text editor in either rich text format or HTML. For example, in a rich text editor, enter text and apply formatting, such as bold, to that text. Click  . The HTML version of the formatted text is displayed in the rich text editor. You can also
enter text with HTML formatting in the rich text editor and click To display your HTML in rich text format.
. The HTML version of the formatted text is displayed in the rich text editor. You can also
enter text with HTML formatting in the rich text editor and click To display your HTML in rich text format.If CKEditor is activated under the Preferences menu, to enter text with HTML formatting, you must first click Source.
Spell check text Check the spelling of text in a text editor or rich text editor that is embedded into a Management Center properties view or editable list view. For example, in an entry field, right-click; then click Check Spelling. The Spell Check dialog opens and displays each misspelled word within the text that you are editing. You can replace each misspelled word with one of the suggested words or skip the misspelled text. Note: Spell check does not support the following languages:- Japanese
- Korean
- Romanian
- Simplified Chinese
- Traditional Chinese
List only the information you need Filter any list within the Management Center to display only the information you need. For example, only filter catalog entries that are flagged as Displayable to Customers in the Catalogs tool. Filtering is based on the total number of an object within the database. The list that is displayed is the filtering results. If the Management Center cannot display these results, a warning message displays. Subsequent filtering results within the same session do not display. Instead, use the Management Center find area to locate the object you need. Edit in place Click an editable cell within a table to change on the spot. Editing in place is a quick way to make simple changes, without having to go into the properties view of an object. For instance, within a table that lists products, change the price of the product to reflect a new price. You can also edit in place by using Find and Replace to change text strings in business objects such as product descriptions, promotion names, or attachment descriptions. You can click the Find and Replace  icon in the toolbar or click Edit > Find and
Replace.
icon in the toolbar or click Edit > Find and
Replace.Edit multiple cells in a column efficiently Update several cells in the same column at once with the same value. For example, in an editable list view, select multiple rows that you want to contain the same value, and click  . The Edit Column dialog opens. Choose a column to edit and specify the value that you want
to apply to this column for each of the selected rows.
. The Edit Column dialog opens. Choose a column to edit and specify the value that you want
to apply to this column for each of the selected rows.Locate objects to complete the current task Locate objects that you require to complete a task, without navigating away from the current view. Search is available within each tool. You can also search or browse for objects from a utilities view, which you can display and use at any time. For example, while you edit a product, you want to include a reference to another product as a cross-sell item. Obtain a list of products to use for the merchandising associations by clicking the utilities view icon (  ) to search for the products. From the search results, drag a product from the utilities
view into the product properties view.
) to search for the products. From the search results, drag a product from the utilities
view into the product properties view.Define your user preferences to personalize the user interface (on a per user basis) Set global user preferences that become your default preferences for the Management Center. At any time, you can change these settings by using the following option: - Name of the store you want to manage by default
- Language
- Number format
- Date format
- Time format
- Time zone in which to display all dates and times
- Day of the week that you want to use as the first day of the week when you manage tasks with the Management Center
- Number of business objects to display on each page
- Detailed hover help to provide additional help information about a Management Center user interface element (for instance, how to use a specific field)
- HCL Commerce Accelerator menu option that is displayed in the Management Center Tools menu. This preference is viewable only when you use the Microsoft Internet Explorer browser.
- Rich text editor (use either CKEditor or the default Management Center rich text editor)
Define your work area to personalize the user interface (on a per user basis) The Management Center work area can display a list of items (for example, a list of promotions for your store), a properties view to work with details for individual items (such as a specific promotion, from your list), or a calendar view for scheduling purposes. The calendar view is offered in the Promotions and Marketing tools.
You can also configure your work area to show two views. For example, show the list and the properties views in one view: select
 to display the list at the top, and the properties view below it; click
  to show the list to the left of the screen and the properties view to the right.Note: For a list view, if the Management Center cannot display the list, a warning message is displayed. If you create new instances of an object for that list, only the new objects are listed. Within the same session, if you create new products, only the new products (not the total products for the store) display on the list.
Define your table views to personalize the user interface (on a per user basis) View data in the order that works best for you. Data within the Management Center is often displayed in a table (or list view), and which data and how you view it matters. If you frequently review product descriptions, attributes, and prices, then move those three table columns to the beginning of your table. Drag the column headings to the order that best suit your preferences. Similarly, if you do not use certain columns, you can hide them by right-clicking the column heading and selecting Hide. To show a hidden column, right-click any column heading in the list view and click Configure Columns to display the Column Selector dialog. Select the column heading names that you want to show from the list within the dialog. To sort, hide or show multiple columns, or change the width of a column, right-click a column heading. The Column Selector dialog opens.