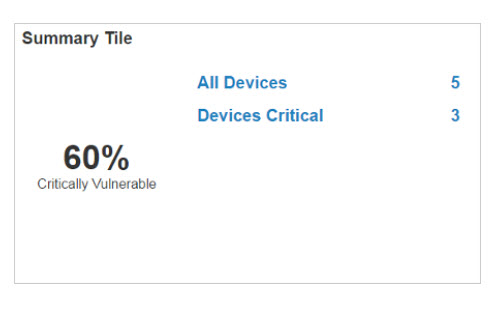
Create a Summary Tile
Use summary tile to express an item as a percentage of another.
To create a summary tile:
- From the Overview page, select Edit Dashboard > Add Tile > Add Custom Tiles.
- Select Summary.
- Enter a name for your tile.
- Select an item (BigFix object) from the drop-down list, and click Add Item.
- Enter a description for this line item on the tile.
- Specify data conditions and values (filter criteria).
- Click Add Condition.
- Select a condition from the drop-down list.
- Select a condition value. Click Add Value again to further refine your conditions.
- Use the Add Condition and Add Value buttons to specify more conditions as required.
- To include every instance of an object (for example, ALL Software Packages), proceed to Step 7.
- Click Add Condition.
- Click Add to add this line item to your tile and return to the Build Tile page. Or click Back to exit without saving.
- Repeat Steps 4 – 7 to create up to five more line items for the tile. Check the Preview pane to see how your tile looks as you build. Drag and drop line items to rearrange them, or click the X to delete a line item.
- Define a summary for the tile. Using the drop-down lists, select two line items to express one as a percentage of the other. For example, a percentage of all devices with patches that are critical. Enter a description for your summary.
- Click Done. On the Edit Dashboard page, move the new tile to the place you want it on the dashboard.