Working with Predefined Tiles
Learn how to add a predefined tile to a dashboard.
The tiles on the WebUI's default dashboards can be used in any combination.
To add a predefined tile to a dashboard:
- Click the Edit Dashboard button.
- On the Edit Dashboard page, click Add Tile.
- On the Select Tile page, click Add From Tile Library.
- Click a tile to add it. The new tile is placed on the page below any existing tiles.
- Drag tiles to arrange them on the page.
- Click the Save button in the upper right corner of the page or Cancel to exit without making changes.

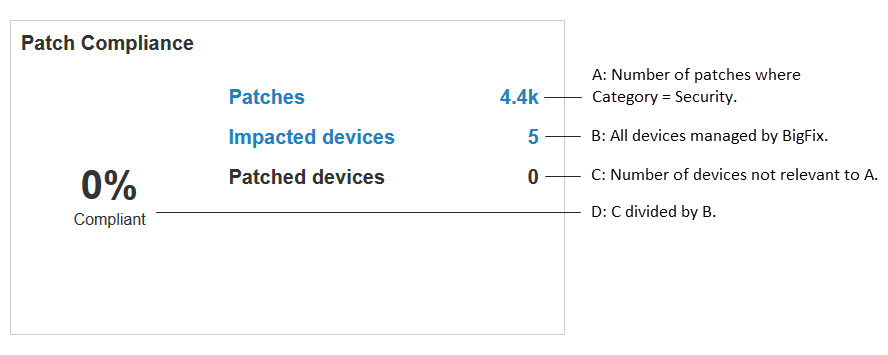
Note: In larger deployments, the Patch Compliance tile can be slow to load. If your deployment has
over 10,000 endpoints, you might experience dashboard delays in loading data with this tile.
Administrators building dashboards may want to refrain from using this tile.