Creating a web activity from within a Commerce Composer widget
In certain Commerce Composer widgets, you can create a web activity directly from the widget properties view. By running a web activity in the widget, you can take advantage of web activity capabilities for managing the widget content. These capabilities include personalization, scheduling, and prioritization.
The widgets that support this feature are listed here:
Before you begin
- Ensure that you understand the types of web activity actions that your widget supports. For example, for a Content Recommendation widget, the web activity action must display content, not categories or catalog entries. Review the topic for your widget in the previous links.
- Ensure that a site administrator configures your site to support Management Center marketing features. See Configuring marketing for Management Center.
About this task
Procedure
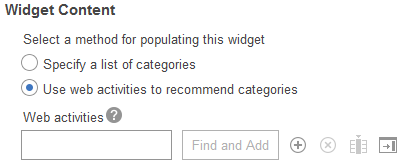
- In the Widget Content section, select the option to use
web activities as the method to populate the widget.Here is an example:
-
Above the Web activities table, click
 Create New Web Activity.
The activity build opens in the Commerce Composer tool.
- In the General Properties tab, set the
properties for the activity.Tip: You do not have to change any of the following properties unless the default values are not suitable for your web activity.
Property Description Name The web activity name is automatically generated using the layout name and slot position. You can type a different name if you want. Description Type a description of the web activity. Priority If you are scheduling more than one web activity in this widget, assign the activity a priority number between zero and 1000. The higher the number, the higher the priority. The web activities are evaluated in priority sequence. Start date Optionally, specify a start date and time for the activity. If you want the web activity to run the entire time that the layout is scheduled to run, do not specify a start date. End date Optionally, specify an end date and time for the activity. If you want the web activity to run the entire time that the layout is scheduled to run, do not specify an end date. Repeatable Specify whether the activity is repeatable. This means that a customer who views the widget multiple times can see the content each time. This behavior is generally desirable for web activities. Campaign If you want to organize this activity under a campaign, specify the campaign. - Decide whether to keep the existing action in the activity
flow, or replace it with a different action. For example, for the Content Recommendation widget, the default activity contains the Recommend Content action. You can delete the Recommend Content action from the flow and drag in a different action from the palette, such as the Recommend Promotion action.Important: You must use an action that displays the type of data (content, catalog entries, or categories) that your widget supports. Refer to the widget topic links at the beginning of this topic to see a list of supported actions for each widget.
- Click the action in the activity flow, and then set its properties.
- Optional:
Add target elements to your activity.
Targets define what more criteria a customer must meet to see the information you specified for this e-Marketing Spot.
- From the Targets section in the palette, drag a target element onto a flow connector in the work area to the left of the action element that you want to target.
- Click the target element to display its properties in the properties view.
- Complete the properties for the target element.
- Optional:
Add branch elements to your activity.
A branch element splits a single path in the activity into two or more paths. You can then use different target and action elements on each path within the same activity.
- Click Save and then click Close.
In the widget properties, the web activity is listed in the Web activities table. Notice that its status is Inactive.
- Right-click the web activity, and then click Activate.