In this lesson, you add the hero ad to your layout by using
a Content Recommendation widget.
About this task
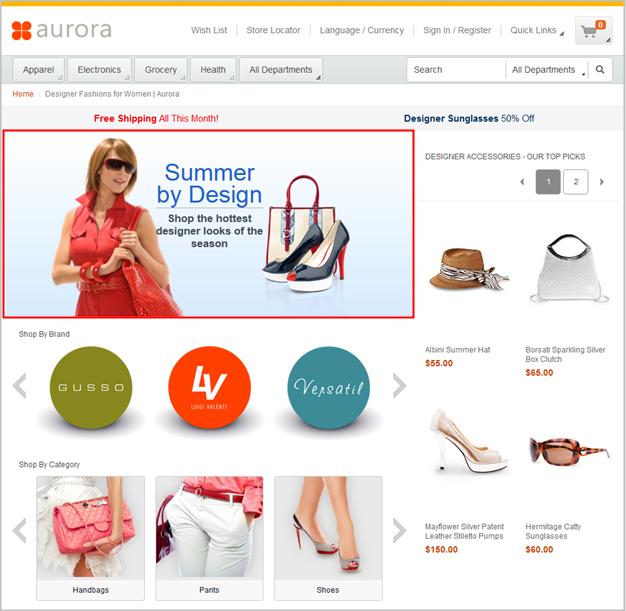
The following screen capture shows the Summer by Design
hero
ad:
For
the Summer by Design
ad, all of the images are uploaded to
Management Center and ready for use. In this lesson, you create marketing
content to display in the Content Recommendation widget. The marketing
content contains static HTML that renders the Summer by Design
ad.
To
learn more about the Content Recommendation widget, read the following
topic:
Procedure
- In the Commerce Composer tool,
ensure that you are on the Design Layout tab.
- In the Wireframe image, click slot
4.
- In the Filter by field, type Content.
- Click Content Recommendation Widget,
and then click OK.
The properties
for the widget open.
- In the Widget Properties section,
to the right of each field, hover over the information icon and read
the tooltip. For this widget, all of the default property settings
are appropriate, so do not change the default settings.
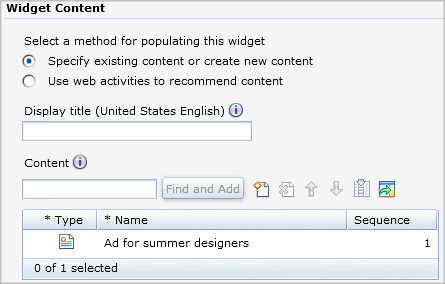
- In the Widget Content section, notice
the two options for populating the widget:
- Specify existing content or create new content
- Use web activities to recommend content
 |
A number of Commerce Composer widgets
support web activities as
an alternative to specifying content directly in the widget. Web activities
offer these advantages:
- You can use targets in web activities to personalize the widget
content for different customers.
- You can schedule web activities. For example, if the layout is
scheduled for the month of May, you might schedule a different web
activity to run each week.
- You can run multiple web activities in the widget and assign a
different priority to each web activity.
If your goal is to display the same content to all customers
while this layout is in use on the storefront, you probably do not
need a web activity. |
For this widget, instead of running a web activity, you create
marketing content directly in the widget.
- Above the Content table, click
 Create New Content.
The properties view for new content is displayed.
- In the Name field, type Ad
for summer designers
- In the Content type field, select Text
for store page display
- In the Text field, click
 . CKEditor
opens in a new window.
. CKEditor
opens in a new window. - Click Source.
- Paste the following HTML code into CKEditor:
<link href="/wcsstore/Aurora/rwdWebAssets/summerEssentials/styles.css" rel="stylesheet" />
<div class="container" dir="ltr" id="albiniCollect">
	<div id="albiniCollect-bkgrd">
		<div>
		</div>
	</div>
	<div class="background">
		<div class="gradient">
			<div class="espotCont">
				<div class="multiImgCont2">
					<div id="girl3">
						<div>
						</div>
					</div>
					<div id="girl2">
						<!--[if IE 8]>        <img src="/wcsstore/Aurora/rwdWebAssets/summerEssentials/girl1.png"></img>      <![endif]--><!--[if gte IE 9]><!-->
						<div>
						</div>
						<!--<![endif]--></div>
				</div>
				<div class="titleCont">
					<div class="title">
						Summer by Design</div>
					<div class="title4">
						Shop the hottest designer looks of the season</div>
				</div>
				<div class="multiImgCont">
					<div id="bag1">
						<!--[if IE 8]>        <img src="/wcsstore/Aurora/rwdWebAssets/summerEssentials/bag1.png"></img>      <![endif]--><!--[if gte IE 9]><!-->
						<div>
						</div>
						<!--<![endif]--></div>
					<div id="bag2">
						<div>
						</div>
					</div>
					<div id="belts">
						<div>
						</div>
					</div>
					<div id="heels">
						<!--[if IE 8]>        <img src="/wcsstore/Aurora/rwdWebAssets/summerEssentials/heels.png"></img>      <![endif]--><!--[if gte IE 9]><!-->
						<div>
						</div>
						<!--<![endif]--></div>
				</div>
				<div class="clearFloat">
				</div>
			</div>
			<div class="clearFloat">
			</div>
		</div>
	</div>
</div>
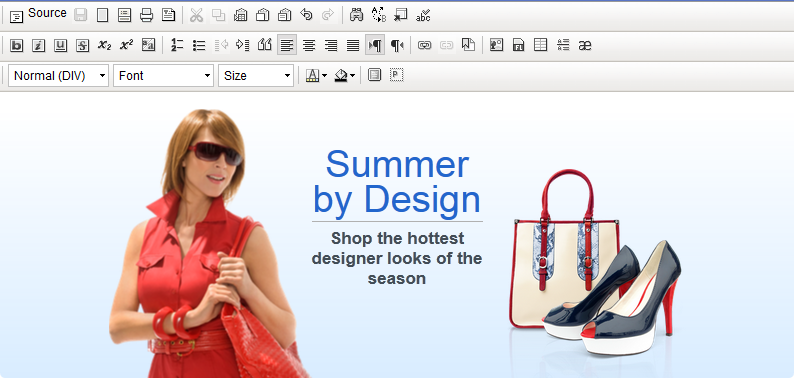
- Click Source again.
The
editor displays a WYSIWYG version of the widget content:
- To close CKEditor, click OK.
- To save your marketing content, click Save,
and then click Close.
The properties
view for the widget is displayed. Notice that the marketing content
is now included in the
Content table:
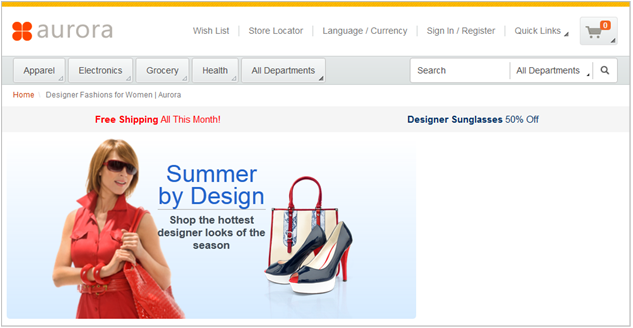
- Click Save and Preview.
Your
layout now has four widgets:
Results
In this lesson, you added a Content Recommendation widget
to display the hero ad for the layout. In the next lesson, you will
add another Content Recommendation widget that shows the designer
brands as images with click actions.
