
Setting the default catalog for an extended site
About this task
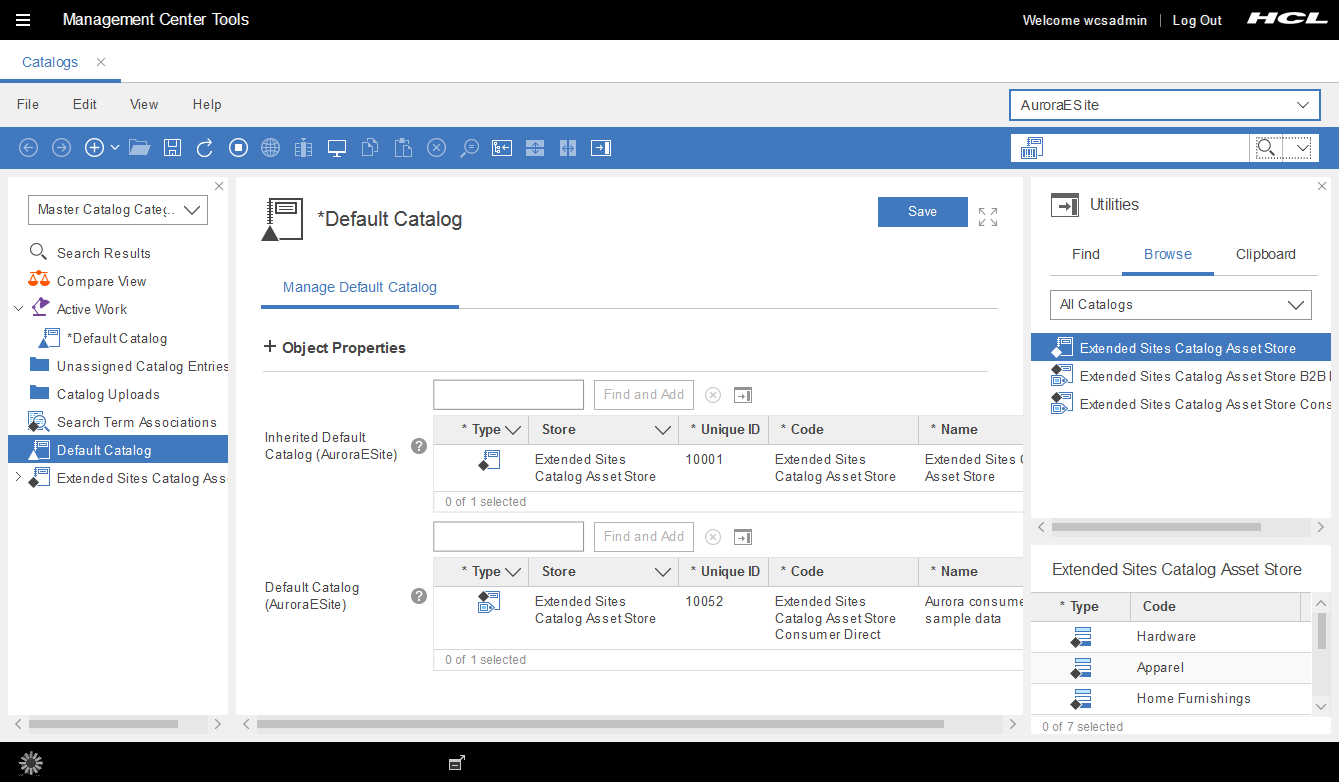
If you are using extended sites, and plans to use the default catalog, your site can have multiple default catalogs set. You can have a default catalog for your asset store and potentially a separate default catalog for each of your extended site stores. If you set the default catalog at the asset store level that default catalog is inherited as the default catalog for the extended site stores. If you set the default catalog at the extended site store level the specified catalog is the default catalog for only the extended site store. Setting the default catalog at the extended site store, replaces any inherited asset store default catalog for the extended site store.
In the default catalog properties when you access the Default Catalog in the explorer filter, two default catalog tables display. The top table is for setting the default catalog at the asset store level. The bottom table is for setting the default catalog at the extended site store level. When working at the extended site level, the asset store default catalog table is read-only and displays the default catalog that is set at the asset store level. The extended site store default catalog table is for setting the default catalog for the specific extended site store you are working in.
Procedure
- Open the Catalogs tool.
- Select your extended site store.
- From the explorer filter, select Default Catalog.
The default catalog properties display in the main work area.
- In the Manage Default Catalog tab, use the Find and Add function or the utilities view to find the catalog to set as the default catalog for your store.
-
Select and drag the catalog into the appropriate default catalog table for your asset or
extended site store.
The default catalog table for an extended site store resembles the following image:
- Save your changes.
-
Preview your store with store preview to verify your setting:
-
Click
 , or click
- Select your store and click the Launch Store Preview button.
- Confirm that the catalog that displays is your store default catalog.
-
Click