Gateway Application
Following is the User Flow for Gateway Client:
- To download the Gateway Client, go to your tenant’s integration page and open the connector for gateway and click on Download Client Application. After that, the download page for the Gateway Client will open in a new tab and you can download the latest build of the client.
.png)
Figure 310 – Download Gateway Application
.png)
- Open the downloaded executable and it installs the application in your system. When the installation is finished, the app starts up and shows the following page:
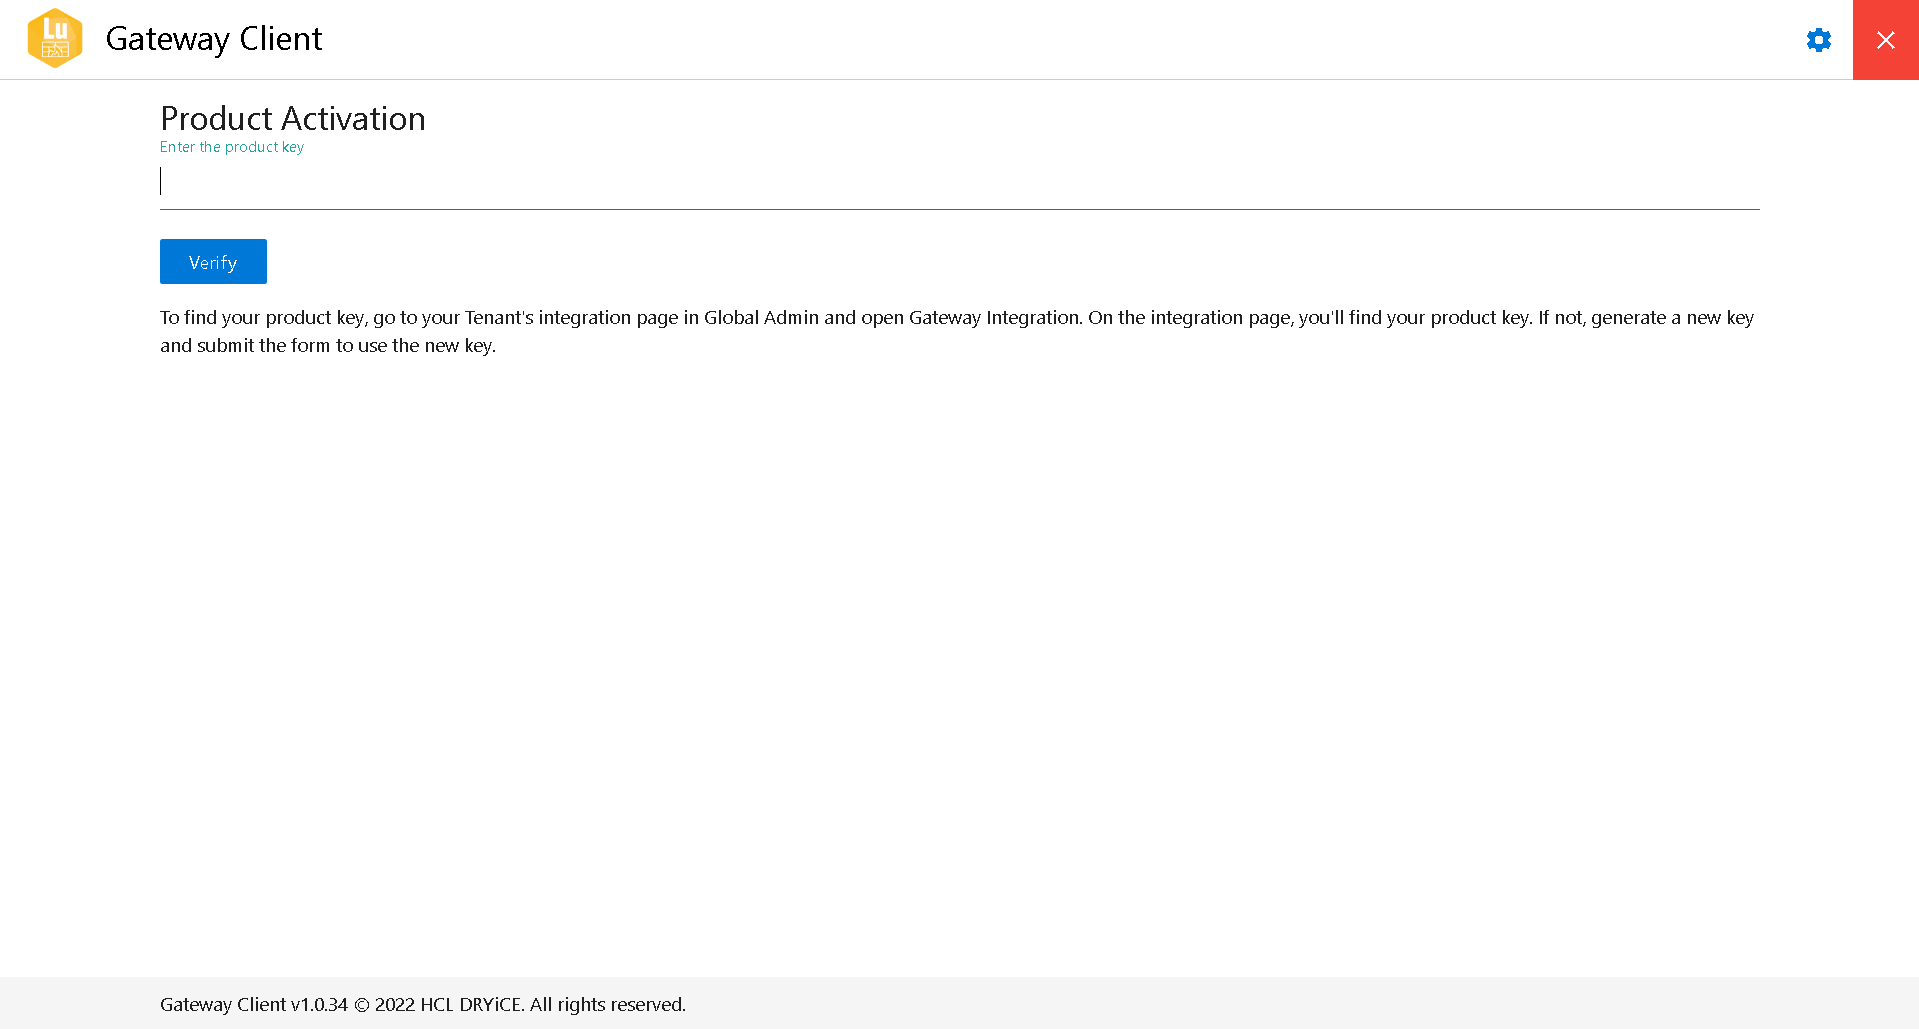
- To activate the application, enter the product key found on the gateway integration page as shown in the previous step. Once the key is pasted in the field, click Verify to activate the app.
- Once the app is activated, the following screen appears:
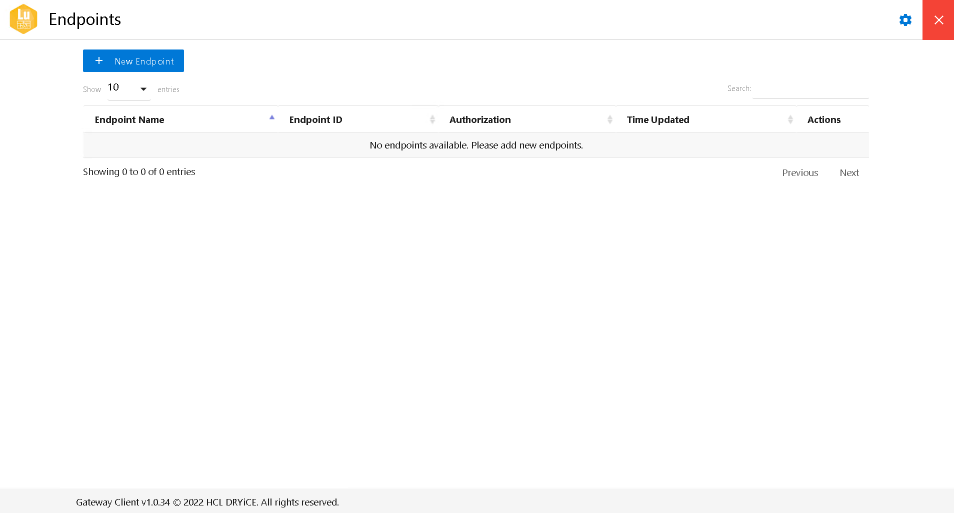
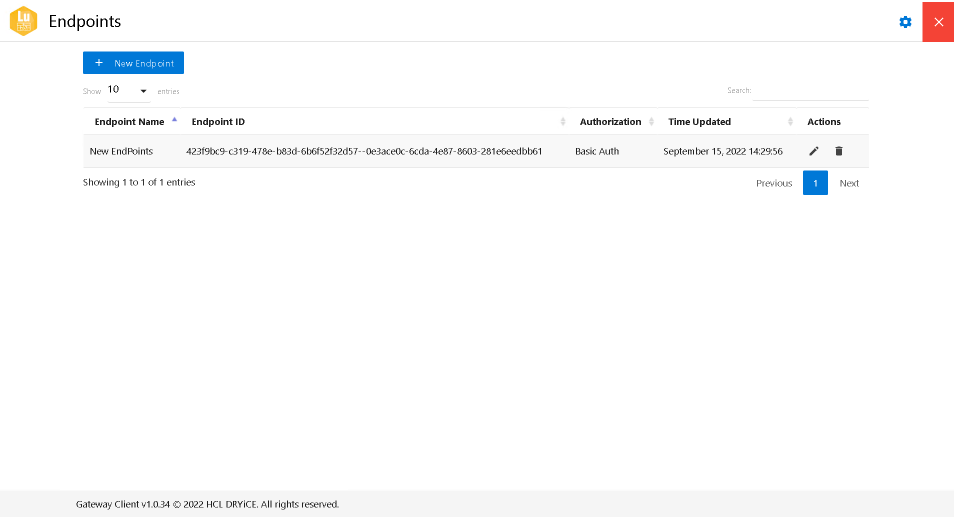
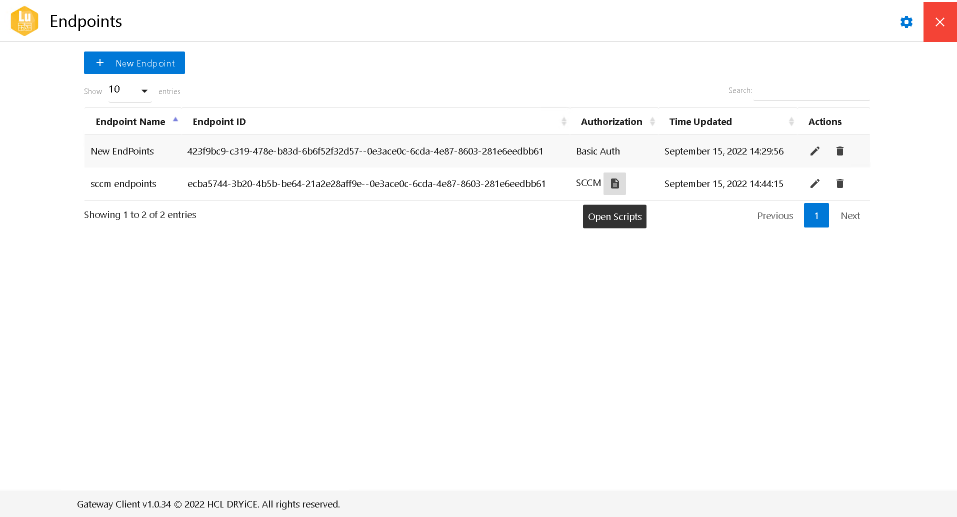
- This is the endpoint table which displays all the endpoints that are added to the application. To add a new endpoint, click New Endpoint to open the endpoint form.
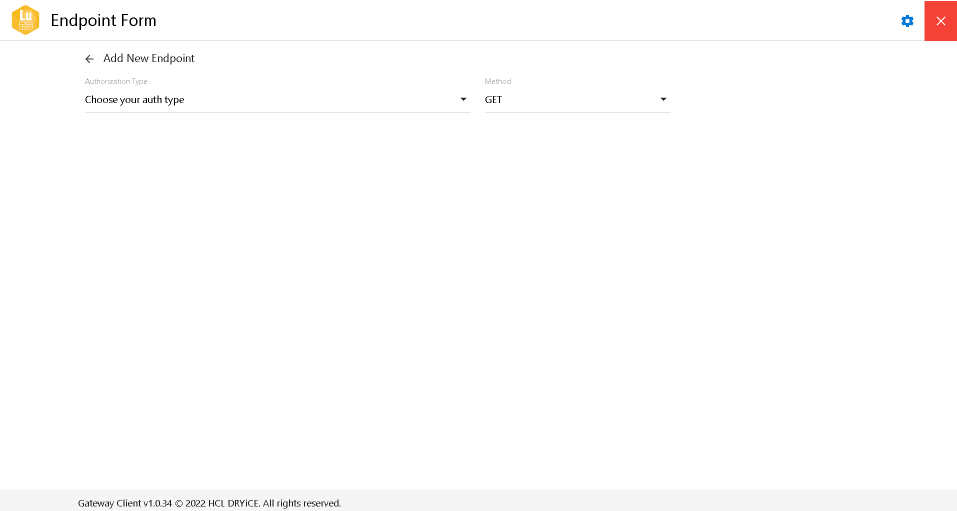
- Choose the Authorization type for the endpoint from the dropdown. The currently supported auth types are SCCM, Basic Auth, API Key and Bearer Token. For the API Method, GET, POST, PUT and DELETE methods are available.

- After the details are entered, click on Add Endpoint to add it.
- The newly added endpoint starts appearing in the endpoint table as shown in the following figure. The table also shows the unique Endpoint ID created for the endpoint which is used to relay requests to the client since the endpoint credentials are not meant to be left the customer environment:
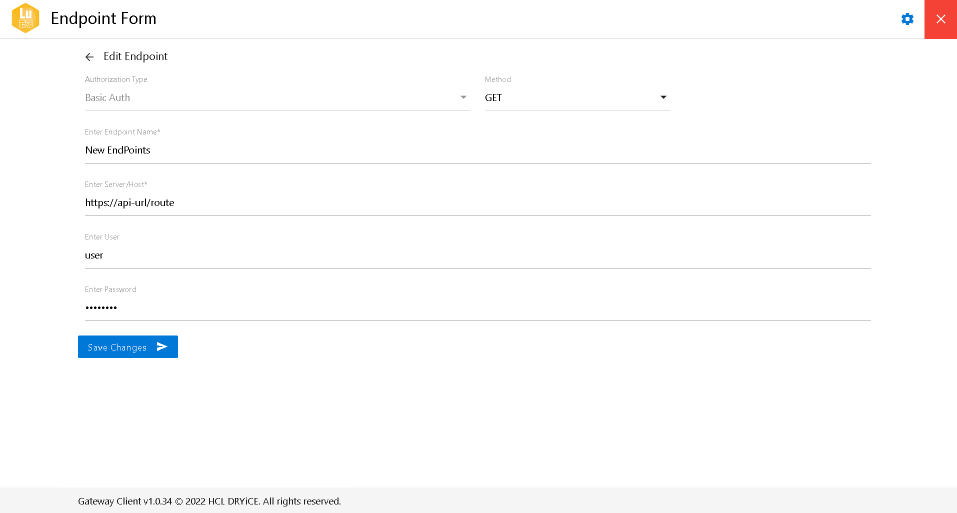
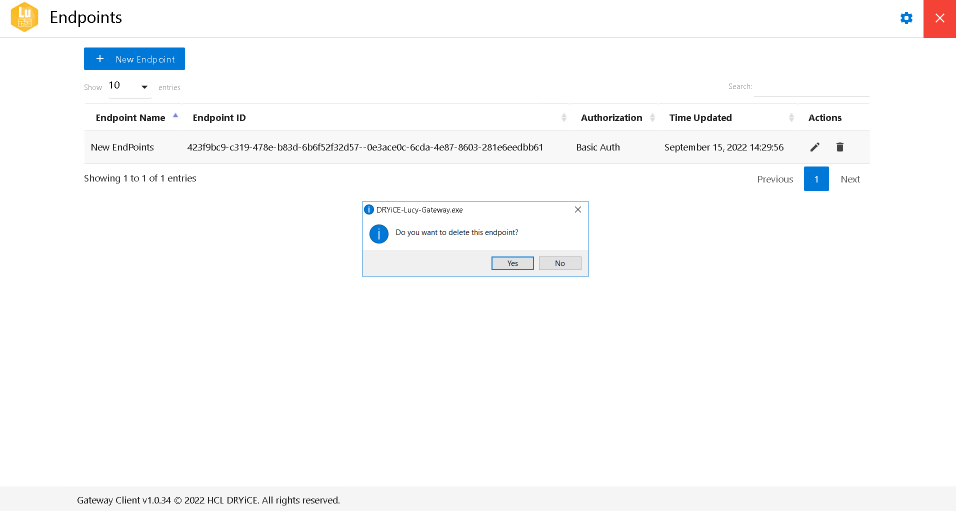
- The following actions can be performed on an endpoint using the icons corresponding to each endpoint under the Action column:
Edit ( ): To edit the details of
the corresponding endpoint.
): To edit the details of
the corresponding endpoint.
Delete ( ): To delete the
corresponding endpoint.
): To delete the
corresponding endpoint.
- When an endpoint is added with SCCM credentials, the Open Scripts icon appears besides the auth type under Authorization column.
- Since SCCM doesn’t work with regular REST API calls, scripts need to be executed for any SCCM queries. A copy of these out of the box scripts is created whenever a new SCCM endpoint is created. To view these scripts, click on the icon.
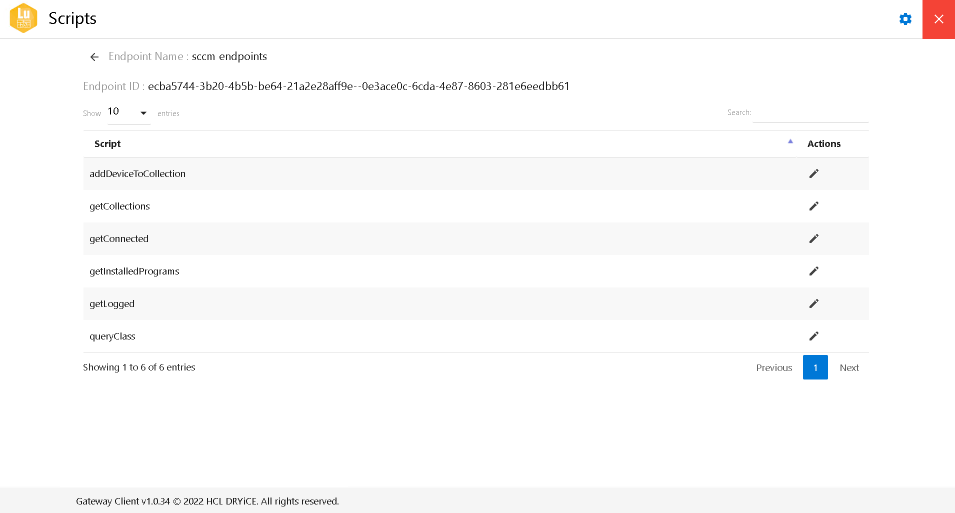
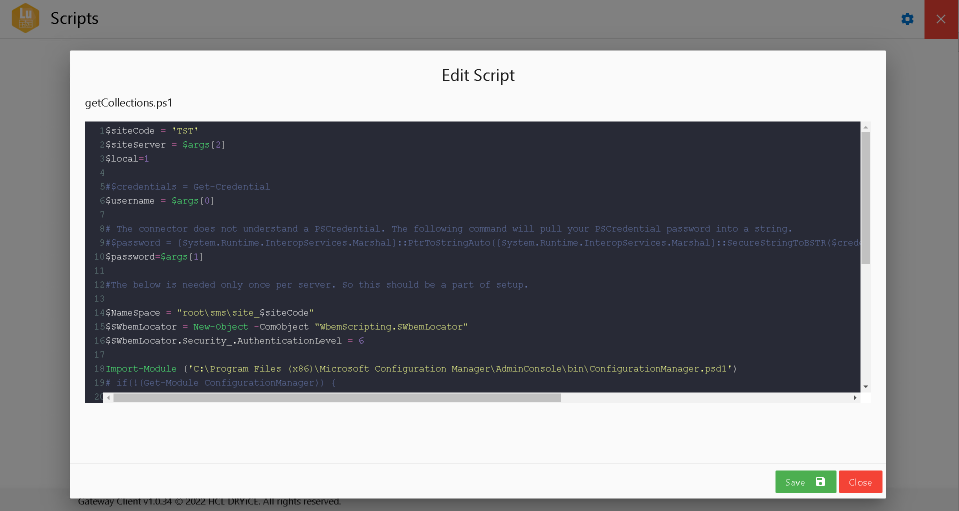
- Although these scripts work out of the box, customers can make any changes to these copies of scripts for this endpoint. To do this, click on the edit icon for any script to edit:
Added Functionalities in Gateway Client:
Auto Update functionality has been disabled for now.
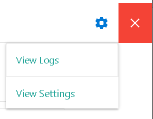
New setting icon has been added on top right corner of app.
On clicking of the settings icon, users get the following options to choose from:
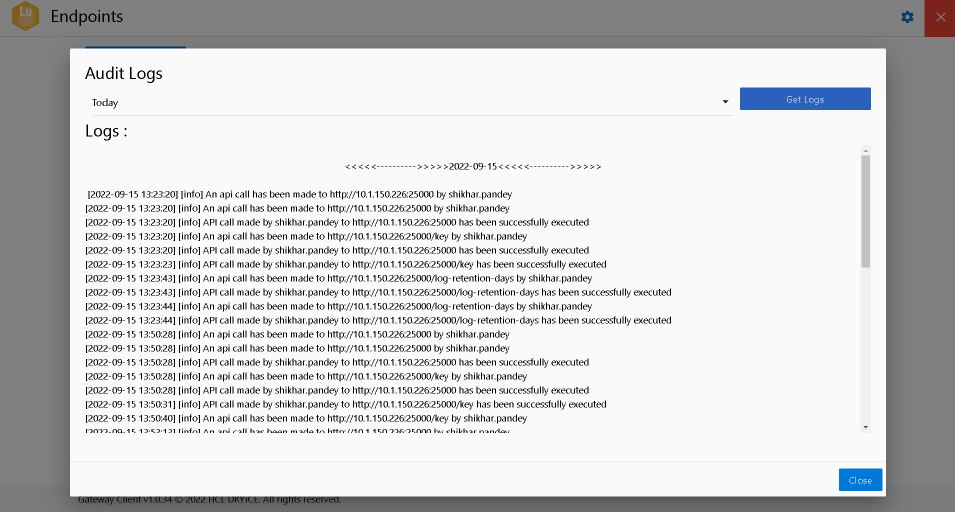
On clicking of the View Logs, users get two more options: Audit Logs and Application Logs:

Audit Logs provides the client-side logs for the app whereas from the Application Logs users get the Server side logs.
Selecting any of the following opens a modal.
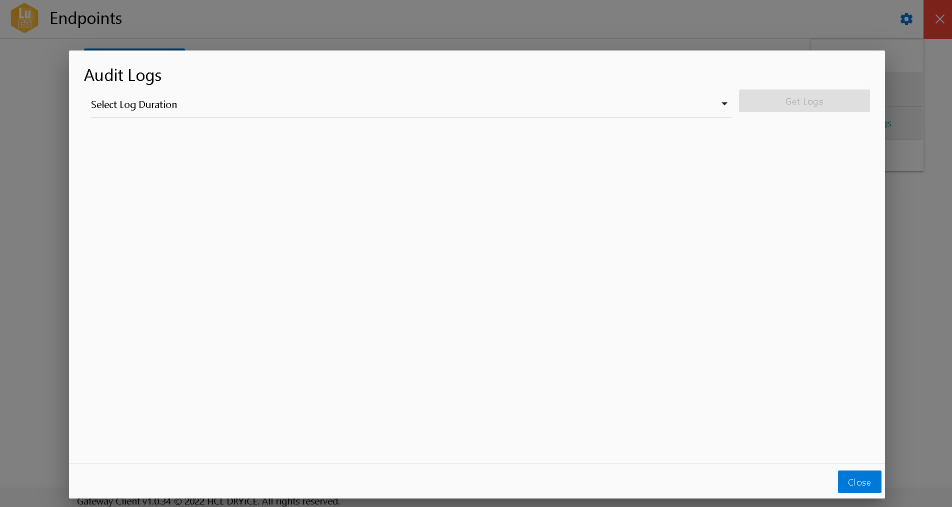
The above modal is same for both Application logs and Audit logs except for the title.
It asks you to select log duration where you’ll get the options as shown in the following figure:
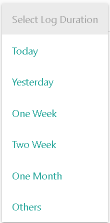
Except for the last option, the name itself indicates what logs would be available after selection.
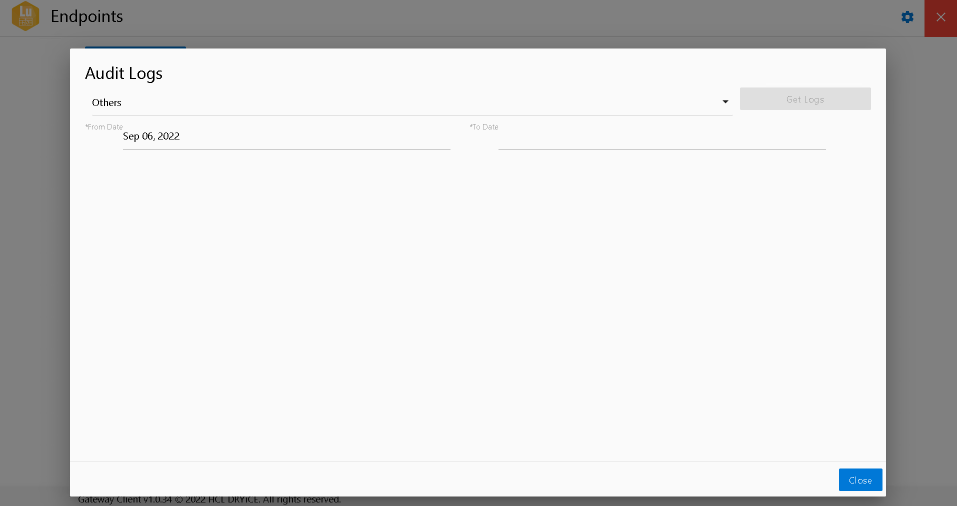
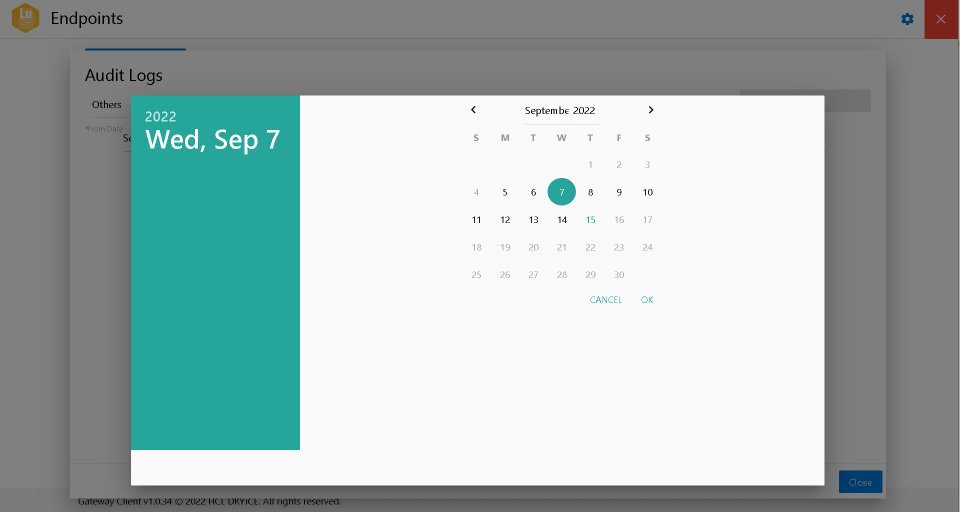
Selecting Others provides the user with the calendar where he can specify the date range.
After selecting the log duration user clicks on Get Logs and the logs appear as shown in the following figure:
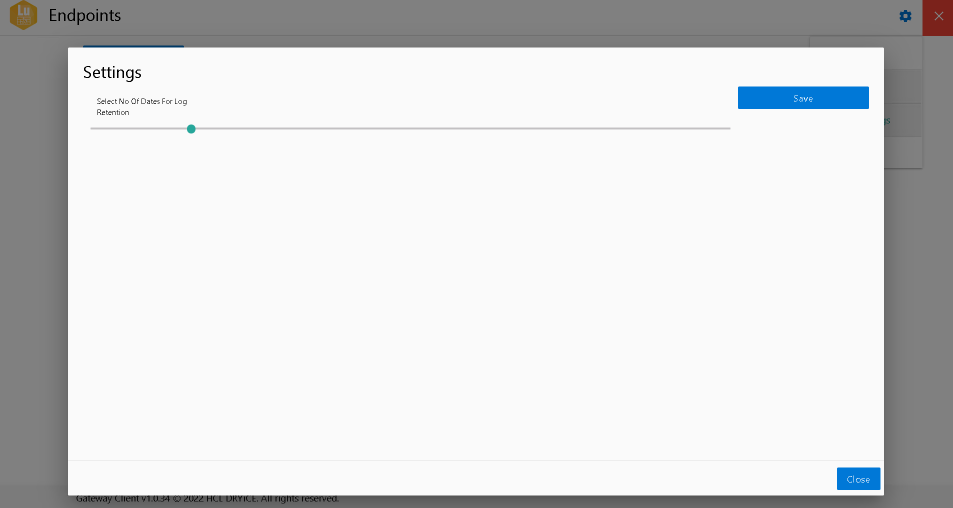
Another option in the settings button is View Setting.
Selecting View Setting option allows you to select no of days for logs retention. This means, with this option user can select for how many days he wants to keep logs and after that limit logs would be deleted.
User can select from a slider between 0 to 60 days.