Finding or editing named ranges
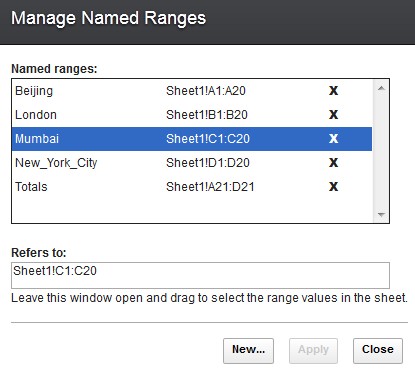
Use the Manage Named Ranges window to find all named ranges in a spreadsheet, or adjust which cells are included in a specific range.
Procedure
- Click .
- To see the location of a named range, click the range name.
The corresponding range of cells is highlighted in the sheet.
- To adjust which cells are included in a named range, take
one of the following actions:
- With the Manage Named Ranges window open, click in the sheet and reselect the range of cells you want. Click Apply. The range address is displayed automatically in the Refers to field.
- Click the range name, edit the range address in the Refers to field, and click Apply.
- Click Close.Note:
- When files in the format of .xls or .xlsx contain named charts, the charts are retained with their name ranges when you edit the file in HCL Connections™ Docs.
- When you edit one formula cell, all the references (include those refer to other sheets) in the formula will be highlighted with color. If you input a new range during editing, the new range is highlighted with a new different color.