Protecting ranges and sheets in spreadsheets
As the file owner or editor, you can limit who can edit a cell range or sheet by creating protected areas within the spreadsheet.
About this task
Also, remember that access control and area protection are limited if you share the entire file with others as readers, as they can always download a published version and edit it in another spreadsheet application.
Procedure
- Make sure you have shared the spreadsheet file with people who need to edit it (or any portion of it). Use the Share button in the title bar if you want to add people as editors now.
- Click . The Protected Areas panel
is displayed in the sidebar.
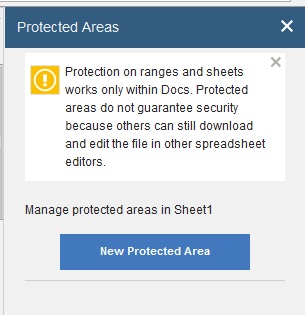 Note: To show the sidebar panel that contains comments, close the Protected Areas panel.
 - Click New Protected Area.
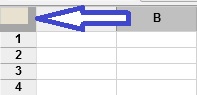
- In the sheet, drag to select a range, or click the beginning
of a sheet (as shown in the diagram) to select the whole sheet. The
correct value for the new protected area is displayed in the sidebar.
 Tip: You can also create a protected area by right-clicking the range or the sheet tab and then selecting Protect Range or Protect Sheet.
 - Once the area is identified, choose one of the following
options:
- Select Editable when you want to limit who can edit the area to a specific subset of the people with Editor access to the file.
- Click to select Read Only from the list when you want to exclude all editors, or a subset of them, from editing the area.
For example, sometimes you might want to protect an entire sheet from all editors (except yourself) by making the sheet Read Only, and then create some Editable ranges, each restricted to only the people you name. That way, a person can edit in the range assigned to them, but not in the rest of the sheet. - In the field that begins "Enter the names of people," select the people that you want from the list, or type the first few letters of a person's name and then select the person from the filtered list that is displayed.
- Click away from the current field, and then click OK.
- If you want to modify or remove protected areas, hover
over an area in the panel and then click the Update
 or Delete button
 .
Important:
.
Important:- Range-level protection overwrites sheet-level protection. For example, a person is given the read-only level for Sheet 1, but the same person was already given editable access for a cell range in Sheet 1, they can still edit the range.
- Whenever a person opens the spreadsheet in edit mode, areas that
are read-only for them show as gray hatching
 . To hide these read-only markers, they can click to deselect the menu item.
 - Owners and editors can see information on all the protected areas in the sidebar panel by clicking .
- Only the file owner can modify or delete all protected areas in the file. Other editors can modify only the protected areas that they created. Editors who need to edit an area that they are restricted from must ask either the file owner or the creator of the protected area to update it.