Creating multilevel lists in documents
Insert indented ordered lists or an outline that contains a document's section headings.
Procedure
- From an open document, click the location that you want to insert the multilevel list.
- Click .
- Click a thumbnail image to choose a preformatted style.
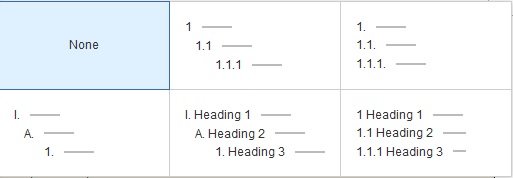 Tip: If you plan to use ordered headings in your document, choose a style that has headings in the thumbnail.
 - Click OK.
- Perform one of the following actions as you type the list:
- For a list that does not include headings, use the Tab key or Shift+Tab key to indicate the indent level for each item. The numbering symbol that corresponds with each level is automatically displayed.
- For a list of headings, use the Select Style icon
 to indicate the heading level
for each item. Both the numbering symbol and indent level that correspond
with each heading level are automatically displayed.Note: The Select Style icon is not active during a co-editing session.
to indicate the heading level
for each item. Both the numbering symbol and indent level that correspond
with each heading level are automatically displayed.Note: The Select Style icon is not active during a co-editing session.
What to do next
Note: You can also apply the first level of a preformatted
style to an existing list by typing the items from the beginning,
selecting the items, and then clicking . Then use the
Enter and Tab keys to fill in the sub-levels. If you are working with
headings, notice that pressing Enter after a heading results in a
body text style for the next line, rather than the same style that
results when you press Enter in a list that does not include headings.