
Adding a Quick Checkout profile
A shopper can add a new quick checkout profile to enable auto-population of the billing and shipping addresses during the cart checkout phase.
Procedure
You can register more than one quick checkout profile. To access the registered quick checkout profiles, go to . You can edit or delete checkout profiles.
-
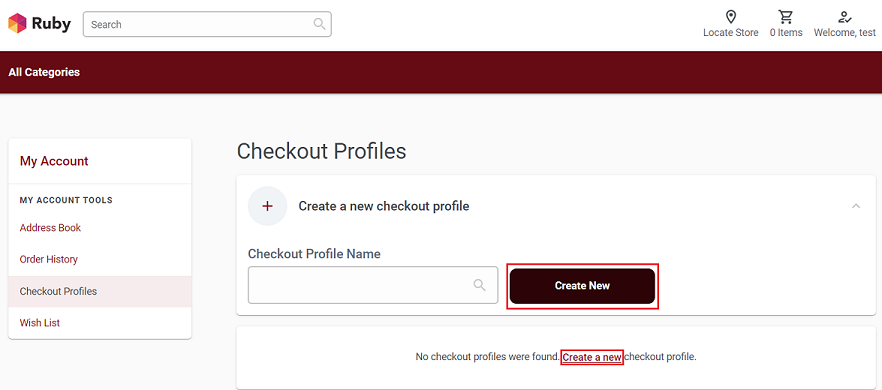
Click the Create a New Checkout Profile icon to expand
it and then click the Create New button. If there are no
existing checkout profiles then click the Create a new
button as shown in the below image
- Enter a name for the new checkout profile.
- Enter the Shipping Information.
-
Select the Shipping method (refer to Select Shipping Method for more details) and a
Shipping address for the checkout profile. To add a
new shipping address, click the create a new one button.
For more details, refer to Create Shipping Address.
Note:
- If you prefer the same billing and shipping address, select the Shipping and Billing radio button in Address Type section or click on Use This Address to select the address for the checkout profile.
-
Click the Next button.
Note: The Next button at the bottom of the page will be activated only when the checkout profile name and shipping information is updated.
-
Enter the Billing Information and select a billing
address for the new checkout profile. To add a new billing address, click the
create a new one button. Refer to Create Billing Address for more details.
Note:
- If the billing and shipping address is the same, click the Billing address is same as Shipping Address box or click the Use This Address option to select an address for the checkout profile.
- Enter the Payment Information and select a Payment Method. For more details on payment methods, refer to Payment methods.
-
Click the Create Profile button.
Note: The Create Profile button at the bottom of the page will be activated only when the billing and payment information is updated.