Virtual Assistant
Virtual Assistant (VA) is a virtual agent performing human like conversations and services or tasks based on user conversations. These virtual assistants are group of projects that contain specific set of flows. Each virtual assistants can have customized logo, header, footer and canvas designs. Each of the projects of every virtual assistant can have separate agent transfer, schedule meeting, cognitive flow management and conversation management configurations.
To create Virtual Assistant, follow the steps below:
- In the homepage, click the three dots > Settings > Virtual Assistant.
- Click NEW VIRTUAL ASSISTANT, and enter Virtual assistant name and description.
- Click SAVE. As a result, a new virtual assistant will be created. By default, Common project will be listed in the Virtual Assistant.
- Click the plus icon next to Projects to add multiple projects. If you want to remove the existing project, click REMOVE.
Configure Personalized Theme
After creating the virtual assistant, follow the steps below to customize the chat window or Virtual Assistant:
-
In the Virtual Assistant page, click Personalized Theme.
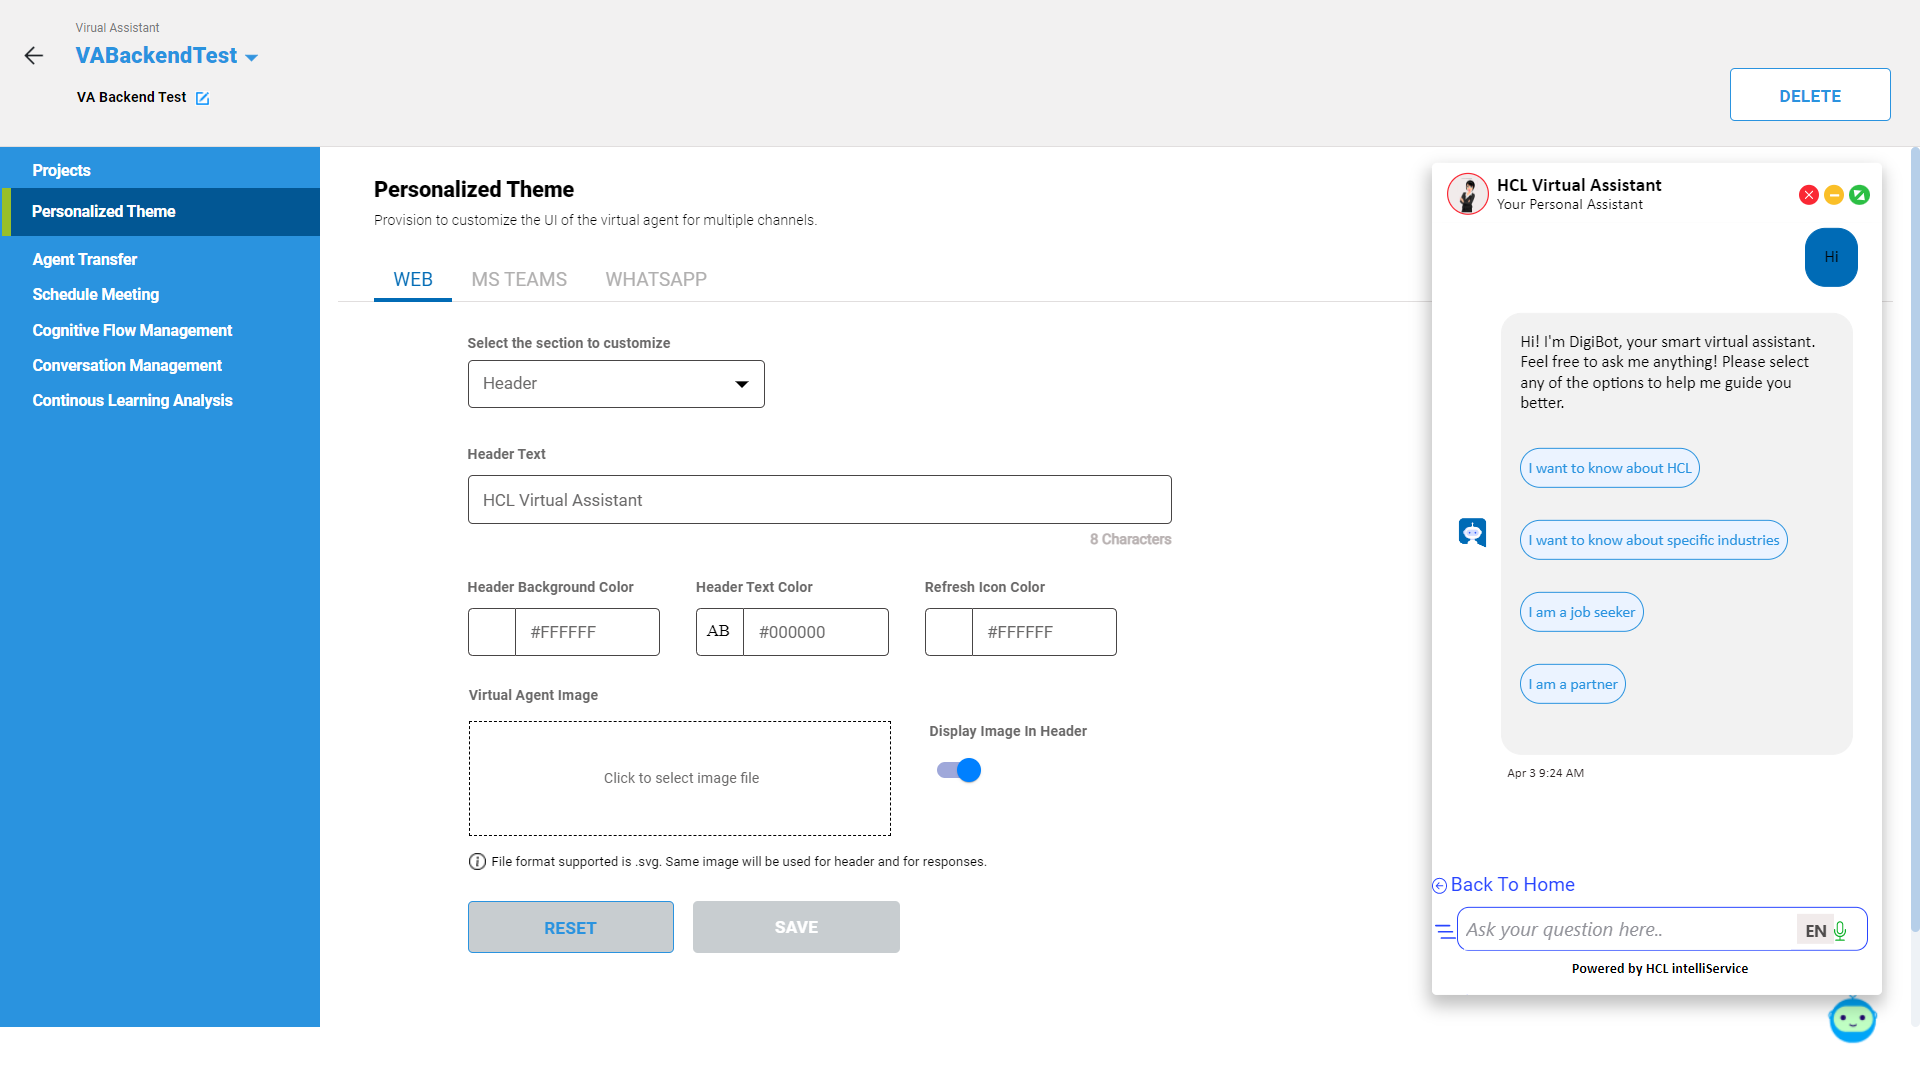
- In the Personalized Theme page, on the WEB tab, in the Select
the section to customize drop-down, select one of the options below:
- Personality - customize the VA image, background color of VA and close icon color.
- Header - customize VA image at the header, header text, header background color and text color.
- Canvas - customize the canvas background color, user/bot response text color, border color, background color and time-stamp color as well as the button behavior.
- Footer - customize footer the Powered by text element, Back to Home element, User prompt element’s text, background color, and text color as well the Menu Options element’s options, sub options and their respective routing.
- After making the changes and customization, click SAVE.
Implement virtual assistant in client website
- In the browser, use the following url https://<IntelliServicedomain>/VATheme/Intelli<VAname>.html, and modify the parameters to view the sample Virtual Assistant page. Sample VA url https://uat.intelliservice.ai/VATheme/IntelliSampleVA.html.
- In the above url, you can replace the following paramaeters with
corresponding parameters:
- <Intelliservicedomain>: replace this with your domain name like uat.intelliservice,ai
- <VAname> : replace this with virtual assistant name that is configured with projects, flows, and VA theme.
- After replacing the parameters, open the url in the browser and test the VA.
- On succesful testing of VA, open the source code of the webpage, copy and paste the source code in your webpage footer.