In this lesson, you customize the storefront, including the My Account Navigation widget,
to link to the new page.
Procedure
Perform these steps in HCL Commerce Developer.
-
Identify the files that require updates in this lesson.
-
Open a web browser and go to your custom store at the following URL:
- https://localhost:8443/shop/en/myesite
-
Click My Account in the header and log in.
-
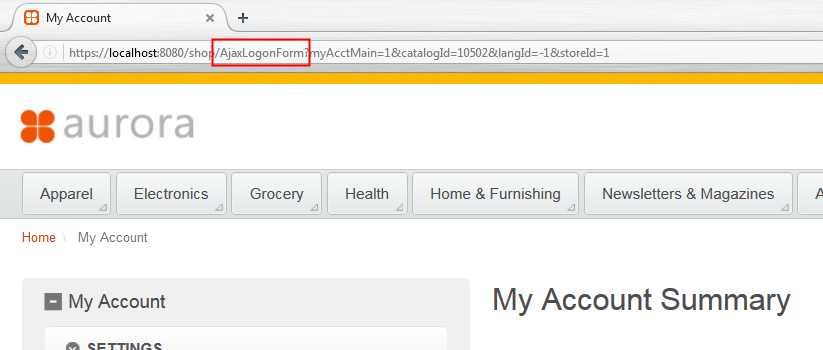
Review the following flow:
In the My Account page, the view name (
AjaxLogonForm) can be seen in the
URL:
The view controller mapping for
AjaxLogonForm is defined in the
crs-web\WebContent\WEB-INF\spring\member-views.xml
file:
<bean id="AjaxLogonForm"
class="com.ibm.commerce.store.mvc.view.spring.StoreInternalResourceView"
>
<property name="url"
value="/UserArea/AccountSection/LogonSubsection/LogonSetup.jsp"/>
<property name="https" value="1"/>
<property name="generic" value="1"/>
</bean>
As shown, AjaxLogonForm is mapped to the LogonSetup.jsp
file.
The
LogonSetup.jsp file then imports the
MyAccountDisplay.jsp file when a user is logged
in:
<c:set var="incfile"
value="${env_jspStoreDir}/UserArea/AccountSection/MyAccountDisplay.
jsp"/>
Then, the
MyAccountDisplay.jsp file imports the
MyAccountNavigation
widget:
<wcpgl:widgetImport useIBMContextInSeparatedEnv="${isStoreServer}"
url="${env_siteWidgetsDir}com.ibm.commerce.store.widgets.MyAccountNav
igation/MyAccountNavigation.jsp"/>
Therefore, the
MyAccountNavigation widget displays the left side navigation
on the My Account page:
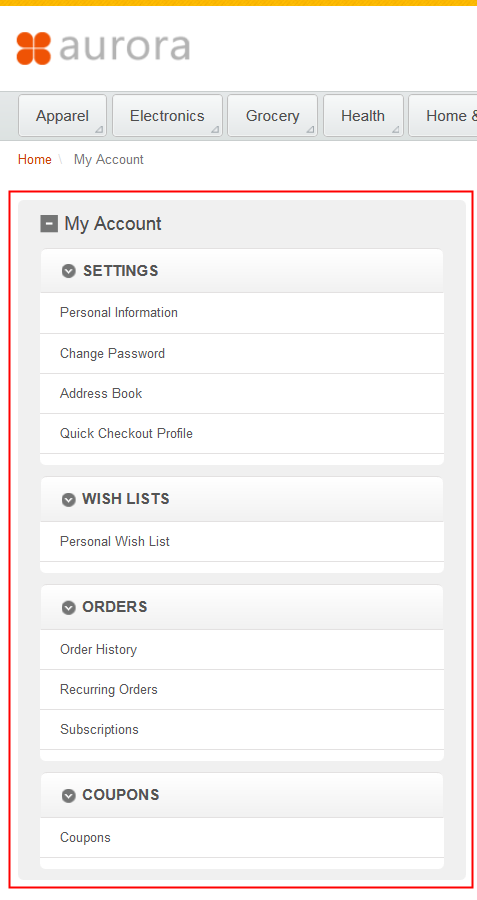
This is the widget that you will customize to include a link to the new page that you will create
later in this tutorial.
The MyAccountNavigation widget resides in the IBM provided stores web
archive (crs-web.war) to use as a template. To customize it in this tutorial,
you will copy it to your own custom folder.
-
Update the store widget files to suit your scenario.
Tip: All the code changes that are done in this tutorial are available as samples in the
tutorial resources (
StoreLab1.zip) you downloaded at the beginning of this tutorial.
Instead of manually making the changes, you can copy the files from the sample to the
workspace.
-
In the crs-web project, go to the WebContent
directory and create a new directory called Widgets_S0126i.
-
Copy the directory to the new Widgets_S0126i directory that you created
in the preceding step.
-
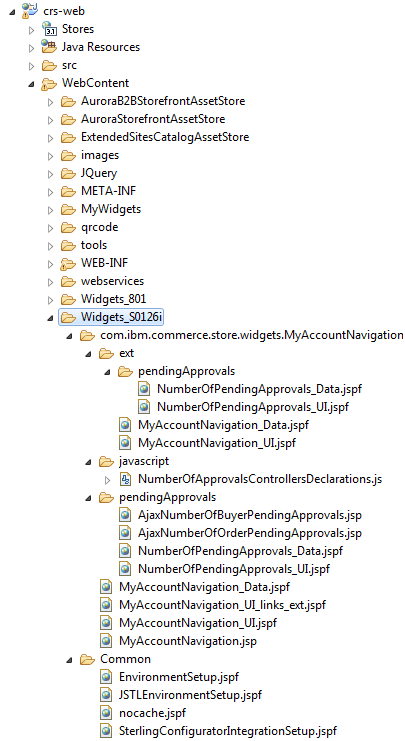
From the Enterprise Explorer, right-click crs-web and select
Refresh. The new Widgets_S0126i directory and its
contents should now be visible in the project.
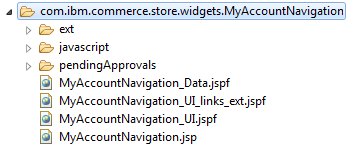
The directory and its contents should resemble the following screen capture within the
project:
-
Note the following rule when copying JSP files from the IBM provided web archive to your own
custom folder: any references to existing JSP files found in the copied JSP files must be updated so
that the correct path is used.
For
example:
<c:import
url="${env_siteWidgetsDir}com.ibm.commerce.store.widgets.CategoryReco
mmendation/CategoryRecommendation.jsp">
Would
change
to:
<c:import context="${staticIBMAssetContextRoot}"
url="${env_siteWidgetsDir}com.ibm.commerce.store.widgets.CategoryReco
mmendation/CategoryRecommendation.jsp”>
This change ensures that the files in the custom folder continue to correctly point to files from
the IBM provided web archive.
However, since none of the files that you have copied in this tutorial contain a
<c:import> tag, no updates are required.
-
Static JSP files include only files that are located within the same web archive. Therefore,
copy the file dependencies and update the custom widget JSP files to point to the correct locations
within the same web archive.
-
In , create a directory called Common.
-
Copy the following files and directory structure from to the new Common directory that you created in the preceding
step:
In the root of the new
Common directory, paste the following files:
- EnvironmentSetup.jspf
- JSTLEnvironmentSetup.jspf
- nocache.jspf
- SterlingConfiguratorIntegrationSetup.jspf
-
From the Enterprise Explorer, right-click crs-web and select
Refresh. The new directories and its contents should now be visible in the
project.
-
Update the file paths in the JSP files to point to the correct locations within the
com.ibm.commerce.store.widgets.MyAccountNavigation directory.
-
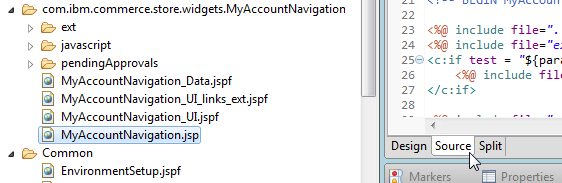
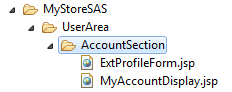
Expand .
The files are displayed in the Enterprise Explorer:
-
Open the MyAccountNavigation.jsp file for editing and switch to the
Source view.
-
Change the following line:
<%@ include file="/Widgets_801/Common/EnvironmentSetup.jspf" %>
To:
<%@ include file="../Common/EnvironmentSetup.jspf" %>
Save
and close the file.
-
Open the MyAccountNavigation_Data.jspf file.
All the URLs that correspond to the links that are displayed in the My Account navigation are
defined in this file. You will add a URL to the new demographics page that will be created later in
this tutorial.
-
Locate the
<wcf:url> tag that defines the
profileFormViewURL variable:
<wcf:url var="profileFormViewURL" value="ProfileFormView">
<wcf:param name="storeId" value="${WCParam.storeId}" />
<wcf:param name="catalogId" value="${WCParam.catalogId}"/>
<wcf:param name="langId" value="${langId}" />
<wcf:param name="profileFormStyle" value="strong"/>
</wcf:url>
-
Immediately below this line, insert the following code snippet:
<wcf:url var="extProfileFormViewURL" value="ExtProfileFormView">
<wcf:param name="storeId" value="${WCParam.storeId}" />
<wcf:param name="catalogId" value="${WCParam.catalogId}"/>
<wcf:param name="langId" value="${langId}" />
</wcf:url>
A new variable called extProfileFormViewURL is defined, which corresponds to
the ExtProfileFormView view. This view will be created later in this tutorial.
This view will map to the new JSP file that we will create to capture the additional demographic
information from the customer.
-
Open the MyAccountNavigation_UI.jspf file. All the links displayed on the
My Account page are defined in this file.
-
Locate the following section:
<flow:ifEnabled feature="quickCheckout">
   <li>
      <a href="<c:out value='${profileFormViewURL}'/>" id="WC_MyAccountSidebarDisplayf_links_3"><wcst:message key="MA_QUICK_CHECKOUT" bundle="${widgetText}"/></a>
   </li>
</flow:ifEnabled>
-
Immediately after the
</flow:ifEnabled> tag, insert the following code
snippet:
<li>
   <a href="<c:out value='${extProfileFormViewURL}'/>" id="WC_MyAccountSidebarDisplayf_links_3a"><wcst:message key="MA_EXT_PROFILE_INFO" bundle="${widgetText}"/></a>
</li>
Save
and close the file.
-
Expand the pendingApprovals directory.
-
Open the AjaxNumberOfBuyerPendingApprovals.jsp file for editing.
-
Locate the following lines:
<%@ include file="/Widgets_801/Common/EnvironmentSetup.jspf" %>
<%@ include file="/Widgets_801/Common/nocache.jspf" %>
Change
them
to:
<%@ include file="../Common/EnvironmentSetup.jspf" %>
<%@ include file="../Common/nocache.jspf" %>
Save
and close the file.
-
Open the AjaxNumberOfOrderPendingApprovals.jsp file for editing.
-
Locate the following lines:
<%@ include file="/Widgets_801/Common/EnvironmentSetup.jspf" %>
<%@ include file="/Widgets_801/Common/nocache.jspf" %>
Change
them
to:
<%@ include file="../Common/EnvironmentSetup.jspf" %>
<%@ include file="../Common/nocache.jspf" %>
Save
and close the file.
-
Update the MyAccountNavigation widget. The
MyAccountDisplay.jsp file imports it.
-
Expand .
The files are displayed in the Enterprise Explorer:
-
Open the MyAccountDisplay.jsp file.
-
Locate the following line:
<wcpgl:widgetImport useIBMContextInSeparatedEnv="${isStoreServer}" url="${env_siteWidgetsDir}com.ibm.commerce.store.widgets.MyAccountNavigation/MyAccountNavigation.jsp"/>
-
Replace the default version of MyAccountNavigation with the copy you have
created. That is, replace the preceding line with:
<c:import url="/Widgets_S0126i/com.ibm.commerce.store.widgets.MyAccountNavigation/MyAccountNavigation.jsp"/>
The <wcpgl:widgetImport> tag is a wrapper around the
<c:import> tag. The <wcpgl:widgetImport> tag is typically
used to import widgets when their JSP file paths are not known, when only the widget identifier or
slot ID is known. When the JSP file path is known, as is the case with
MyAccountNavigation, then <c:import> can be used.
For more information about the <wcpgl:widgetImport> tag, see Tag: widgetImport.
-
Define the MA_EXT_PROFILE_INFO properties key noted in preceding code
snippets in the widget text properties file.
-
Expand .
The files are displayed in the Enterprise Explorer:

-
Open the widgettext.properties file.
-
Add the following line to the properties file:
MA_EXT_PROFILE_INFO=Additional Profile Information
Then, save and close the
file.
The Additional Profile Information string will be used in the storefront as
the link text to your new page.
-
Restart the Store Test Server, and start the Customization Test Server and Search Test server
container, if the server and container are not already running. For more information, see the
Servers view:

Results
In this lesson, you used HCL Commerce Developer to update the My Account Navigation widget
and link to the new page.In the next lesson, you will browse your custom storefront and ensure
that the link to the new page exists under My Account.