Creating the new store page
In this lesson, you create the new demographics page in your storefront, so that customers can enter their information.
Procedure
-
Copy the
StoreLab1/MyStoreSAS/UserArea/AccountSection/ExtProfileForm.jsp
file to the following directory: .
The ExtProfileForm.jsp file contains code that displays a form to the customer which captures the additional profile information. When the customer enters the information and clicks Submit the information is updated in the database.
- Expand .
-
Open the storetext_v2.properties file. This properties file contains
translatable text that is used in the storefront. Add the following lines to the end of the
file:
These keys are used in the ExtProfileForm.jsp file.# ExtProfileForm.jsp EXT_PROFILE_TITLE=Additional Profile Information MARITAL_STATUS=Marital Status HOUSEHOLD=Number of people in household (including children) CHILDREN=Number of children in household - Save your changes and close the file.
-
Define the Spring view controller configuration for the ExtProfileForm.jsp
file.
The directory contains the Spring configurations. This includes both default and customized configurations. Custom Spring configurations must be included in the -ext files. Each store has its own version of these files. The files outside of the store directories contain the default configurations and apply to all stores.
-
Expand and open the ExtProfileForm.jsp file. Locate the following
line:
<form name="Logon" method="post" action="RESTUserRegistrationUpdate"
id="Logon">
In this sample, the action used is RESTUserRegistrationUpdate. When the customer enters the required information in the form and clicks on the Submit button, the defined action is called. The RESTUserRegistrationUpdate value is a URL that should map to a Spring action controller. This mapping can be found in the crs-web\WebContent\WEB-INF\spring\controllers.xml file:<prop key="/RESTUserRegistrationUpdate">userRegistrationUpdate</prop>The RESTUserRegistrationUpdate URL maps to the userRegistrationUpdate action controller. The userRegistrationUpdate action controller bean is defined in the crs-web\WebContent\WEB-INF\spring\member-controllers.xml file:<bean id="userRegistrationUpdate" class="com.ibm.commerce.store.mvc.controller.spring.RESTActionController "> <property name="https" value="1"/> <property name="authenticate" value="0"/> <property name="parameter" value="personHandler.updatePerson"/> <property name="generic" value="1"/> <property name="csrfProtected" value="1"/> </bean>In the preceding controller bean definition, the
parameterproperty identifies the REST service that is called when this action is called. Each REST service has a template that defines its endpoint URL, method, request, and response formats. The default REST templates are located in the crs-web\WebContent\WEB-INF\xml\config directory. The templates that are related to the member component are in the com.ibm.commerce.person directory.The parameter value is in the following format: resourceName.methodName. Therefore, personHandler.updatePerson represents the updatePerson method of the personHandler REST service in the rest-template-config.xml file, as shown in bold:<resource path="{serverHost}/{contextPath}/store/{storeId}/person" name="personHandler"> <serverParam name="serverHost">$WCParam.serverHost</serverParam> <serverParam name="contextPath">$WCParam.contextPath</serverParam> <serverParam name="storeId">$WCParam.storeId</serverParam> <method name="updatePerson" httpMethod="PUT" path="@self?action={action}"> <var name="action">updateUserRegistration</var>The default template for updatePerson does not include marital status, household, and children in the request. Therefor, if you call updatePerson in its current form, those fields will not be saved in the database. You will customize the REST template to include these missing fields.
- Expand and create the following directory structure: config/com.ibm.commerce.person.
-
Copy the
StoreLab1/WEB-INF/xml/config/com.ibm.commerce.person/rest-template-config-ext.xml
file from the sample tutorial assets to the newly created directory. This file is a copy of the
default com.ibm.commerce.person REST template, but contains the missing fields
in the updatePerson definition towards the end of the template.
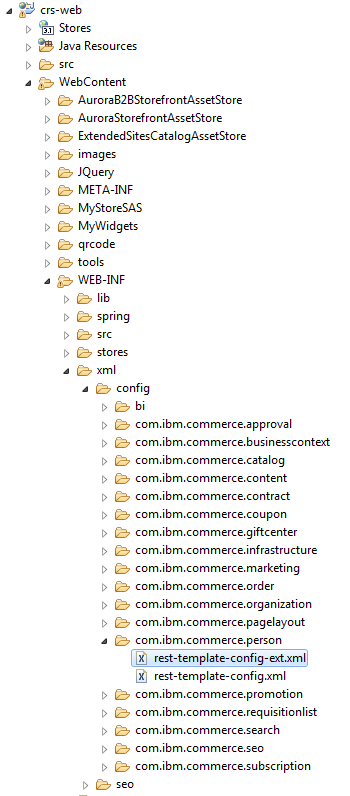
Refresh the crs-web project. The directory and its contents should resemble the following screen capture within the project:
 You can open the file and review it, noting that the following values exist:
"maritalStatus" : "$maritalStatus",
"household" : "$household",
"children" : "$children"
The name of the JSON request parameter must match the parameters that are supported by the REST service. The name of the variable must match the input variable that is defined in the JSP file form where the customer input is captured.
The supported request parameters for updatePerson are shown in the following REST API: User and Organization Management.
-
Go to the Tag: Person section and click PUT
/store/{storeId}/person/@self.
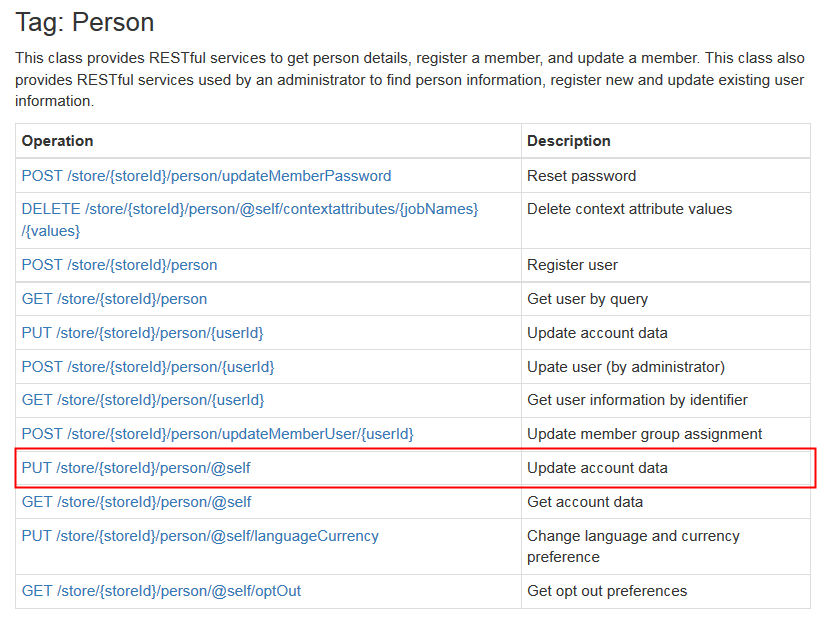
This URL matches the resource path and method path defined in the REST template, as shown in bold:<resource path="{serverHost}/{contextPath}/store/{storeId}/person" name="personHandler"> <serverParam name="serverHost">$WCParam.serverHost</serverParam> <serverParam name="contextPath">$WCParam.contextPath</serverParam> <serverParam name="storeId">$WCParam.storeId</serverParam> <method name="updatePerson" httpMethod="PUT" path="@self?action={action}"> <var name="action">updateUserRegistration</var> -
Click UserRegistrationUpdateRequest in the request body.

This link displays the list of supported request parameters. -
Restart the Store Test Server, and start the Customization Test Server and Search Test server
container, if the server and container are not already running. For more information, see the
Servers view:
