Tutorial: Creating business logic
In this tutorial,
you create the business logic for a new view, controller command,
data bean, and entity bean. New business logic is required when a
change is made to the default business logic behavior of WebSphere
Commerce. This tutorial guides you through creating business logic
to support an application to track bonus reward points earned by customers
in a new customer loyalty program application. The assets you will
create include a view, a controller command, a task command, data
beans, and an entity bean. This tutorial is for demonstration purposes
only and does not reflect all the logic required to build a fully
functional loyalty program application. From this tutorial, you learn
the common development steps for creating the previously listed code
assets.
Learning objectives
After completed this tutorial, you should be
familiar with the following concepts:
- Business logic
- Views
- Controller commands
- Data and entity beans
After completing this tutorial,
you should be familiar with the following tasks:
- Creating business logic to develop WebSphere Commerce applications
- Creating views to display content on storefront pages
- Creating controller commands to return a view task to be implement
- Creating data beans to provide dynamic content for a JSP page
- Creating and integrating entity beans to store data returned from a JSP page
Time required
Expect this tutorial to take about 3 hours to complete. The tutorial takes longer if you explore concepts related to this tutorial.
Skill level
This tutorial is intended
for WebSphere Commerce developers responsible for creating code assets
and customizing WebSphere Commerce business logic. To complete this
tutorial, you should be familiar with the following terms and concepts:
- WebSphere Commerce Developer
- The Java programming language
- JSP pages
- EJBs
- Databases
System requirements
Before beginning
this tutorial, ensure that you completed the following tasks:
- Install WebSphere Commerce Developer version 7.
- Publish the Madisons store archive.
- Downloaded and extracted the WCSample.zip file to a temporary directory, for instance C:\Temp. This file contains code required to complete this tutorial.
- Configured the development environment to use the same database type as the target machine. For more information, see Changing the development database.
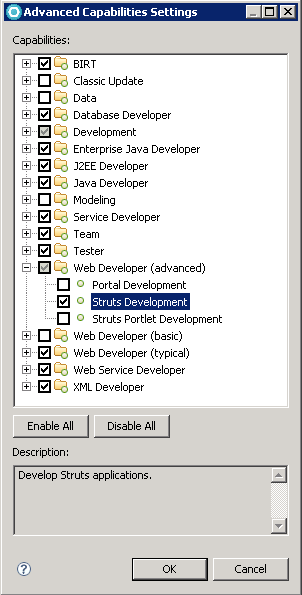
- Enabled Struts Development in
WebSphere Commerce Developer, if it is currently disabled:
- Select .
- Select .
- Click Advanced... and select , if it is currently disabled.

- Click OK to accept your changes and close the Advanced Capabilities Settings window.
- Click OK to accept your changes and close the Preferences window.
Tutorial resources
The following code
samples used in this tutorial as a reference: