Tutorial: Extending a Struts action
In this tutorial, you learn how to extend Struts actions in the context of WebSphere Commerce store development. Specifically, you are creating a new action class, MyNewAction, that extends the WebSphere Commerce BaseAction class. Then, you configure an existing starter store action to use MyNewAction as its implementation class.
When a customer accesses a store page from a predefined referral website, such as a business partner search engine, the MyNewAction action creates a cookie. The cookie stores the referring website's URL. The URL can be used to pay royalties to the referring website if the customer completes a purchase within a predetermined time. The URL can also be used to simply gather statistics.
Learning objectives
After completing this tutorial, you should
be familiar with the following concepts:
- Struts
- Action classes
- Implementation classes
After completing this tutorial,
you should be familiar with the following tasks:
- Extending a struts action
- Use cookies in your implementation to associate a referral with users
Time required
Expect this tutorial to take 1 hour to complete. The tutorial can take longer if you explore concepts that are related to this tutorial.Skill level
This tutorial is intended
for WebSphere Commerce Store developers responsible for customizing
a store and creating store functionality. To complete this tutorial,
ensure that you are familiar with the following terms and concepts:
- Java programming language
- Struts
- Java servlet programming
System requirements
Before you
begin this tutorial, ensure that you complete the following tasks:
- Install WebSphere Commerce Developer version 7.
- Publish a starter store archive.
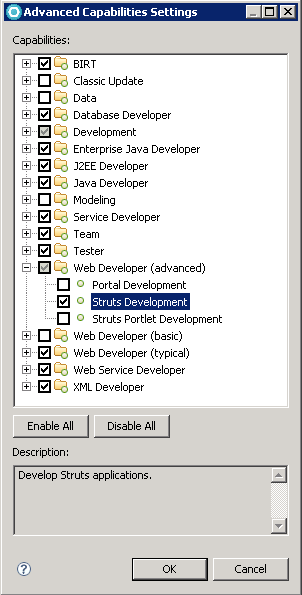
- Enable Struts Development in WebSphere
Commerce Developer, if it is disabled:
- Select .
- Select .
- Click Advanced... and select , if it is disabled.

- Click OK to accept your changes and close the Advanced Capabilities Settings window.
- Click OK to accept your changes and close the Preferences window.