In this lesson, you learn how to modify the
MyNewControllerCmdImpl to pass information to the JSP page. You modify
the command to add additional name-value pairs into the existing rspProp
TypedProperties object that stores response properties from the command.
Within the JSP page, you use the JavaServer Tag Library (JSTL) expression
language to extract the information from the response properties.
Procedure
- Modify the MyNewControllerCmdImpl
class.
- In the Enterprise Explorer view ,
expand .
- Open the MyNewControllerCmdImpl.java
file for editing.
- In the Outline view, select the
performExecute
method.
- Locate and uncomment section 2 to add the code that
stores two parameters in the response properties object which will
be passed to the view:
/// Section 2 ////////////////////////////////////////////////>
    /// The controller command passes variables to the JSP page>
  /// add additional parameters in controller command to rspProp
  ///  for response
    String message1 = "Hello from IBM!";

  rspProp.put("controllerParm1", message1);
  rspProp.put("controllerParm2", "Have a nice day!");>
/// End of section 2/////////////////////////////////////////
- Save your changes.
- Update the MyNewJSPTemplate.jsp file:
- In the Enterprise Explorer view ,
expand .
- Right-click the MyNewJSPTemplate_All.jsp
file; select .
- Right-click the MyNewJSPTemplate.jsp
file; select .
- In the MyNewJSPTemplate_All.jsp
file, locate and copy section 4; paste the copied section into the MyNewJSPTemplate.jsp
file between the
<!-- SECTION 4 --> and <!--
END OF SECTION 4 --> markers. This section uses the JSTL
expression language to retrieve and display the values that were passed
from the controller command.
- In the MyNewJSPTemplate.jsp
file, section 4 should resemble:
<!-- SECTION 4 -->
<h3>
<fmt:message key="ParametersFromCmd" bundle="${tutorial}" />
</h3>
<fmt:message key="ControllerParm1" bundle="${tutorial}" />
<c:out value="${controllerParm1}"/>
<br />
<fmt:message key="ControllerParm2" bundle="${tutorial}" />
<c:out value="${controllerParm2}"/>
<br />
<br />
 <!--
END OF SECTION 4 -->
This section uses
- Save your changes.
- Test the modifications to the controller command and the
JSP page:
- Start
or restart the WebSphere Commerce test server.
- Expand .
- Right-click the index.jsp file;
click . Your storefront page displays in
the web browser.
Note: If prompted to select a server,
select Choose an existing server and click Finish.
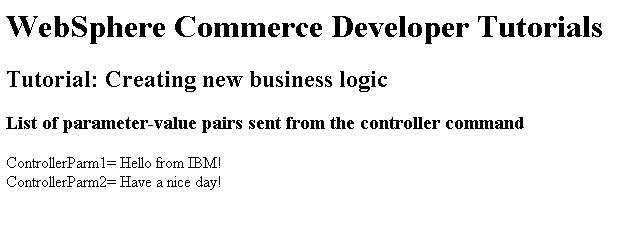
- In the web browser, enter the following URL:
http://localhost/webapp/wcs/stores/servlet/MyNewControllerCmd
The new JSP page displays in the web browser: