In this lesson, you create a view and its corresponding JSP page. A view represents the
data that is displayed in the storefront. In this tutorial, you register the view to a JSP page,
when you type the view URL in a Web browser, the corresponding JSP page loads. In this lesson, the
view you create is called MyNewView and the corresponding JSP page is called
MyNewJSPTemplate.jsp.
Note: The file paths in this tutorial are specific to the Madison store and might be different for
your storefront.
About this task
In this lesson, you learn how to perform the following tasks:
- Place JSP pages and image files to apply to a specific store.
- Use Rational Application Developer to create JSP pages.
- Create property files to contain JSP page text.
- Update the struts-config-ext.xml file to
map views to corresponding JSP pages
- Set up access controls for the new view.
- Use the WebSphere Commerce development environment to test the
new view.
Procedure
-
Map the new view to the new JSP page by inserting an entry into the
struts-config-ext.xml file. Determine the unique identifier for your store
before you insert the new entry into the struts-config-ext.xml file.
-
Start the test
environment.
-
Navigate to the following URL in a web browser:
http://localhost/webapp/wcs/admin/servlet/db.jsp.
-
In the input box, enter the following SQL statement:
select STOREENT_ID from STOREENT where IDENTIFIER = 'Madisons';
Where
Madisons is the name of your store. Make note of the
STOREENT_ID value.
- Add an entry for your view and JSP page to the struts-config-ext.xml file:
- In the Enterprise Explorer view expand .
- Right-click the struts-config-ext.xml file;
click .
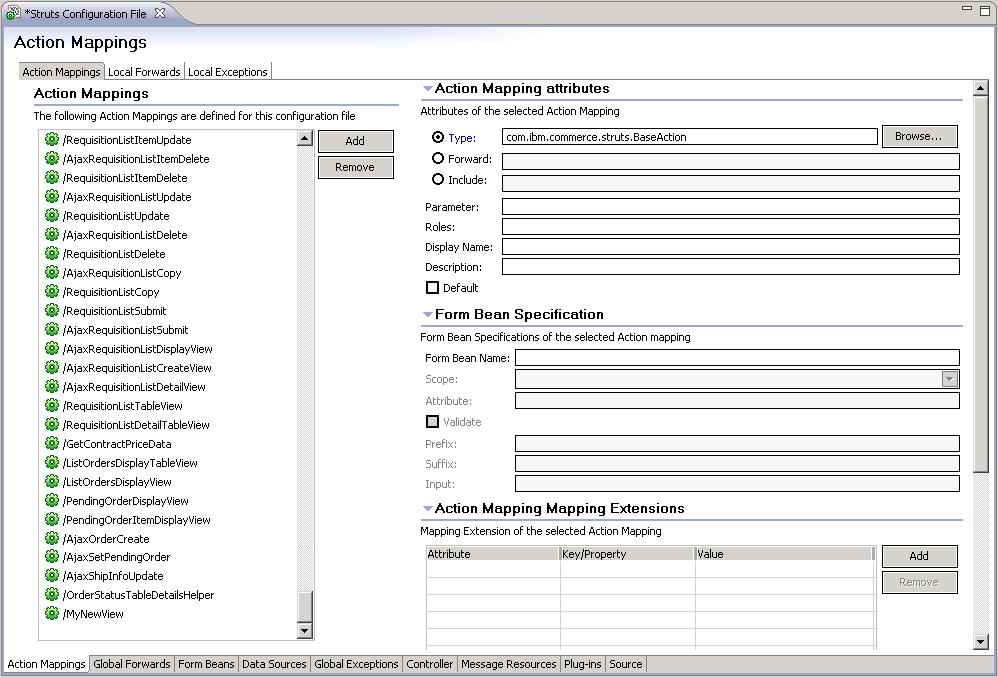
- Set the mapping settings in the Action Mappings tab:
- In the Actions Mappings section, click Add.
Rename the path value from the default /action1 to
path value
/MyNewView
- In the Action Mapping attributes section,
enter com.ibm.commerce.struts.BaseAction in
the Type field.
The mapping settings in the Struts Configuration File Editor resemble the following:
-
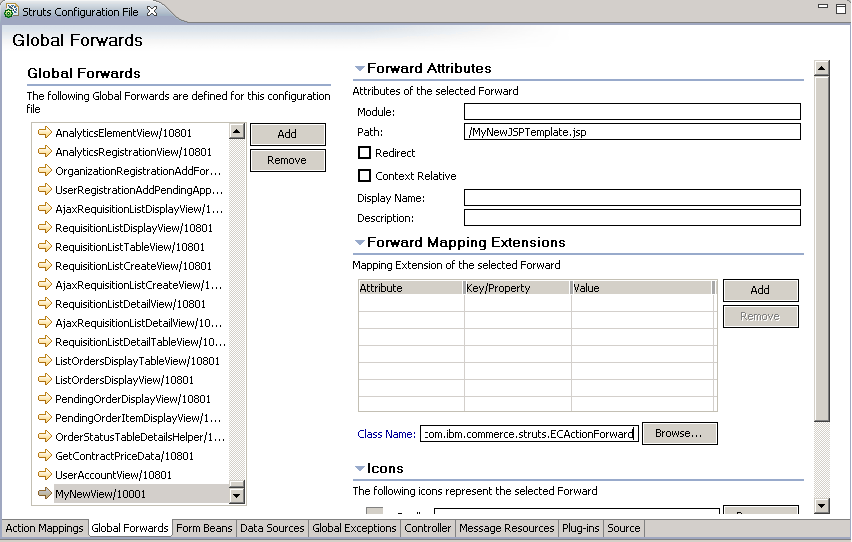
Click the Global Forwards tab; click Add.
- Change the default name from success to MyNewView/storeId for
the view name.
For example, change the default name
to MyNewView/10001 where 10001 is your storeent_id.
- In the Forward Attributes section,
enter /MyNewJSPTemplate.jsp in the Path field.
- In the Forward Mapping Extensions section,
enter com.ibm.commerce.struts.ECActionForward in
the Class Name field.
- The Global Forwards tab of the Struts Configuration File Editor resembles the following:
- Save your changes and leave the Struts Configuration
File Editor open.
- Update the struts configuration registry component. The
registry component is used by the server to detect your changes to
the struts configuration files:
-
Open the Administration
Console and select Site on the Administration Console
Site/Store Selection page.
-
Click . A list of registry components for the site opens.
- Select the check box for the Struts Configuration registry
component; click Update.
-
Click Refresh to reload the Registry window. After
the update is complete, the status column reads Updated.
-
Create a properties file to store the translatable text for the JSP pages. If you use
translatable text from the JSP page itself, the task of translation is much
simpler and is also key to a globalized website.
You create a properties file for the locale en_US. You can create properties files for each
locale you support. If you view the store that uses the locale fr_FR, you can also create a
properties file for the fr_FR you use, containing text in French. You also create a default
properties file, with no locale in the file name. If a customer uses a locale that does not have a
corresponding properties file, the text from the default properties file displays.
When the WebSphere Commerce Developer builds the Stores project, it copies the new properties
files to the Stores project in the Stores\WebContent\WEB-INF\classes\Madisons
directory. The files are used as a resource bundle by your new JSP page. A resource bundle contains
the text that displays in the JSP page through a Web browser and is retrieved
from this file.
Note: The Tutorial_All_en_US.properties file is provided as the code source for
the tutorial and copying is encouraged to reduce the effort of typing and minimize typing
errors.
-
In the Enterprise Explorer view, navigate to .
-
Right-click the Tutorial_All_en_US.properties file; select
Copy.
-
Right-click the Tutorial_All_en_US.properties file again; select
Paste. In the Name Conflict window, type
TutorialNLS_en_US.properties.
-
Right-click the TutorialNLS_en_US.properties file; select
Copy.
-
Right-click the TutorialNLS_en_US.properties file again; select
Paste. In the Name Conflictwindow, type
TutorialNLS.properties.
-
Click OK.
- Create the MyNewJSPTemplate JSP page
for your new view, MyNewView:
Note: MyNewJSPTemplate_All.jsp is provided as a source code sample for the
tutorial and copying is encouraged to reduce the effort of typing and minimize typing errors. When
you create your JSP page, create a new blank JSP page and copy and paste appropriate sections from
the MyNewJSPTemplate_All.jsp source code file.
- In the Enterprise Explorer view,
expand .
- Right-click Madisons; select .
- In the File name field, enter
MyNewJSPTemplate.jsp.
- Click Finish.
- The MyNewJSPTemplate.jsp file opens.
Click the Source tab.
- Open the MyNewJSPTemplate_ALL.jsp file
for editing.
- In the MyNewJSPTemplate_ALL.jsp file,
copy the text between
<?xml version="1.0" and content="IBM
Software Development Platform"/>.
- In the MyNewJSPTemplate.jsp file,
delete the default code and paste the copied text into the file.
-
Copy the preparation section from the MyNewJSPTemplate_ALL.jsp file into
the MyNewJSPTemplate.jsp file. This preparation section sets the place holders
for updates you make to the file.
- In the MyNewJSPTemplate_ALL.jsp file copy the text between the
<%--PREPARATION SECTION and END OF PREPARATION SECTION --%>
markers, but not the markers themselves.
- Paste the copied text to the end of your MyNewJSPTemplate.jsp file.
- In the MyNewJSPTemplate_ALL.jsp file,
copy sections 1A and 2.
- Paste the copied text into your MyNewJSPTemplate.jsp file
between the
<!-- SECTION 1A -->, <!--
END OF SECTION 1A -->, <!-- SECTION 2 -->,
and <!-- END OF SECTION 2 --> markers.Section
1A includes the JSTLEnvironmentSetup.jspf file that sets up environment
variables. Section 2 creates the resource bundle object that retrieves
information from the properties file and sets the locale. TutorialNLS refers
to the name of the properties file that you customized in the previous
step. The .properties file extension for TutorialNLS.properties is
not included because the Java Standard Tag Library (JSTL) syntax requires
that the file extension is not included in the setBundle tag
- In the MyNewJSPTemplate_ALL.jsp file,
copy section 3.
-
Paste the copied text into your MyNewJSPTemplate.jsp file between the
<!-- SECTION 3--> and <!-- END OF SECTION 3--> markers. The
code retrieves text that is created in your properties files.
-
Create and load access control policies for the view. You specify the command-level access
control in this step. The command-level access control policy specifies that all users are allowed
to execute the view. This type of access control policy might not be suitable in every circumstance.
The access control policy is defined by the MyNewViewACPolicy.xml file.
-
Stop the WebSphere
Commerce test server.
-
In a command prompt, navigate to the
WCDE_installdir\bin directory.
-
Run the acpload command:
-
Ensure that the policy files are successfully created:
- Navigate to the WCDE_installdir\logs directory. Inspect
the acpload.log and messages.txtfiles to ensure that the
access control policy loaded successfully. The messages.txt file might not
exist if the load completed successfully.
- Navigate to the WCDE_installdir\xml\policies\xml
directory. Ensure that the MyNewViewACPolicy_idres.xml and
MyNewViewACPolicy_xmltrans.xml files were created. These files are created as
part of a successful idresgen utility process.
- Test your new view in the WebSphere Commerce development
environment.
- Start
the WebSphere Commerce Test Server.
- Expand .
-
Right-click the index.jsp file; click . The storefront page is displayed in the Web browser.
Note: If prompted to select a server, select Choose an existing server and
click Finish.
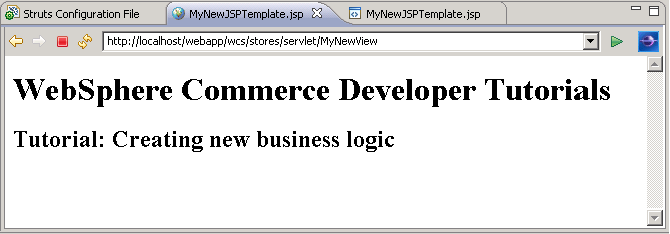
- In the Web browser, enter the following URL:
http://localhost/webapp/wcs/stores/servlet/MyNewView
The new JSP page is displayed in the Web browser: