Preparing your workspace
In this lesson, you import sample code files
into your WebSphere Commerce workspace. This sample code contains code
that is required to complete this tutorial.
Procedure
- Open WebSphere Commerce Developer.
- In the Enterprise Explorer view,
ensure the Toggle Project Grouping button is
selected as shown in the following screen capture:
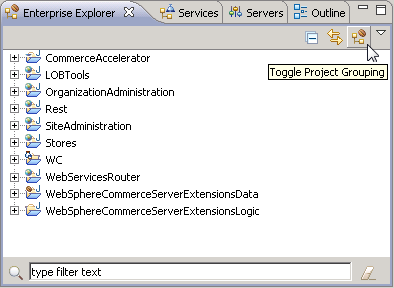
By selecting the Toggle Project Grouping button, you ensure that the view in WebSphere Commerce Developer matches the screen captures and instructions in this tutorial. - Import the sample Java code that is provided in the WCSample.zip file
into your workspace:
- In the Enterprise Explorer view, expand .
- Right-click the src directory; select Import. The Import wizard opens.
- From the Select an import source list, select ; click Next.
- Click Browse beside the From directory field.
- Navigate to the temporary directory where you extracted the WCSample.zip file; navigate to the notcompletedsourcecode\newbusinesslogic\Javafiles directory.
- Click Select All to select all the files under the Javafiles directory.
- In the Folder field, the WebSphereCommerceServerExtensionsLogic\src folder is specified by default.
- Click Finish.
- You see errors in the BonusDataBean class. These errors are resolved as you progress through the tutorial.
- Import the JSP page for this tutorial:
- Import the properties file for the tutorial into the appropriate
directory:
- In the Enterprise Explorer view, expand
- Right-click the Madisons directory; select Import.
- From the Select an import source list, select ; click Next.
- Click Browse beside the From directory field.
- Navigate to the temporary directory where you extracted the WCSample.zip file; navigate to the notcompletedsourcecode\newbusinesslogic\storeassets directory.
- Click Deselect All, then select the Tutorial_All_en_US.properties file.
- In the Folder field, the Stores/src/Madisons folder is specified by default.
- Click Finish.
- Copy the sample policy files from the WCSample.zip file
into your workspace:
Results
Test your environment to ensure that you are ready to start the tutorials:
- In WebSphere Commerce Developer, switch to the Server view.
- Right-click WebSphere Commerce Test Server; select Start if the server is stopped or Restart if the server is running.
- In the Enterprise Explorer view, expand .
- Right-click the index.jsp file; select . If the Server Selection window displays, select Choose an existing server and click Finish.
- Select a product and ensure that you can purchase it successfully.
You are now ready to proceed with the remaining tutorial lessons.