IVR List
The BigFix Insights for Vulnerability Remediation (IVR) application in the WebUI provides a quick summary of all vulnerabilities in a data grid format. With the application you can remediate vulnerabilities and create custom IVR reports.
To access the IVR page, from the WebUI main page, click .
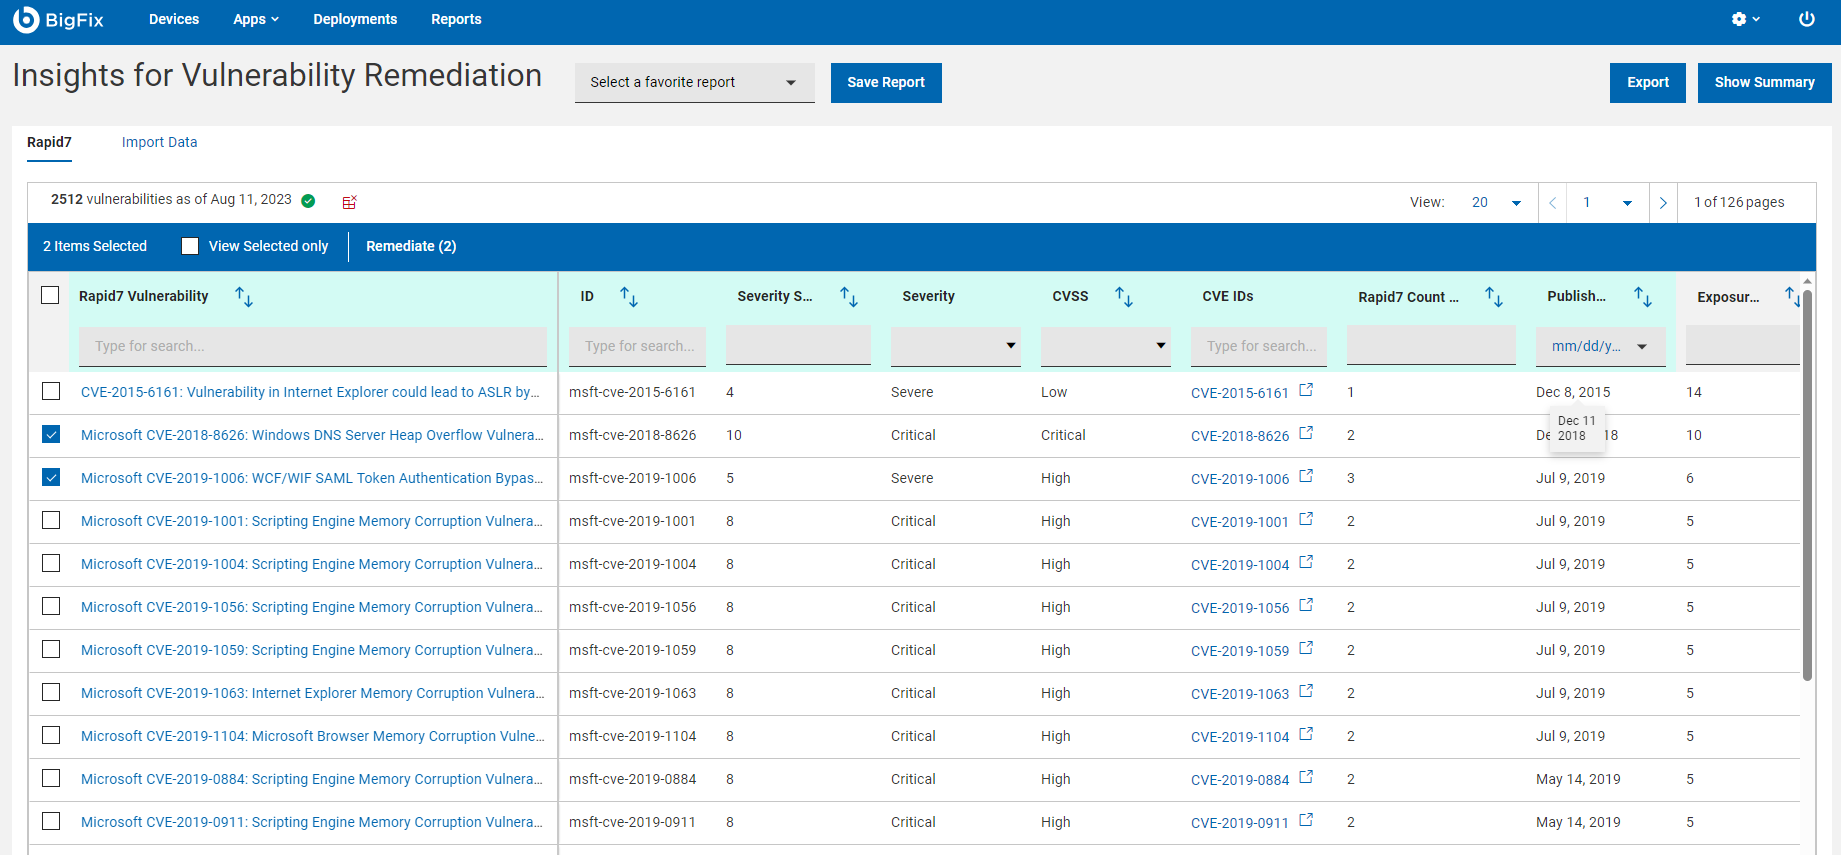
Operator permission settings, connected devices, and site assignments govern the content in the list. With the grid view, you can view the list of vulnerabilities in a table. Click the vulnerability name to navigate to the details of the vulnerability (the overview, vulnerable devices, and deployment). Each column gives an option to search or filter.
The refine results and customizing the data grid function is similar to those in the device page. For more information, see Grid view.
Hover the mouse over the vulnerability list count to see the dates and times updated upon the most recent WebUI retrieval.
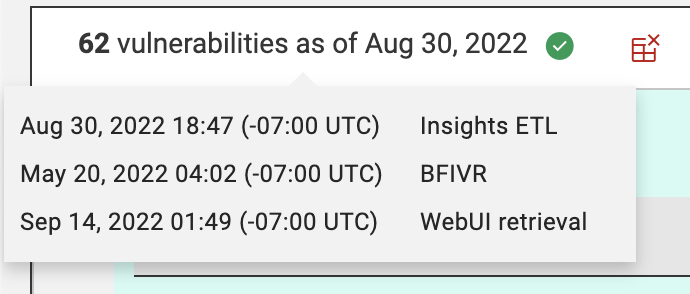
The date in the vulnerability list count indicates the Insights ETL or BFIVR date, depending on which is the most recent. It is recommended to have Insights ETL run to completion first and then run an IVR ETL for the most up to date information.
- Insights ETL is the time of the most recent and successful completion of an Insights ETL. These are determined by the schedules that are setup under Insights. Refer to the link for more information about how to schedule an Insights ETL.
- BFIVR is the time of the most recent and successful completion of an IVR ETL. These are determined by the schedules that are setup upon deployment of the IVR. Refer to the link for more information about IVR ETL scheduling.
- WebUI retrieval is the time of the most recent retrieval of IVR data from the broker. By default, WebUI will attempt to pull data daily via the IVR broker. Refer to the link to view IVR settings that can change the frequency of this retrieval. This is also when WebUI updates the Insights ETL and BFIVR times with the latest metrics.
- Action bar: Select one or more vulnerabilities from the data grid to
enable the action bar.
- View Selected only: Select the checkbox to view only the selected vulnerability.
- Remediate: Click Remediate to navigate to the Take Action dialog, where you can remediate the vulnerability. The number in the parenthesis indicates the number of selected vulnerabilities. For more information, see Take Action: The Deploy Sequence.
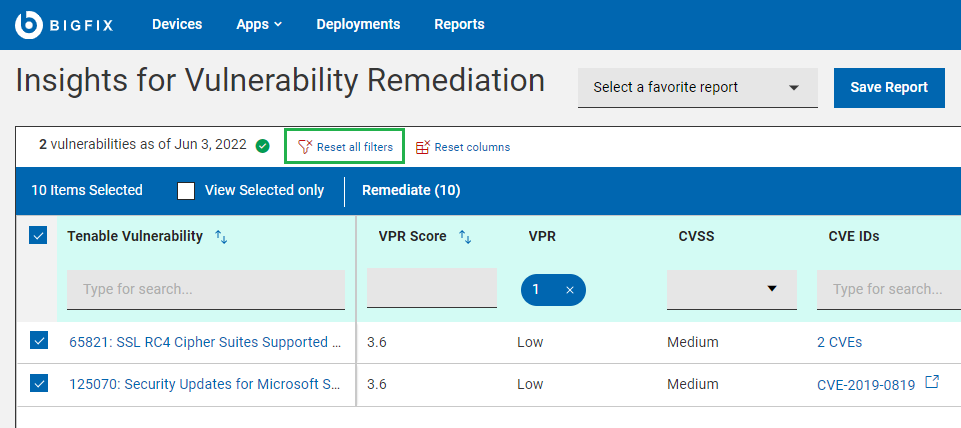
- FiltersNote: Filters in the IVR grid view are presented in green and gray. Green means that information comes from Qualys/Tenable/Rapid 7. Grey colour means that information comes from BigFix Enterprise (BFE) database.You can use filters in the headers to refine results:
- VPR Score: Vulnerability priority rating score.
- VPR: Vulnerability priority rating.
- Severity: Vulnerability severity level.
- CVSS: Common vulnerability scoring system.
- CVE IDs: Use the CVE ID filter to search for vulnerabilities by Common Vulnerabilities and Exposures.
- Published: Published date.
- Scanner Count: Tenable/Qualys/Rapid 7 count - shows the
number of vulnerable devices that Tenable/Qualys/Rapid 7 identified
with correlated BigFix content.Note: Under 2 conditions the grid can show a vulnerability:
- The scanner count must be greater than 0
- The operator must have permission to view to at least one of the fixlets that are associated with that vulnerability
- Exposure count: The aggregate sum of applicable devices for
the associated BigFix content.Note: Exposure count is not a unique count. It is a summation of all applicable devices per Fixlet.
- Product/FamilyTo clear all the selected filters, click
Reset all filters.
- Save Report
- Save the report for reference, edit, update, or delete. For more information, see Reports.
- Show Summary:
- On the IVR page, select the required filters.
- Click Show Summary. You can view the summary of
all the filtered vulnerabilities as charts and tables. Hover over of the
chart to get more details about a data point and the percentages. Hover
over any truncated labels to see the full text in the tooltip. You can
change filters or enter search text and the report dynamically displays
the relevant information.
- Top 10 Critical Exposures by CVE/Vulnerability ID
- Breakdown by CVSS/Vulnerability Priority Rating
- Top 10 Vulnerabilities by CVSS Published
Date/Vulnerability Priority Rating Published
Date

- Export:
You can export the filtered report in a .csv, .xlsx, or .pdf format.
- On the IVR page, select the required filters.
- Click Export.
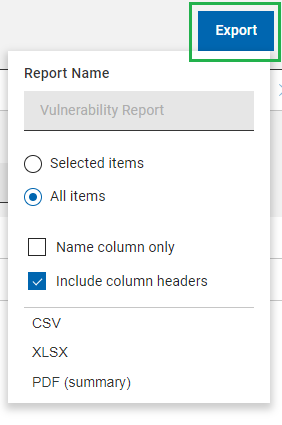
- Use the Selected Items option to choose items from the filtered result to export; Click All Items to export all the items from the filtered list.
- To export only the names of the filtered items, click Name column only
- To export details of every default column of an item, click Include
column headersNote: If you are displaying columns other than the default columns, you can export the name column only.
- Select a file format (CSV, XLSX, or PDF) for exporting the data.
- By default, the report is saved in the Downloads folder with this default file name: Device_Report_mm_dd_yyyy_username. You can change the download settings in your browser to change the file name and download it into a different location. You can save the report to review it later or share it with interested stakeholders.
- If you selected PDF format, a .zip file is downloaded, which contains a .csv file with numerical data and a .pdf file with a visual representation of the data.
- The exported IVR report contains key details about your vulnerabilities that are displayed after applying the filters and search criteria. The details include the vulnerability name, number of vulnerable devices, severity, CVE IDs and all other details that you can see on the screen when you expand every vulnerability.
- Exporting CSV file for IVR import
Tenable:
- Open the sidebar and click on Findings under the Explore
header.
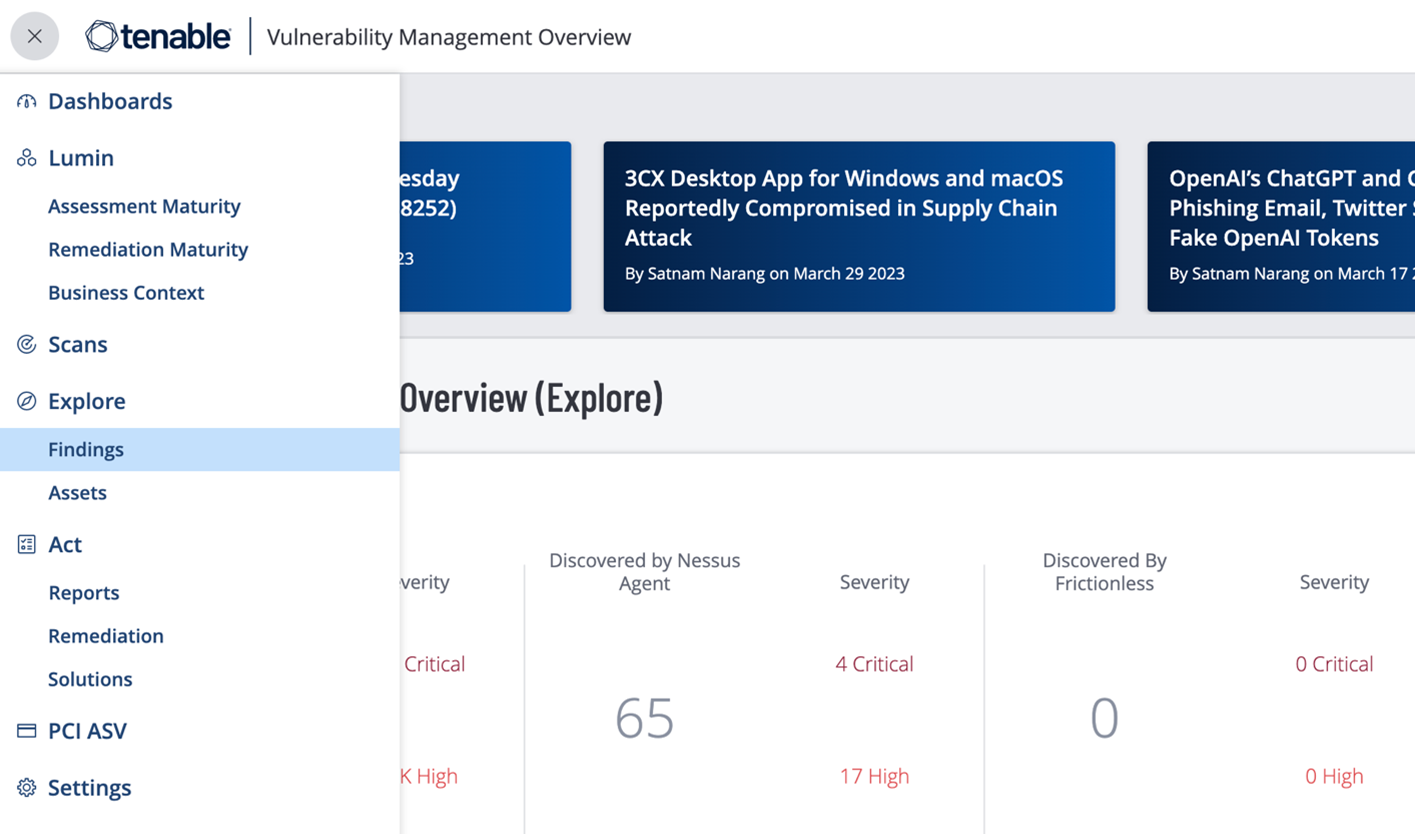
- Apply any necessary filters to the table. Ensure that the Group
by option is set to None. When ready, click
Export.
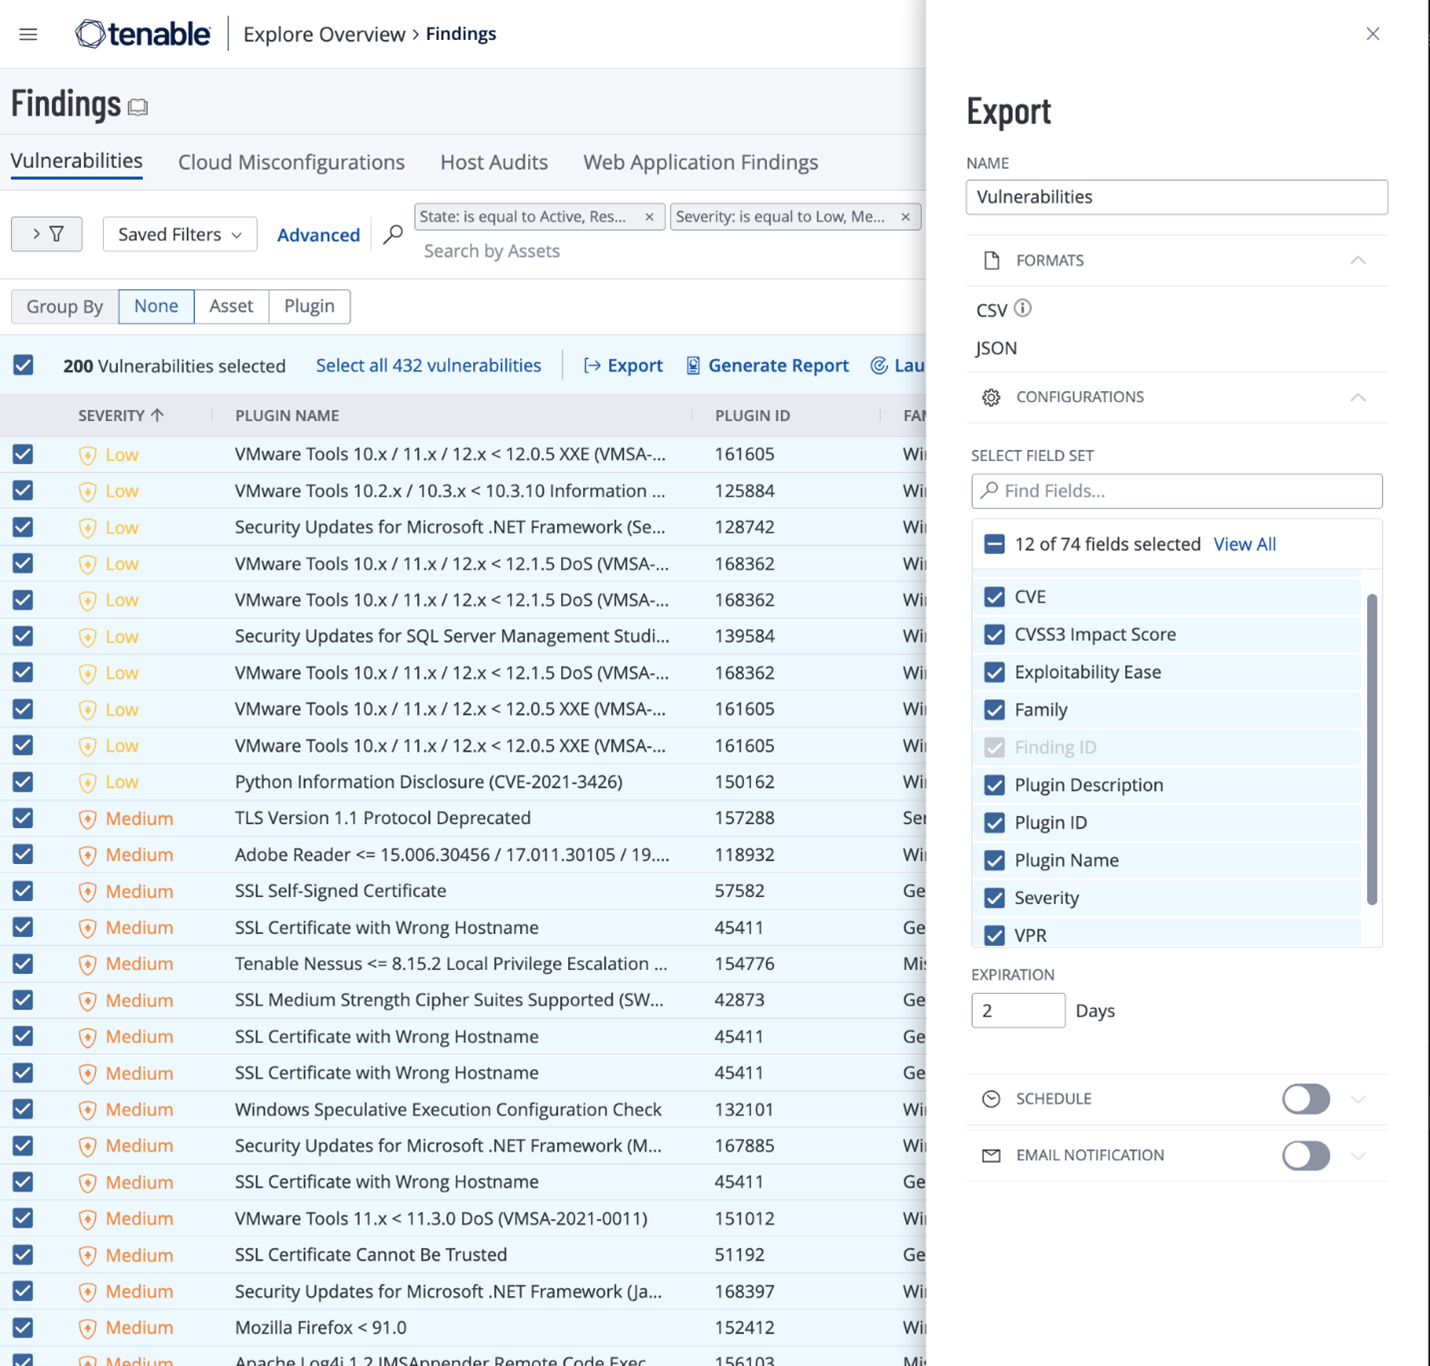
- Under Configurations, select the following fields: Asset ID, CVSS3 Impact Score, Exploitability Ease, Family, Plugin Description, Plugin ID, Plugin Name, Severity, VPR, Vulnerability Published.
Qualys:- Navigate to Vulnerabilities and apply any necessary filters.
Ensure that Vulnerability is selected and do not select any
options under Group by.
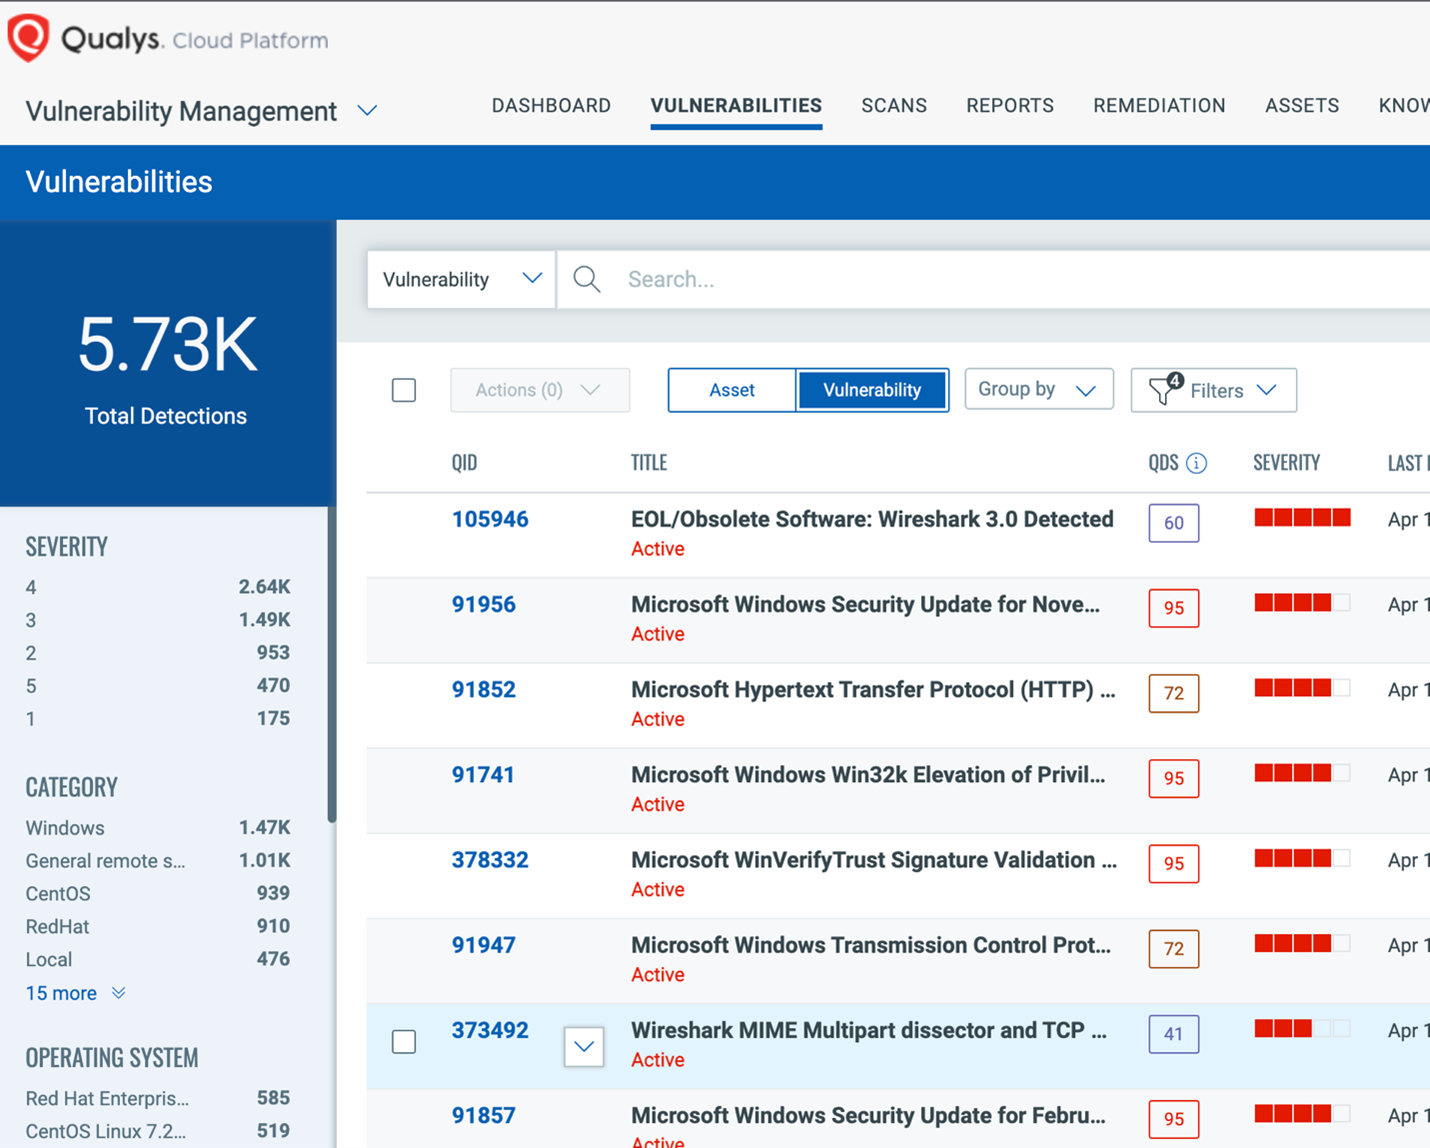
- Click on the Download icon. When the download popup appears, make sure
to select CVE as your Download Type.
You may choose to Select All or select inividually following fields: CVE, CVSS Rating Labels, QID, Title, KB Severity, Severity, CVSS Rating Labels, CVE, Solution, Asset ID, Published Date, Threat, Category.
- Click Download.
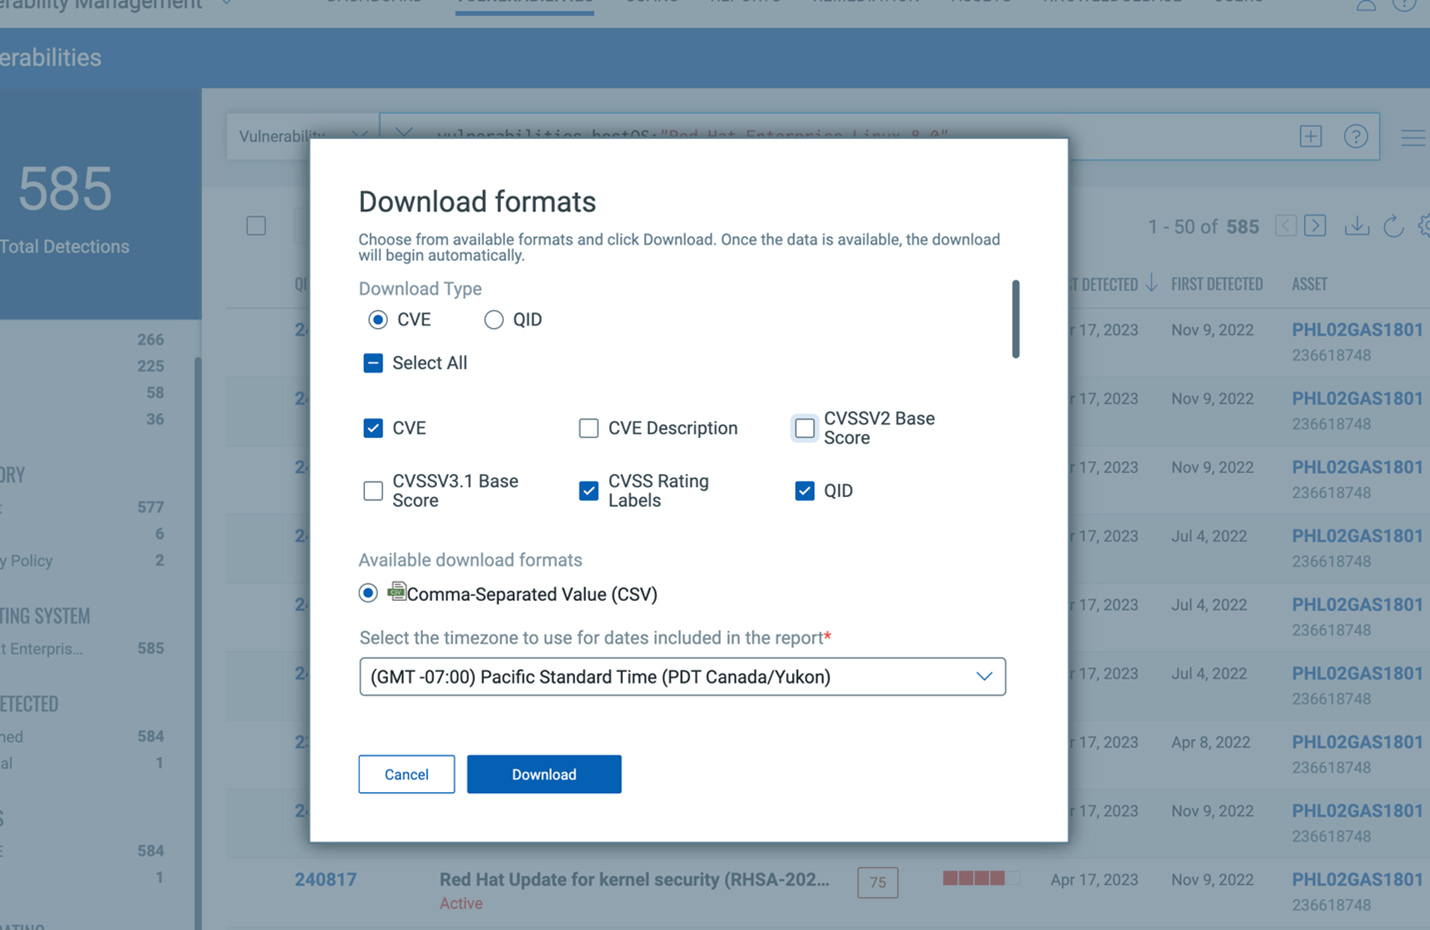
Note: If the exported CVEs appear to be in UTF-16 format, open the file in Excel and resave it as a CSV in UTF-8 format.Rapid 7:- Go to the Rapid 7 Scanner and click on Create >
Report.
- Click on Manage Report Templates and select new.
- Provide a name and description for the template. For template type, select Export (CSV format). Under Content, select the following fields: Vulnerability Title, Vulnerability Tags, Vulnerability Severity Level, Vulnerability Published Date, Vulnerability ID, Vulnerability Description, Vulnerability CVSS Score, Vulnerability CVE IDs, Asset ID
- Click Save.
- Select Create a Report. Under Template, choose the report template you just created. For File format, select CSV and set the scope as desired.
- Click Save & Run the report.
- Open the sidebar and click on Findings under the Explore
header.
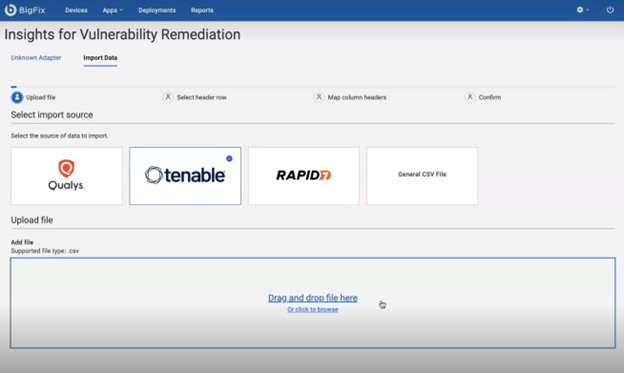
- Importing CSV format reports into IVR: Import DataIVR app enables users to import Qualys, Tenable, Rapid 7, or generic reports in CSV format directly into IVR.To import the report in CSV format:Note: Data Import is available for all users who have access to the IVR app. Please be aware that the WebUI IVR platform supports the import of one CSV file at a time. All users of WebUI IVR, regardless of their roles or permissions, share the responsibility for managing imported CSV reports. This means any IVR user has the ability to both view and delete the imported CSV reports.Note: Data import does not require setting up Insights and running the existing IVR adapters. If you have the Insights set up within your WebUI IVR environment, the data you import does not automatically populate the Insights database.
- Select Import Data tab in IVR app.

- Select the import source: Qualys, Tenable, Rapid 7, or generic CSV file and
upload the file. The IVR app will initiate the import process.
- Select header row that contains your column header.
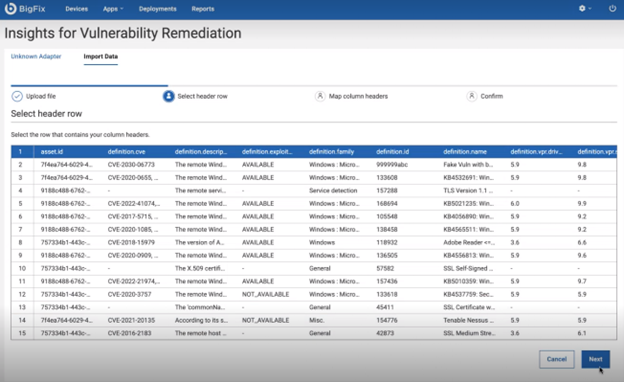
- Map column headers. From each dropdown select the imported header to map the
IVR column headers. To exclude a column, select “Do not include this column”
from the dropdown list.

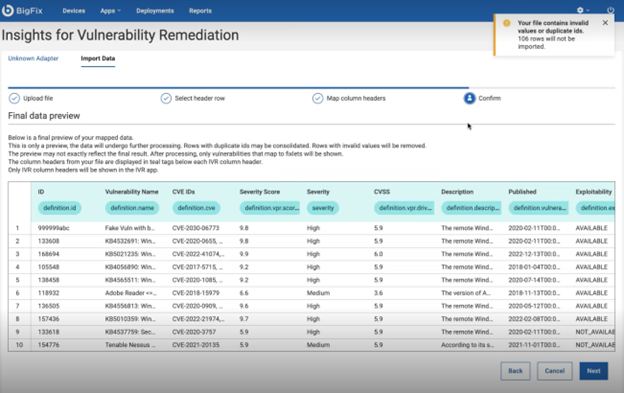
- IVR app will present a summary of the imported data for your review. Verify
the accuracy of the information before finalizing the import.Click
Next.
- Once confirmed, the IVR app will integrate the vulnerability report into its
database. The imported data will now be accessible for analysis and
reporting within the IVR system.Note: Rows with duplicated Ids may be consolidated and rows with invalid values will be removed.List does not contain vulnerabilities that do not have at least 1 fixlet correlated to it. Invalid rows from the CSV file are logged in the app\app\server\server-files folder in the IVR site app folder. The name of the log file is: IVR_CSV_INVALID_ROWS" Example path: C:\Program Files (x86)\BigFix Enterprise\BES WebUI\WebUI\sites\WebUI IVR Development_13783_324_1693266938\ivr-app\app\server\server-files.
- Select Import Data tab in IVR app.
WebUI IVR maps the imported vulnerabilities to Fixlets. You can select the vulnerability and remediate it while the correlation is still in progress in the background. List of vulnerability Ids that were not able to be mapped to at least one Fixlet can be found in the debug logs. Additional information about why particular rows in the CSV file have been marked invalid can be found in the file: <Program Files>\BigFix Enterprise\BES WebUI\WebUI\sites\WebUI IVR_XXXXX_XXXXXXXXX\IVR_CSV_INVALID_ROWS.
- Delete CSV report
To delete the report, click Delete and confirm deletion. Deleting a file will remove all current data from IVR.

- Import new CSV report
To import new report, click Import new. Importing a new file will remove and replace all current data.
