Packaging and deploying custom Commerce Composer widget code
You can deploy your custom Commerce Composer
widget code into your production environment with the WebSphere Commerce
Build and Deployment tool.
The WebSphere Commerce Build
and Deployment tool is designed to address the error-prone and time-consuming
nature of customized asset deployment. The WebSphere Commerce Build
and Deployment tool provides a starting point for you to automate
your build and deployment processes in a standardized, controlled
manner. For more information about the WebSphere Commerce Build and
Deployment tool, see WebSphere Commerce Build and Deployment tool.
The
following procedure provides information to help you package and deploy
the specific widget customization code that you created in this tutorial.
For more information about the full process for packaging and deploying
customization code if you are not familiar with using the tool, see Tutorial: Using the WebSphere Commerce Build and Deployment tool.
Procedure
Create the source code repository
Create the source code repository to include the Data Load
utility files and code packages for your widget customization code.
In a File Manager, go to the WCBD_installdir directory.
Create the following directory structure within the wcbd directory:
source\workspace
Add the Data Load utility files for your custom widget
into your source code repository for the WebSphere Commerce Build
and Deployment tool.
In the WCBD_installdir\source\workspace directory,
create the following directory structure:
DataLoad\dataload\common
You
use the directory structure to hold your widget Data Load utility
files during the build process.
Go to the DataLoad directory within
your new widget project.
For example, if your new widget
project is at the top level in your workspace the filepath to the
directory, can be workspace_dir\NewWidgetProject\Dataload.
Copy all of the folders and files within the DataLoad directory.
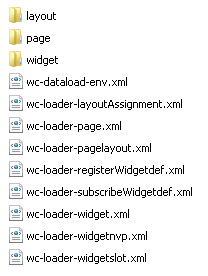
Paste the copied folders and files within the WCBD_installdir\source\workspace\DataLoad\dataload\common directory.
The contents of your common directory can
resemble the following image:
Add the code packages for your custom widget into your
source code repository for the WebSphere Commerce Build and Deployment
tool.
Go to the workspace_dir directory.
Copy the LOBTools directory.
Paste the LOBTools directory within
the WCDE_installdir\wcbd\source\workspace directory.
In the WCBD_installdir\source\workspace directory,
create the following directory structure:
Replace the line of code that you located with the following
code:
<project name="extract-local" default="all">
Save and close the files.
Open the extract-local.properties file
for editing.
Set the value for local.extract.dir= to
be WCBD_installdir/source
Note: In all of the properties files that your WebSphere Commerce
Build and Deployment tool uses, you must use forward slashes in the
filepaths. Otherwise, the build process fails.
Configure the WebSphere Commerce Build and Deployment tool
build settings.
Go to the Ant_installdir\lib
Copy the ant-contrib-1.0b3.jar file.
Paste the JAR files into the WCBD_installdir\lib directory.
Go to the WCBD_installdir directory.
Create a copy of the wcbd-setenv.bat file
and rename the copy setenv.bat.
Create a copy of the wcbd-build.private.properties.template and
rename the copy build-local.private.properties.
Create a copy of the wcbd-build.properties.template and
rename the copy build-local.properties.
Open the setenv.bat for editing.
Change the value for ANT_HOME to be Ant_installdir.
For example, C:/apache-ant-1.8.1
Ensure that the value for WAS_HOME to
be the correct value.
Where
the value for the -Dbuild.label parameter is the
name of your package. You can set the value for the parameter to be
whatever value that you want to name your package. As an example,
the previous command, names the package composer.
When the command runs, the WebSphere Commerce Build and
Deployment tool creates two deployment packages
A package for production server deployment.
A package for WebSphere Commerce Developer server deployment.
The packages are located within the WCBD_installdir\dist directory.
The following steps demonstrate how
to deploy your package from you build system into another WebSphere
Commerce Developer environment. For information about deploying the
package for a production environment, see Configuring and running the server deployment process.
Install the package for WebSphere Commerce Developer server
deployment in your WebSphere Commerce Developer environment.
In the WebSphere Commerce Developer environment where
you are deploying your package, create the WCBD_deploy_toolkit_common_dir directory.
In the WebSphere Commerce Developer environment where
you built the package, go to the WCBD_installdir\dist directory.
Copy the generated wcbd-deploy-toolkit-build-label.zip compressed
file.
In the WebSphere Commerce Developer environment where
you are deploying your package, go to the WCBD_deploy_toolkit_common_dir directory.
Paste and extract the copied compressed file.
The WCBD_deploy_toolkit_dir directory
is created.
Configure the deployment settings for the WebSphere Commerce
Developer environment where you are deploying your package. You must
configure the settings before you run the deployment script. The settings
identify information such as installation paths and environment settings
for your WebSphere Commerce Developer environment.
Go to the WCBD_deploy_toolkit_dir directory.
Create a copy of the wcbd-setenv.bat.template and
rename the copy setenv.bat.
Create a copy of the wcbd-deploy.private.properties.template and
rename the copy deploy-target-env.private.properties,
where target-env is the identifier for your target
environment.
Create a copy of the wcbd-deploy.properties.template and
rename the copy deploy-target-env.properties.
Open the setenv.bat file for editing.
Change the value for WCDE_HOME to be WCDE_installdir.
Open the deploy-target-env.private.properties for
editing.
Configure the following properties to ensure that the
appropriate values are set:
db.user.name=
db.user.password=
For example,
db.user.name=app
db.user.password=password
Open the deploy-target-env.properties file
for editing.
Configure the following properties to ensure that the
appropriate values are set: