Installing a stand-alone Web Reports server
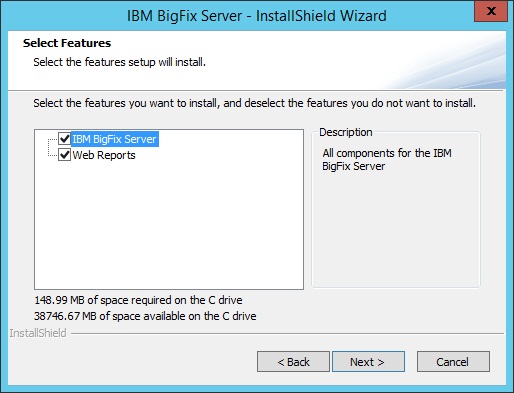
By default, the Web Reports component is installed along with the BigFix server.
However, you can choose not to install this component by deselecting the related check box in the
following dialog:
You can install it later only on a different system by running the following steps:
- Copy the BESInstallers\Server directory from your BigFix server to the system where you want to install the stand-alone Web Reports server.
- From the Server directory, run the setup.exe program to start the server installer.
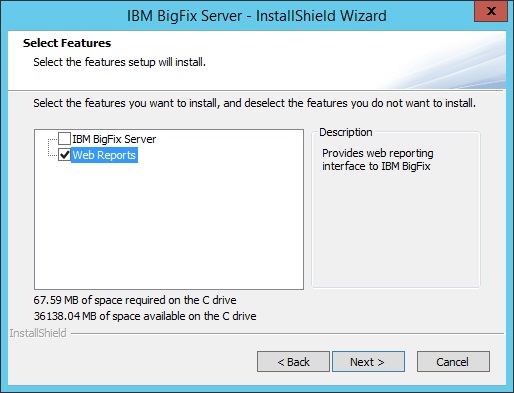
- Select to install only the Web Reports component in this dialog:
- Complete by choosing the database options that applies to your configuration. If you
select Use Remote Database, complete the following
configuration steps:
- On the Database Server window select the desired authentication method. If you choose Windows authentication, you must later on modify the Web Reports service logon to use a Windows authenticated user logon.
- On the Select Features dialog, ensure that only the Web Reports check box is selected.
- Choose the appropriate Destination Location.
- Choose where the Web Reports server will have its root directory and click Next.
- Starting from V9.5.3, you can specify the type of user that will run the Web Reports
services in this dialog:
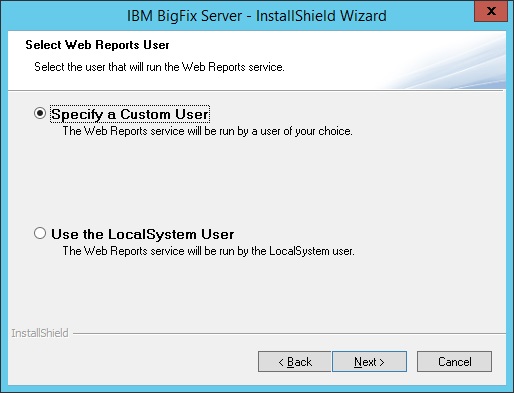
- If you choose to specify the LocalSystem User, you continue with step 7 and
review the installation parameters. If you choose to specify a custom user, you
see the following dialog:
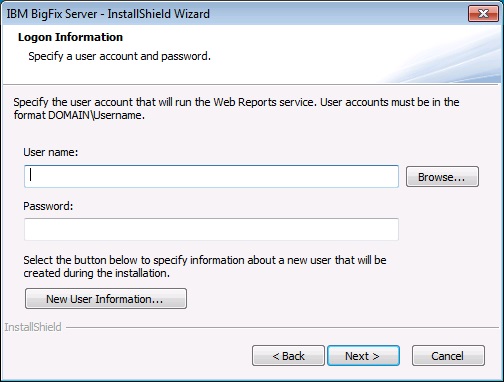
where you can specify an existing local user. This user does not need to have any particular rights or to belong to a group with particular rights to be used as a Web Reports installation user. Enter manually the user name and password or click the Browse button to select the user. If you want to create a new user, click New User Information, and enter the required information in this dialog: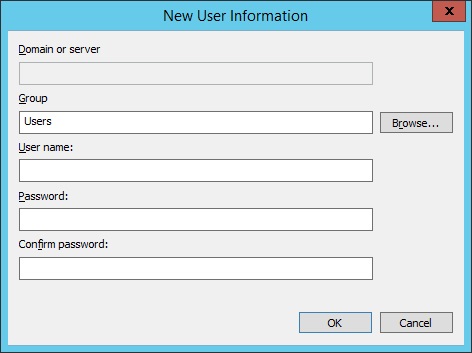
Note: If you are upgrading from earlier versions, the Web Reports service user remains the same as before the upgrade. - If you choose to specify the LocalSystem User, you continue with step 7 and
review the installation parameters. If you choose to specify a custom user, you
see the following dialog:
- Review the installation parameters and click Next to trigger the installation.
- Specify the database login for the server components and authentication method and click Next.
- Configure a data source to specify the BigFix server from where the data are collected. To create or modify a data source, see the procedure in Datasource Settings.
Note: If you run a fresh installation of Web Reports V9.5.2 or later, the HTTPS configuration is
automatically enabled on port 8083. After the installation completes successfully, you can
switch to the HTTP configuration by changing the value of the
_WebReports_HTTPServer_UseSSLFlag setting to 0. For more information,
see Customizing HTTPS on Web Reports.