Integrating ServiceNow Virtual Agent Chat Transfer – Guidelines
This section covers how to configure and enable ServiceNow virtual agent connector to the tenant Instance.
Pre-requisite:
- Access needed for BigFix AEX Global Admin Portal.
- Global Admin URL: https://BigFix AEXglobaladmin.mybluemix.net/
- ServiceNow Credentials needed
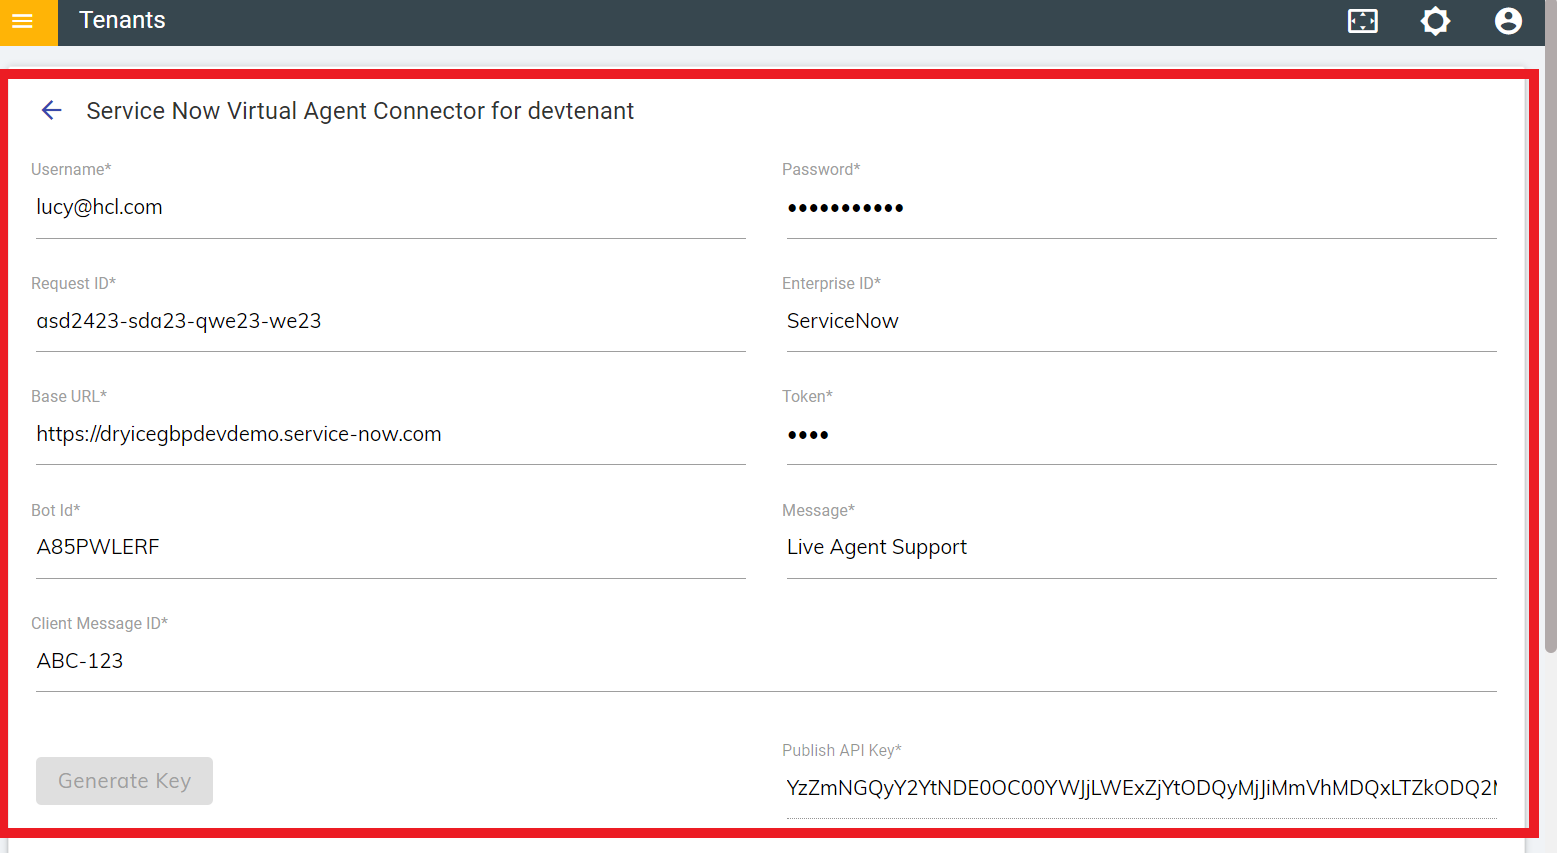
Base URL: https://dryicegbpdevdemo.service-now.com
Username: BigFix AEX@hcl.com
Request Id: asd2423-sda23-qwe23-we23
Enterprise Id: ServiceNow
Token
Password
Bot Id: A85PWLERF
Message: Live Agent Support
Client Message Id: ABC-123
API Key: YzZmNGQyY2YtNDE0OC00YWJjLWExZjYtODQyMjJiMmVhMDQxLTZkODQ2MjhjLWNiOGEtNDBhOS1iYjE1LTUxYTZjMjM0ZTdkMA==
Step by step Procedure:
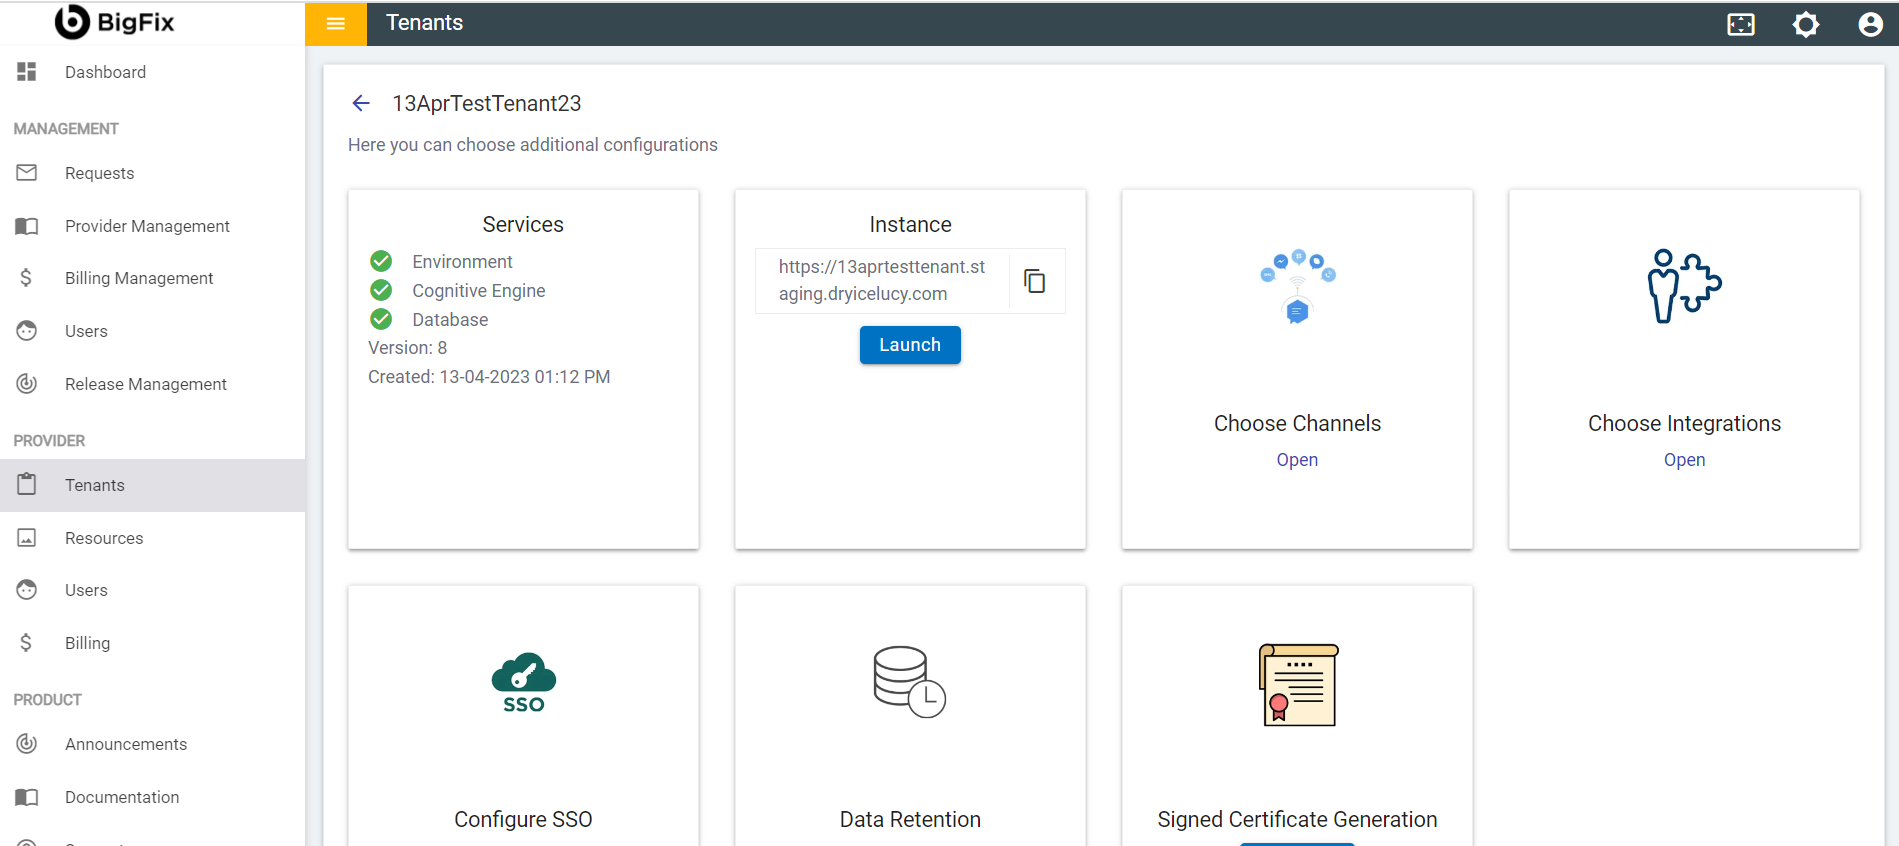
- First login to Global Admin Portal.
- For enabling ServiceNow virtual agent, click configure symbol] next to the tenant you want to configure.
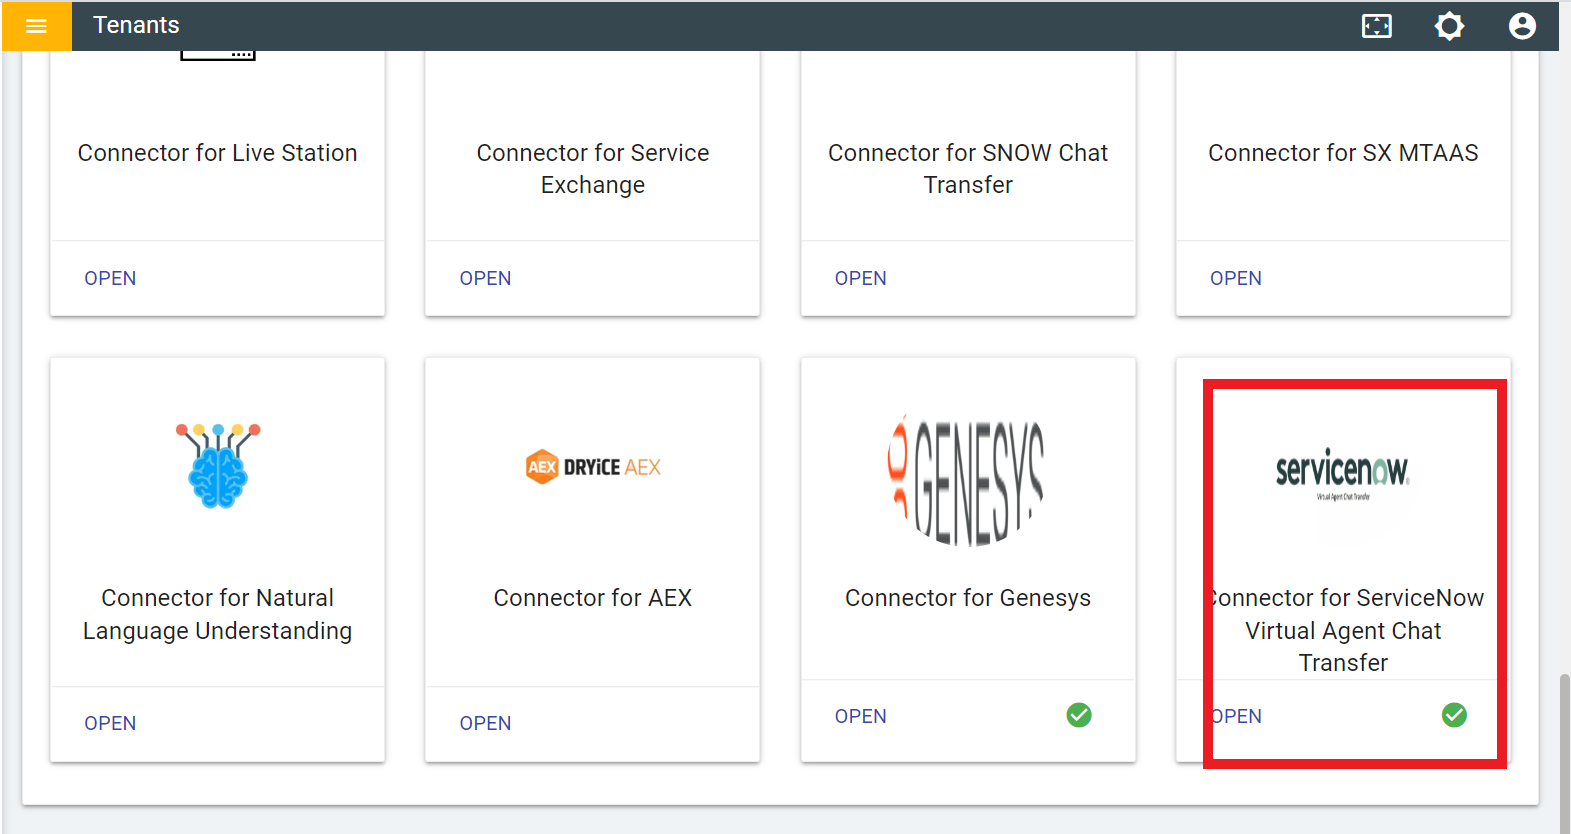
- Click “Open” link in “Choose Integrations” box as shown in the below figure:
- To configure ServiceNow Virtual Agent Connector on tenant, go to the ServiceNow Virtual Agent integration and click Open. It will open a new page and asks you to enter the required information.
- Fill out all the fields in the form. The brief description of the form elements are as follows:
- Base url: URL to hit ServiceNow Virtual Agent’s API.
- API key: API key used to hit ServiceNow Virtual Agent API.
- Resource Id
- Enterprise Id
- Username/Password
- Token
- Bot Id
- Message: Message to publish on chat window
- Client-Message-Id
- Publish key: This key is auto generated once the Generate key button is clicked.
- Generate key Button: Once clicked, this button will populate publish key field and both field and button will be disabled then.
- Test Button: This button tests the credentials of the given connector, if input creds are correct
- Test button gets converted into green Tick mark indicating correct credentials
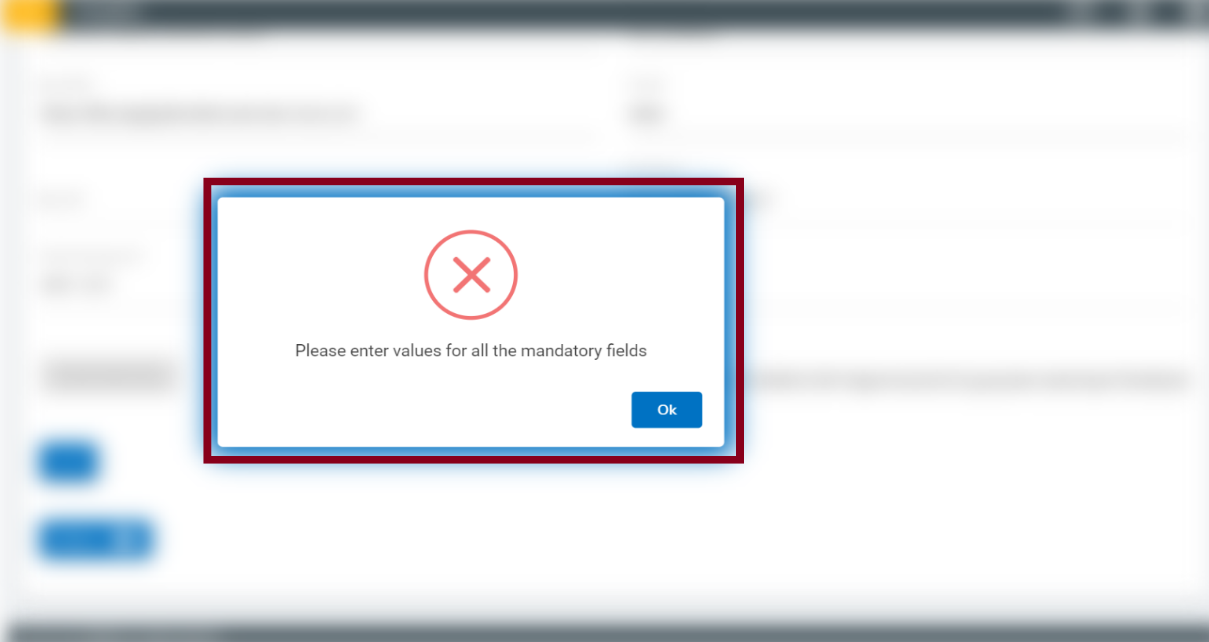
- If input creds are wrong, or something fails while testing the creds, test button turns into red cross mark.
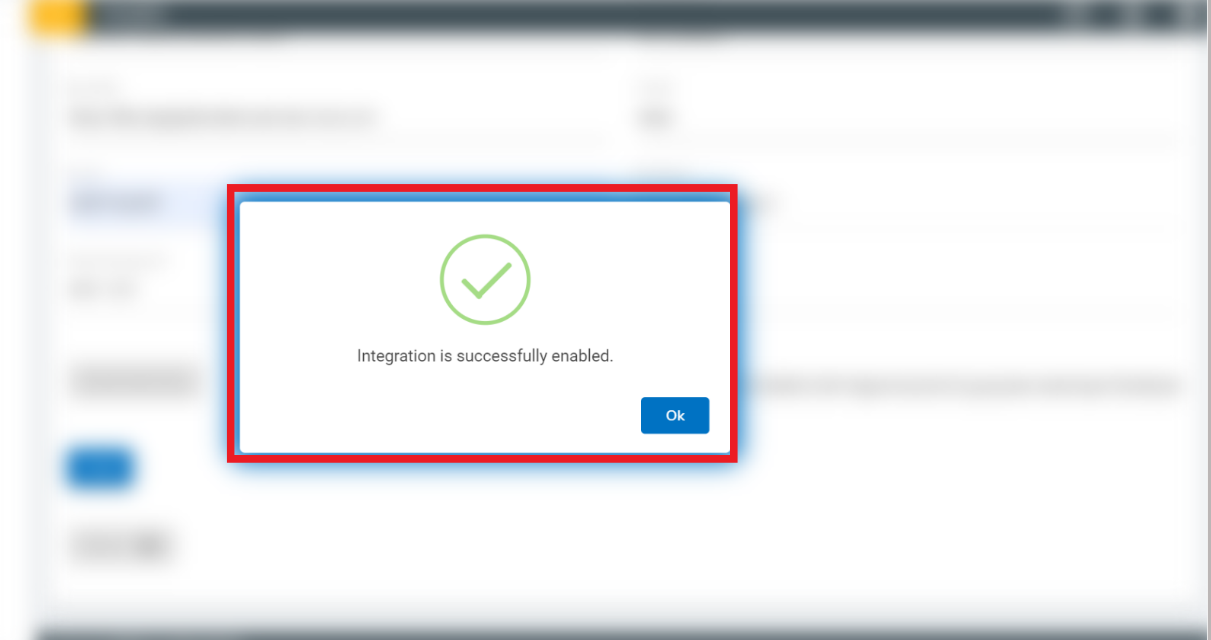
- Save Button: Save button is used to submit creds and enable integration on selected tenant.
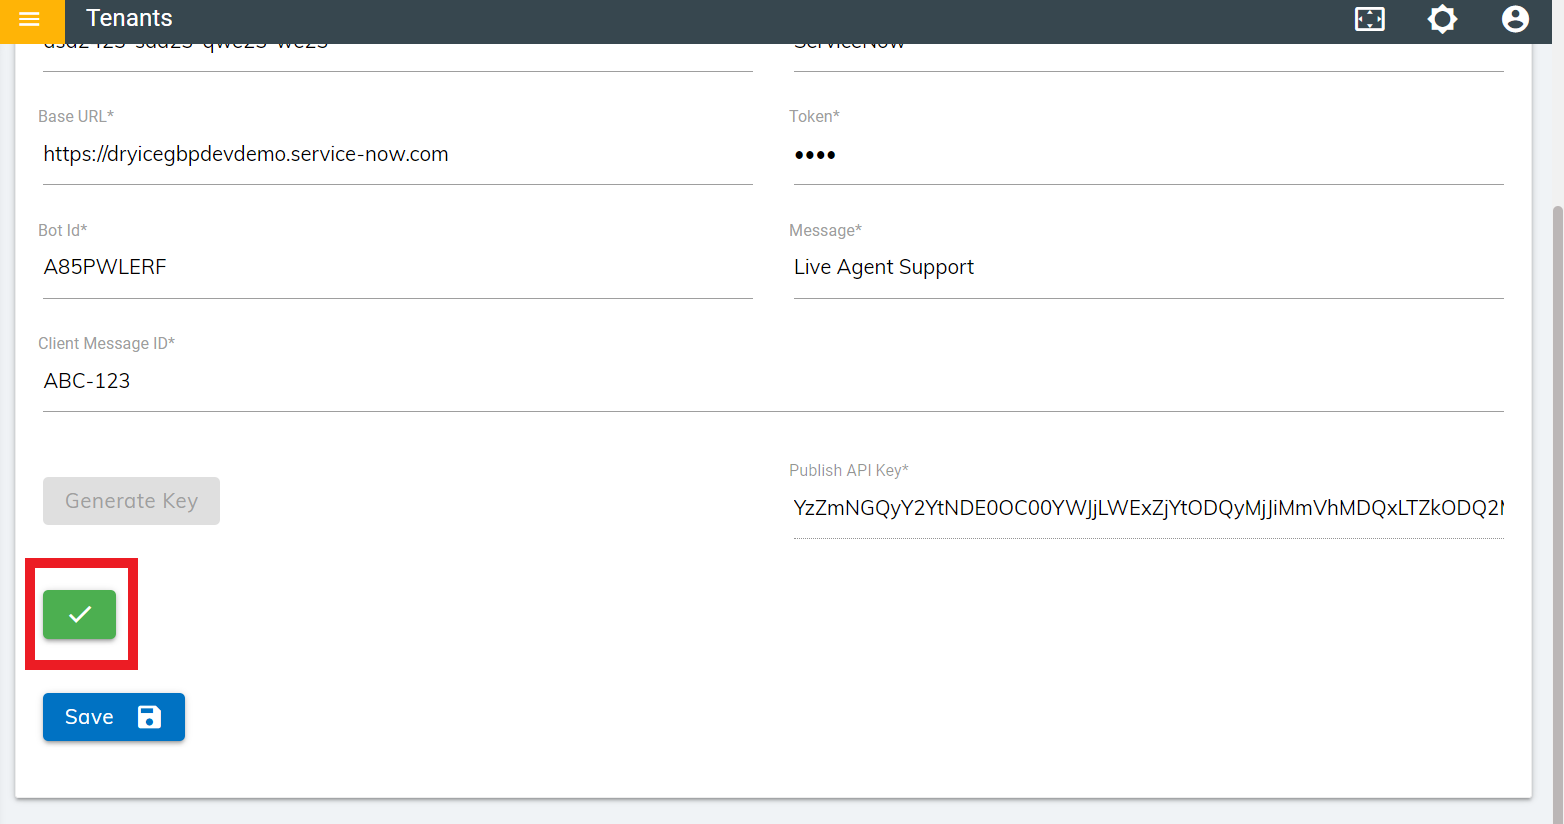
- Click on Save Button to enable the integration.
- Launch the instance.
-
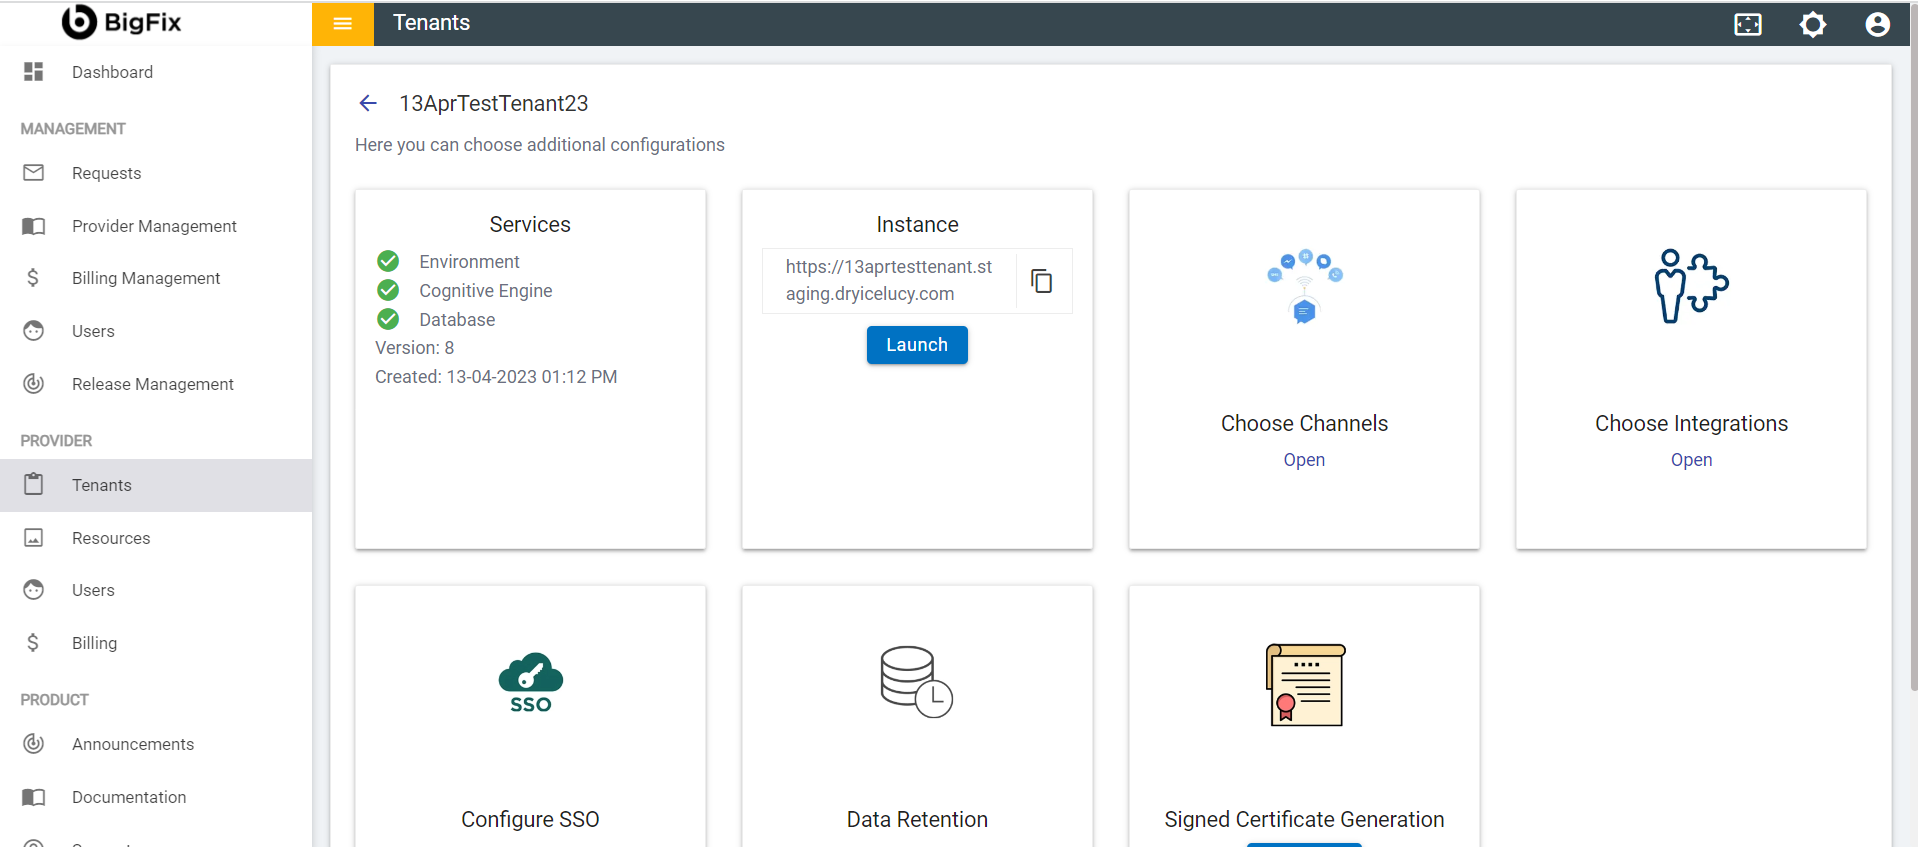 Figure 57 – Launch the
Instance
Figure 57 – Launch the
Instance
- Navigate to Integration module List of integrations
- Here you will see a rule with name SERVICENOW_VIRTUAL_AGENT
which is used to communicate with live agent.
Figure 7. Figure 58 – Integrations List 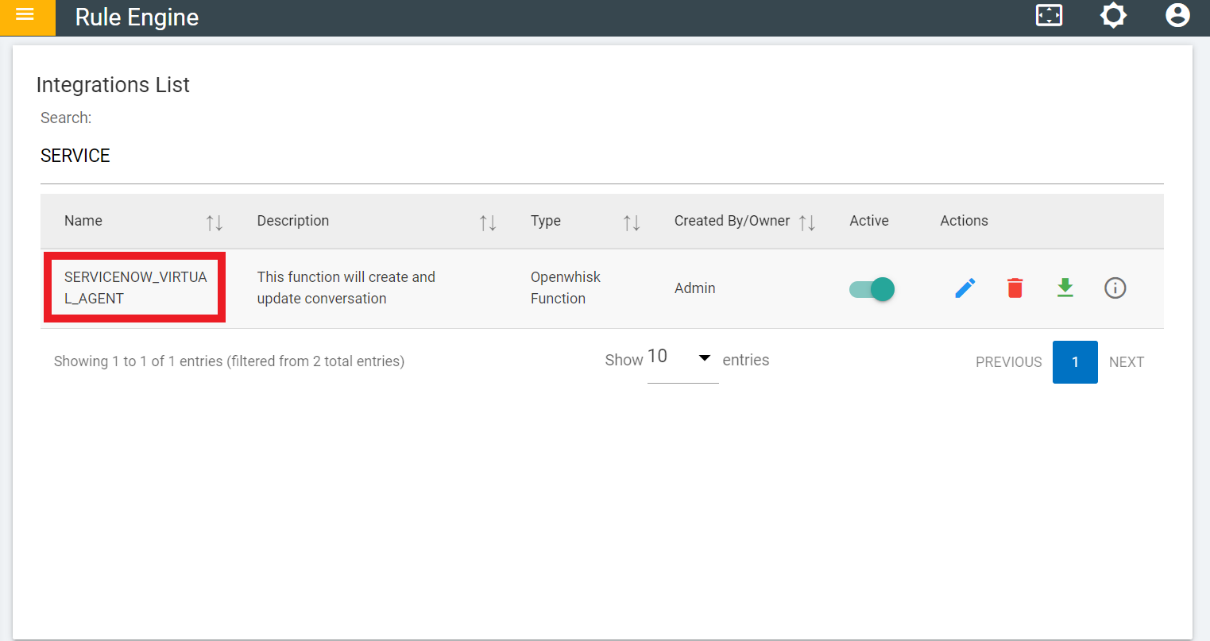
Figure 8. Figure 59 – Openwhisk 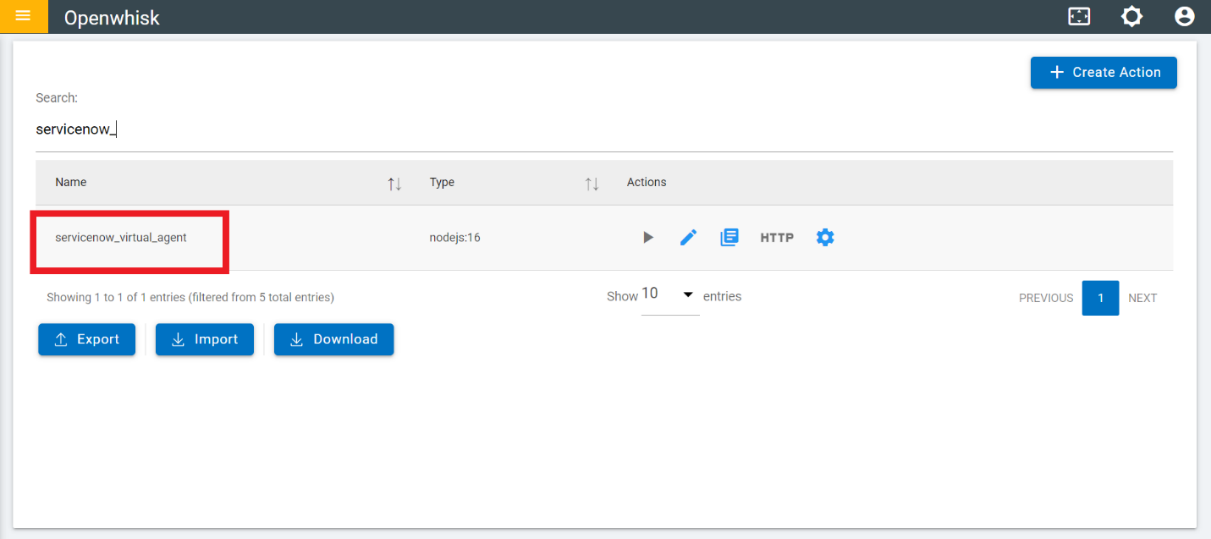
- In the openwhisk there is an openwhisk action with servicenow_virtual_agent.
- These steps ensure that ServiceNow Virtual Agent is successfully enabled on your instance.