Triage issues and recommend solutions
Follow the instructions in this tutorial to triage issues and recommend solutions based on the integrated ticketing system.
In this tutorial, you'll learn how to:
- Configure ticketing data and train model for Product Triage
- Cleanup symptoms and root causes
- Test triage issues and recommend solution
Prerequisites
Before you start triage issues, make sure have the following:
- Access to Product Triage feature
- Ticket management system is integrated or ticketing data available for upload.
Configure ticketing data
To begin with, follow the steps below to upload the ticket data dump into the system:
- In the homepage, on the left pane under the profile pic, click the three dots to navigate to the Settings page. Click Integrations > Tickets, and select the ticket data dump and project say "producttriage".
- Then in the collection, create a new collection say "ticketdump", to store the ticket data dump.
- After selection ticket data dump, project and collections, click
Upload. For the training purpose, lets assume the ticket data
dump contains Issue ID, Product, Description,
Cause and Closure Description fields.
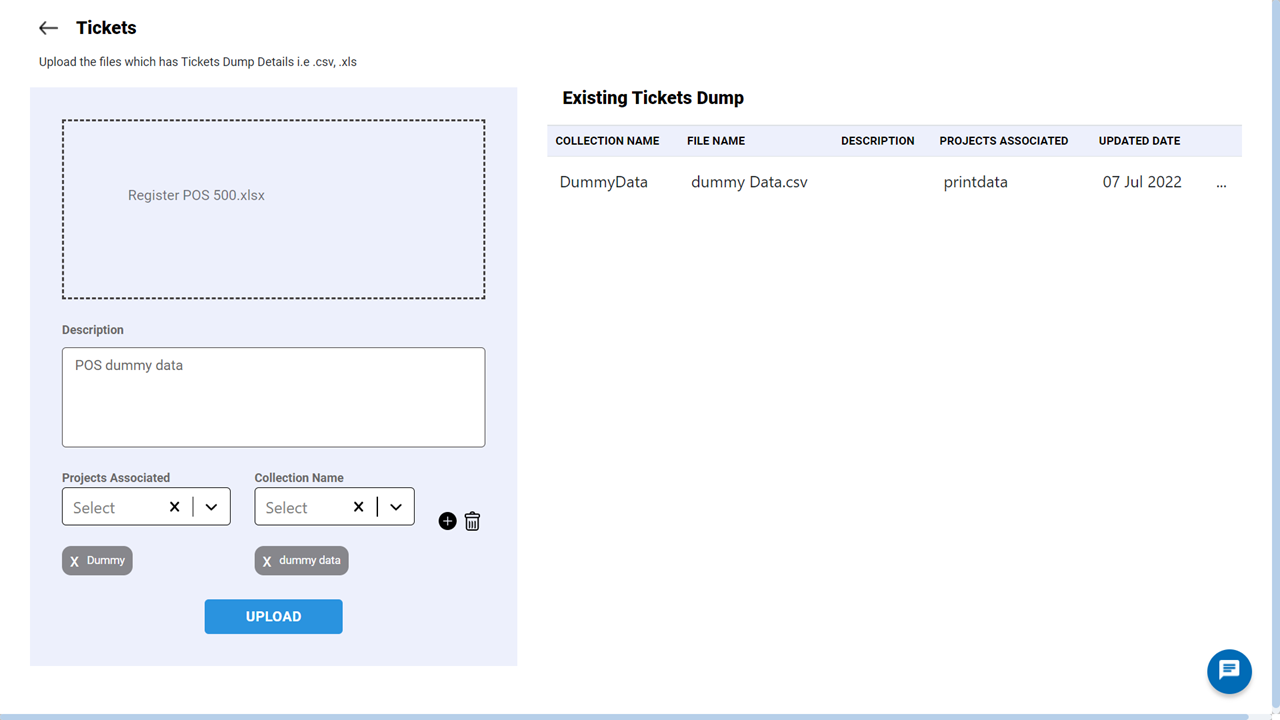
- As a result, the dump will be pushed into collection against the project.
Map attributes and train data
After uploading or integrating the data into the system, you must configure the attributes with the ticket data dump fields for model training.
To perform the attributes mapping, follow the steps below:
- Navigate to Triage > Setup Triage Attributes and Train Model page under the Settings page, and select corresponding project and source value as "TEST_TICKET - ticketdump".
-
Then click Product, and select the Source Attributes as Product, and click Apply.
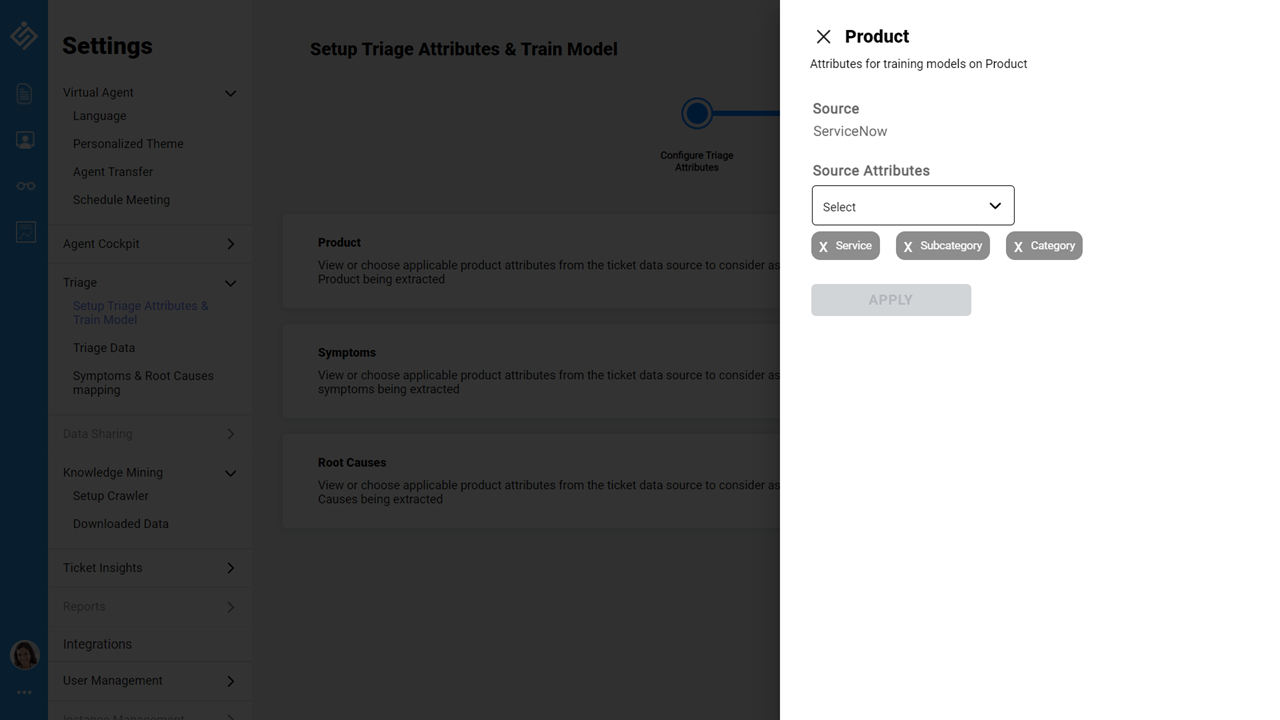
- Similarly, for Symptoms, select the Source Attributes as Description, and for Root Causes, select the Source Attributes as Closure Description.
- After mapping the attributes, click Save & Proceed to train the ticket data to generate symptoms and root causes. The model training of the data will take sometime to complete. On Successful completion, the symptoms and root cause data will be available in the Triage Data page.
Cleanup triage data
After model training is performed, sometimes the generated data might needs cleaning up to ensure meaning full sentences and mapping of symptoms and root causes.
To perform triage data cleanup, follow the steps below:
- Navigate to the Triage Data page, and on the Symptoms tab, click the appropriate symptoms to be corrected, and make changes in the Edit Symptoms page.
-
In the Edit Symptoms page, you can modify the existing data like Associated Symptoms, Triage questions, Associated Root Causes and product data. During the triaging process, the associated symptoms are used as utterance of an issue and triage question act as leading questions.
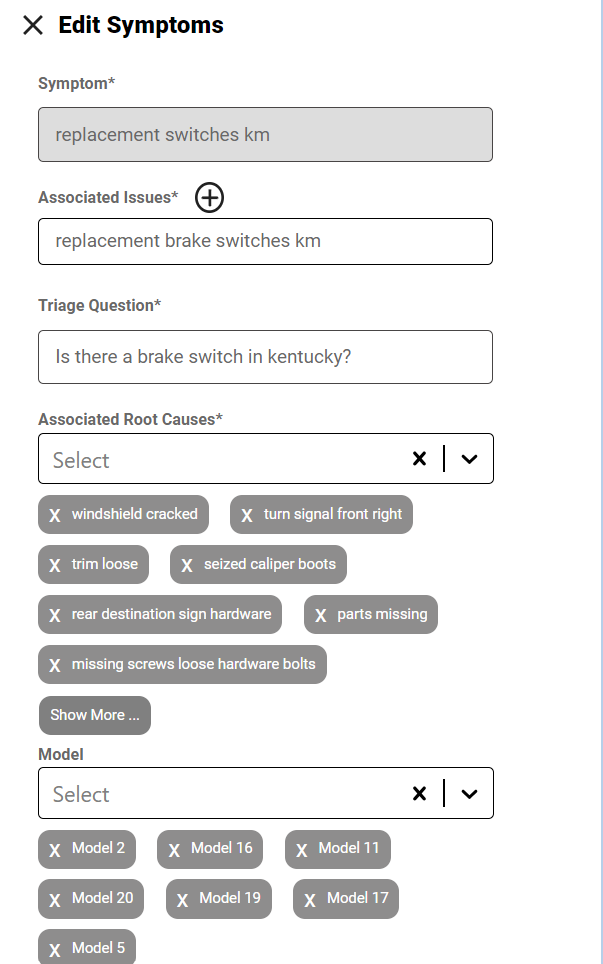
- After making modifying the changes, click Apply to confirm the changes.
- Similarly, you can modify the root causes as well.
- After updating the changes, navigate to Symptoms & Root Causes Mapping page in Settings.
- You can update the relevancy score of root cause towards the symptoms and vice versa. Based on the relevancy scoring, the system will recommend solutions for the identified issues. Root causes with higher relevancy will be listed as top solution in the triage page.
Manually add symptoms and root cause
While cleaning the triage data, you can manually add additional symptoms and root causes.
To add symptoms, follow the steps below:
- Navigate to the Triage Data page, on the SYMPTOMS tab, at the right side of the page, click the plus icon.
- In the Add Symptom form, in the Symptom field, enter the symptom.
- In the Associated Issues field, enter an associated issue. To add additional issues, click the plus icon next to the field name, and add associated issues.
- In the Triage Question field, enter appropriate questions that will be displayed while triaging the issues.
- In the Root Causes field, for the empty root cause list, enter the root cause to be displayed in the triage. If the root cause list is not empty, you can select the appropriate root cause from the drop-down list.
-
In the Model drop-down list, select the appropriate models to be associated with the symptoms.
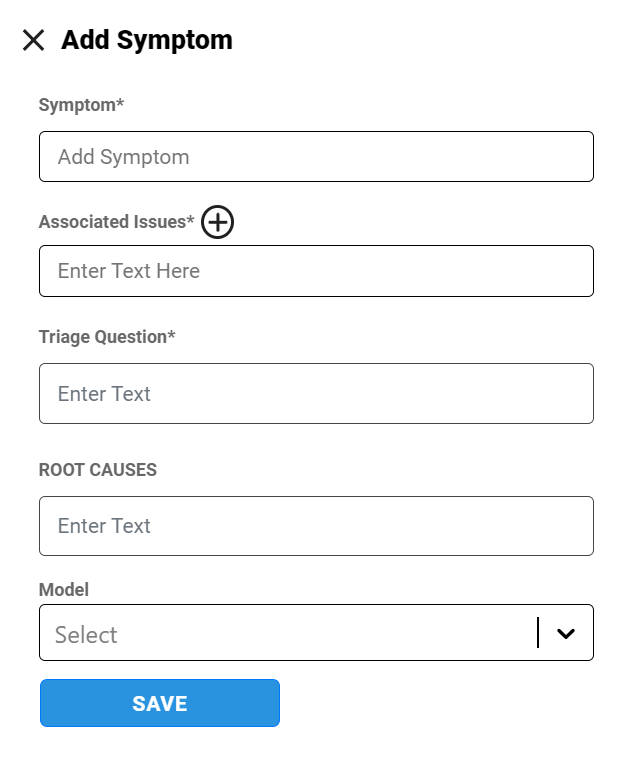
- Click SAVE. If you are newly adding a root cause, that will be listed in the ROOT CAUSES tab.
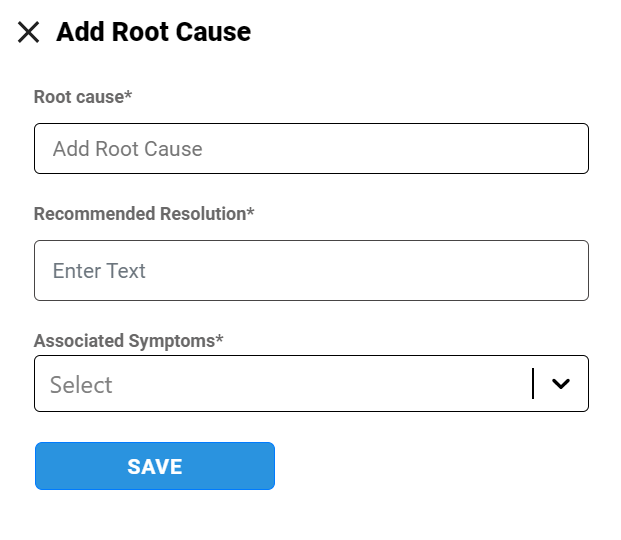
-
Similarly, in the ROOT CAUSES tab, you can add a new root cause, recommended resolution, and associated symptoms.
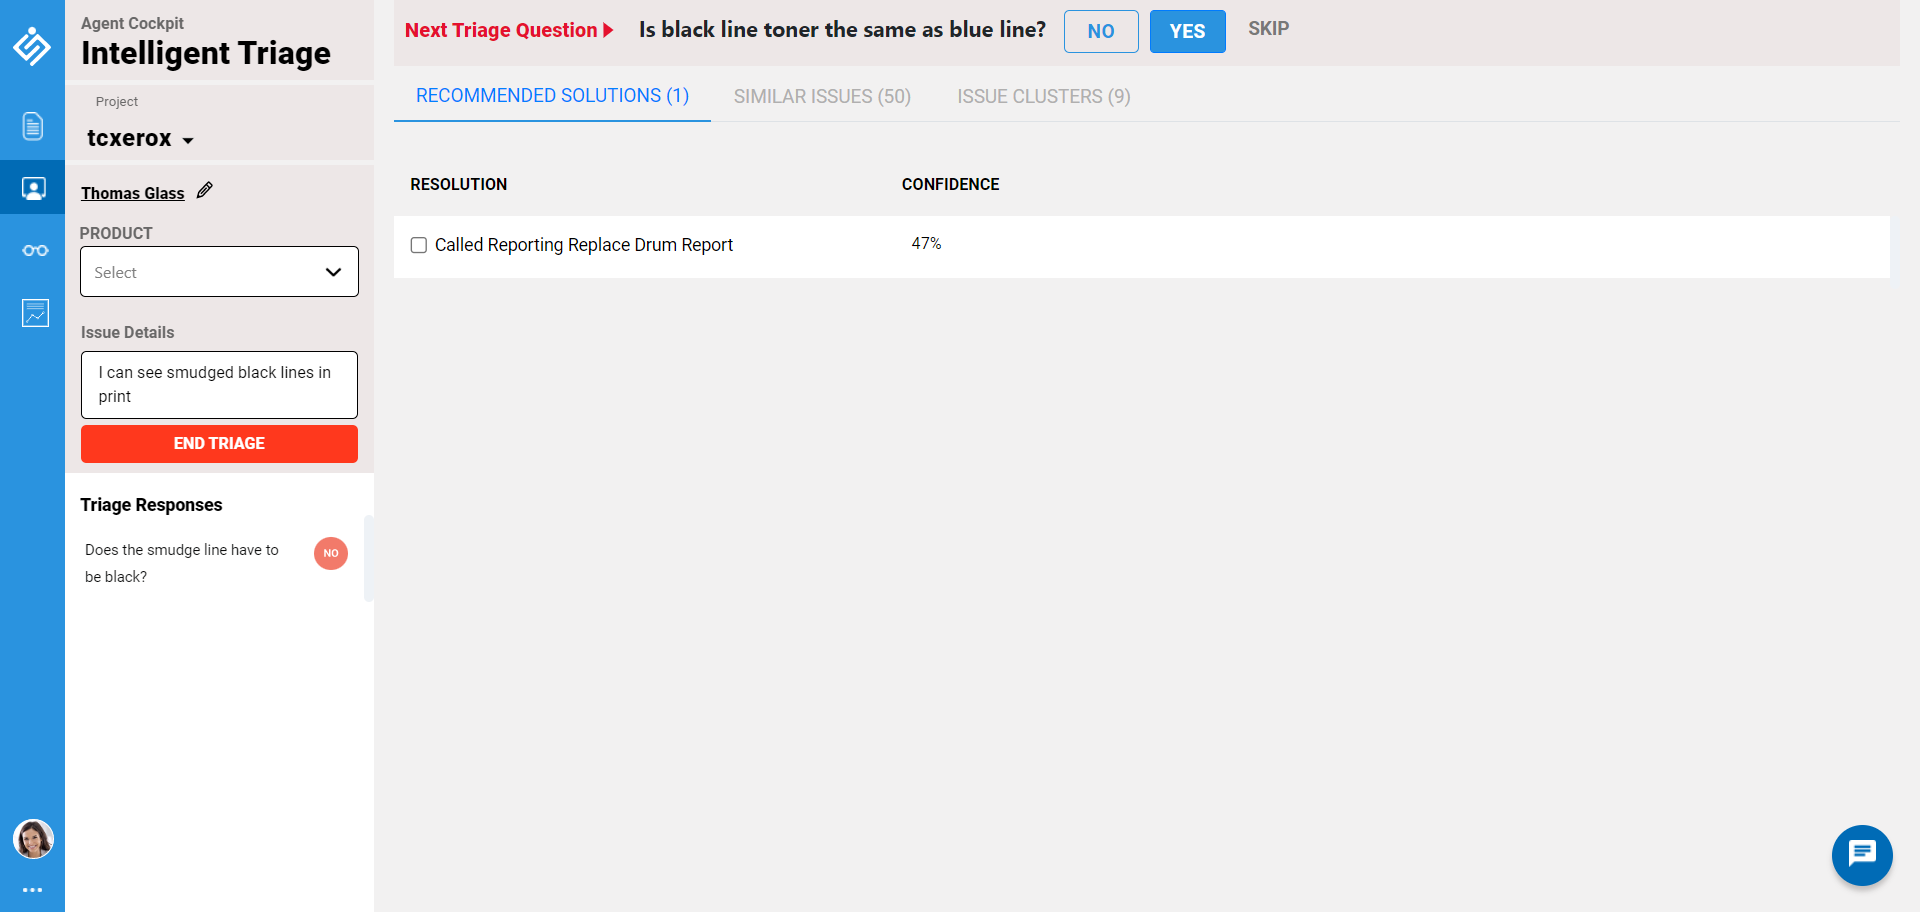
Test product intelligent triage
After configuring the data, mapping the attributes and cleaning up the data, navigate to the Product Triage page. By default, the last accessed project will be selected in the Project. If the default project is not expected one, then select the appropriate project and select attributes. In our case, the attributes are just "product", and enter the issue say "I can see smudged black lines in the print". Click Start Triage to generate leading questions and recommended solutions. A sample screenshot with the issue, triage questions and recommended solutions are provided below for reference. The answered triage questions are listed down below the issue text box. Based on the triage questions response, the recommended solution will be narrowed down.