Create a lead capture flow
Welcome to the tutorial on creating a lead generation chatbot flow! In this guide, we'll walk you through the process of building a chatbot that can gather important lead information such as usernames and email addresses. By implementing this flow, you'll be able to capture valuable leads and streamline your marketing efforts.
Lead generation is a crucial aspect of any business, and chatbots provide an effective and engaging way to collect lead data. In this tutorial, we'll focus on designing a flow where the chatbot requests the user's username and email address. This information can later be used for follow-ups, newsletters, or targeted marketing campaigns.
Using a user-friendly platform that requires no coding experience, we'll guide you through the steps of creating conversational prompts, implementing input validation, and storing the lead information securely. By the end of this guide, you'll have a fully functional lead generation chatbot that can efficiently capture user data.
By the end of this guide, you'll have a chatbot that can engage users, request their username and email address, and help you gather valuable leads.
In this tutorial, you'll learn how to:
- Create a demo project
- Create ExploreOfferings intent
- Train intent with expected user phrases
- Create LeadCapture flow using multiple action nodes
- Map the intent and flow
- Test your bot
Prerequisites
Run Intelliservice in Chrome browser for better user experience. You might face screen resolution issues in other browsers.
Create a project
To create a project, follow the steps below:
- After logging into the application, in the homepage, click the CREATE drop-down next to the Projects label.
-
Select NEW PROJECT, and in the Add Project Details form, enter the project name as "Demo".Note: Project name field accepts only alphanumeric and avoid any space or special characters.
- In the Description field, enter "This is demo project", and click SAVE.
-
As a result, Project created successfully message will be displayed and navigate to the Project page as shown below.
Create an intent
To create ExploreOfferings intent, follow the steps below:
- In the homepage, select the project of your preference, and click ADD > NEW INTENT.
- In the Add Intent Details form, enter the following information:
- Intent Name: ExploreOfferings
Description: Explore Our Offerings and Services
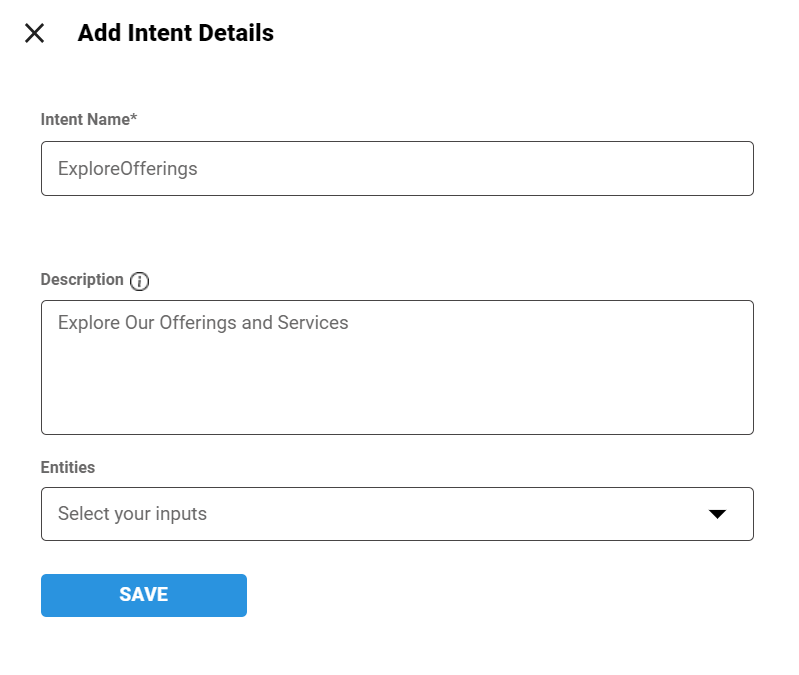
- Click SAVE. You will notice an ExploreOfferings intent has been created under the ACTIVE INTENTS tab of the Intents section.
Train intent with phrases
To trigger the ExploreOfferings intent, the intent must be trained with user phrases.
- In the Intents page, on the ACTIVEINTENTS tab, for the ExploreOfferings intent, click on the three dots menu > View/Edit.
- Click the plus icon next to the Phrases, and add the following sample
phrases:
- Explore offerings and services
- Know about your products
Know about your offerings
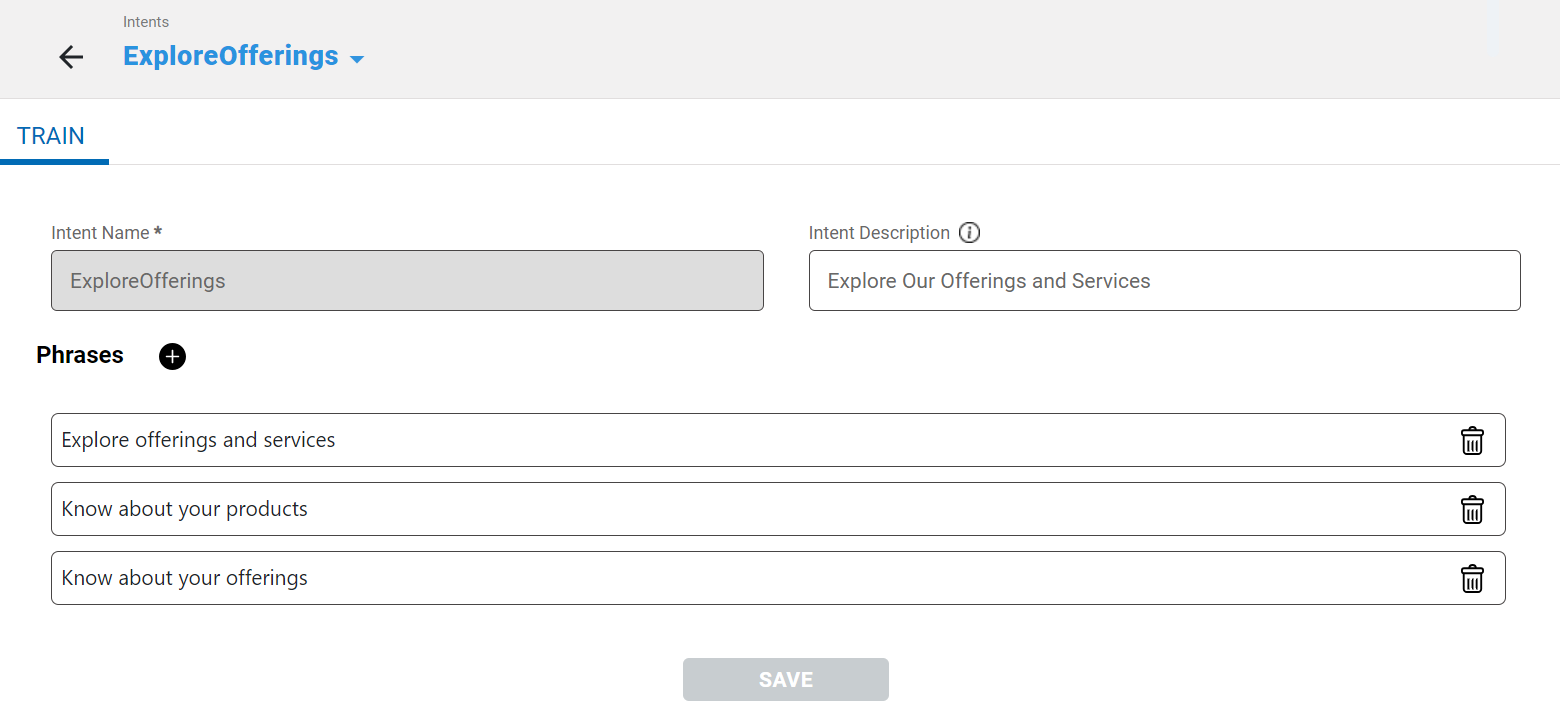
- Click SAVE. The underlying NLP model has been adequately trained to identify and trigger the ExploreOfferings intent from the user query.
Create a flow
To create the flow, follow the below steps:
- After creating the intent and training the intent, click ADD > NEW FLOW.
- In the Add Flow Details form, enter the Flow Name as LeadCapture.
- Click SAVE. You will notice a LeadCapture flow has been created under the Flows page.
Design the flow
The flow is divided into three segments as receiving the user inputs like user name, selecting options in forms, and confirmation message to contact the user.
To design the flow, follow the steps below:
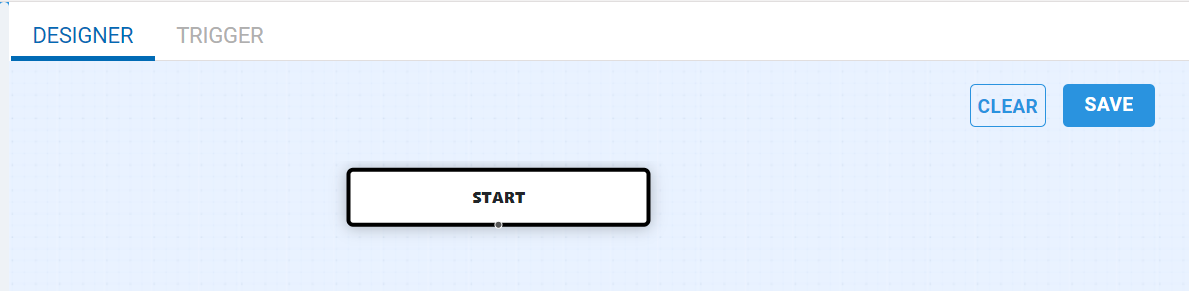
- In the Flows page, on the left pane, click the LeadCapture flow. You will notice multiple tabs – Designer, Trigger, Actions, and Templates.
-
By default, in the Designer tab, you will see the START node as the first node.
Get user name
In this first segment, we request you to provide the your user. Please enter your name when prompted. Your name will help us personalize our communication with you and ensure we address you correctly throughout the process. Let's get started by capturing your name.
- From the Actions pane, drag and drop the Text action node into the editor space of the Designer tab.
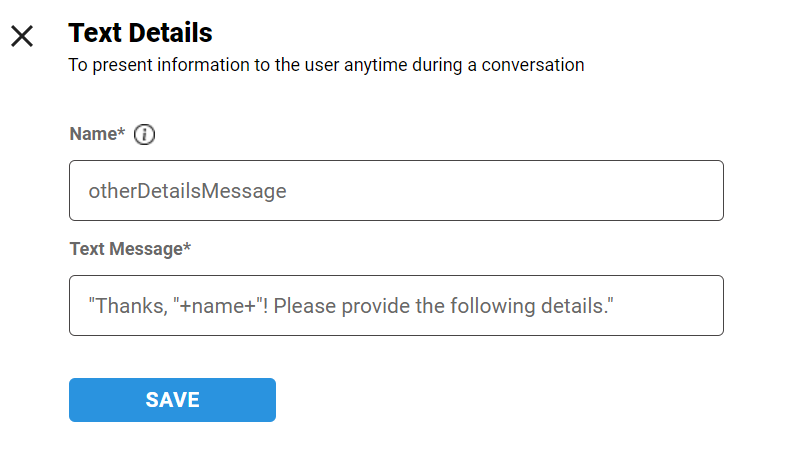
- Double-click the dropped TEXT node, and you will notice the Text Details form.
- Enter the following details in the Text Details form:
- Name: welcomeMessage
- Text Message: 'Great! I would love to help you with our product offerings.\n\nPlease share your contact details so that I can reach out to you in case I lose you during the interaction.'Note: Include either single or double straight quotes, and avoid using curly quotes.
- In the Text Details form, click SAVE to save the Text node details.
-
Now, connect the welcomeMessage Text node to the START node by dragging the connector end point from start node to the TEXT node.
- Similarly, drag and drop the TEXT PROMPT node in the Designer
pane, and double-click the node. In the Text Prompt Details form,
enter the following details:
- Name: name
- Text Prompt Message: 'May I know your full name.'Note: Include either single or double straight quotes, and avoid using curly quotes.
- In the Text Prompt Details form, click SAVE to save the Text Prompt node details.
- Now connect the name TEXT PROMPT node to the welcomeMessage TEXT node. Again, drag and drop a TEXT node in the Designer pane.
- Configure the Text Details form with the following details and
save the details:
- Name: otherDetailsMessage
- Text Message: 'Thanks, '+name+'! Please provide the following details.'Note: Include either single or double straight quotes, and avoid using curly quotes.
- Connect the otherDetailsMessage Text node to the name TEXT PROMPT node.
Configure forms
Now that we have your name, we kindly request you to fill out the form with your email address. Your email address is essential for us to contact you regarding your inquiries or any updates related to our products or services. Please enter your email address when prompted.
Additionally, we value your preferences and want to provide you with relevant information. You will also have the option to select whether you would like to opt-in or opt-out of our newsletter. Choose the appropriate option based on your preference.
- Following the previous segment, in the Desginer tab, drag and drop the
INPUT CAPTURE node, double-click the node, and in the
Input Capture details, configure the following:
- Name: form
- Drag and drop the
TEXT FIELD component into the Form designer and
configure it with the following details:
- Enable the Required toggle button
- Name: email
- Label: 'Enter your email address'Note: Include either single or double straight quotes, and avoid using curly quotes.
- Error message: 'Email address is mandatory'Note: Include either single or double straight quotes, and avoid using curly quotes.
- In the form designer, click SAVE to save the Text Field component details.
- Drag the RADIO
BUTTON component below the email TEXT FIELD
component and configure it with the following details:
- Name: receiveNewsletter
- Label: 'Would you like to receive our monthly newsletter?'Note: Include either single or double straight quotes, and avoid using curly quotes.
- How many radio buttons you want ?: 2
- Option 1 Name: Yes
- Option 1 Value: Yes
- Option 2 Name: No
- Option 2 Value: No
In the form designer, click SAVE. to save the Radio Button component details.
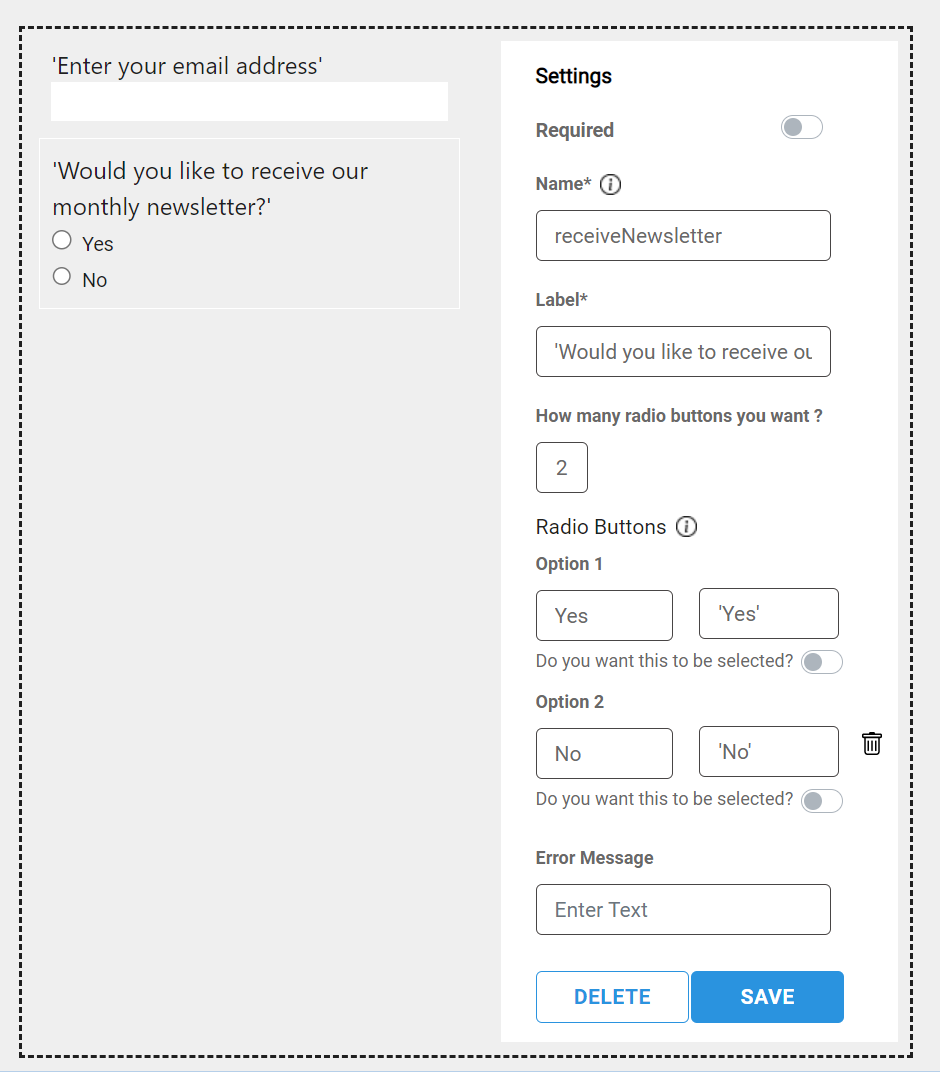
Figure 1. Configure Options for Lead Capture
- Form Submit Button: Submit
- In the Input Capture Form, click SAVE to save the Input Capture node details.
- Now connect the form Input Capture node to the otherDetailsMessage Text node.
Confirming contact details
In this final segment, we will verify the contact details you have provided to ensure their accuracy. Please review the information displayed and confirm its correctness. Once you have confirmed your contact details, we will securely store the information and proceed with assisting you further.
- Lastly, drag and drop a Text node in the designer pane.
- Configure the text node with the following details in the Text Details
form:
- Name: thankyouMessage
- Text Message: 'Thanks a lot for all the details. You will receive information about our product offerings shortly on '+form.email+'.'Note: Include either single or double straight quotes, and avoid using curly quotes.
- In the Text Details form, click SAVE the text details.
-
On the editor space of the Designer tab, click SAVE to save the overall flow.Note: As a best practice, it is advised to save the flow in the Designer pane, after configuring and connecting each nodes.
Map intent and flow
After creating the intent and flow, it is crucial to map the intent to the corresponding flow/action so that when the intent is triggered, the associated flow is executed. Mapping the intent and flow allows for seamless communication between the user's inputs and the chatbot's responses. By establishing this connection, the chatbot can understand the user's intent and provide the appropriate actions or responses based on the predefined flow.
Follow the below steps:
-
In the Flow page, click the TRIGGER tab, and click Add Trigger. As a result, the Add TriggerDetails form will be displayed.
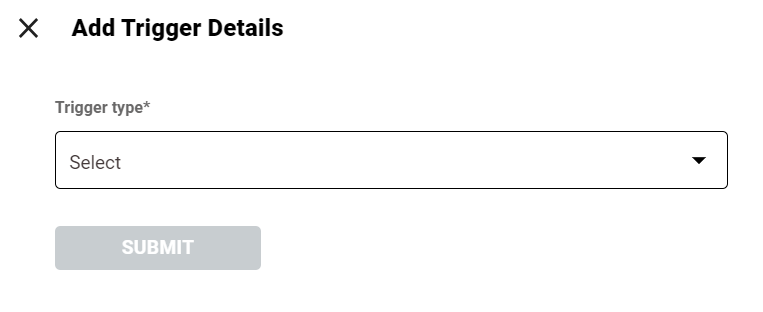
- In the Trigger type* drop-down list,select the Intent based option, and in the Intent name* drop-down list, select the ExploreOfferings intent as option.
- Click SUBMIT to save the flow and intent mapping.
Test your bot
To begin the lead capture process, simply click on the chat icon located at the bottom right corner of the page. Once the chat window opens, you can start exploring our offerings.
Once you enter the chat, our intelligent NLP model will recognize your intention to explore our products and trigger the "ExploreOfferings" intent. Consequently, the chatbot will seamlessly transition into the "LeadCapture" flow, which is specifically designed to collect lead information.
In this flow, the chatbot will kindly request your full name and email address. Please provide your name and email address when prompted. Additionally, you will be presented with options to either opt-in or opt-out for our newsletter. Based on your preference, select the appropriate option.
After you have entered your name, email address, and made your newsletter preference, the flow will conclude by displaying a heartfelt thank you message. At this point, the lead capture process will be successfully completed.
Troubleshooting
| Issue | Solution |
| Something went wrong | Check the field value are in single or double straight quotes and not in curly quotes. |
| Sorry, I am not able to understand your query. ... | Check for intent and flow mapping in Trigger Tab. If intent and flow are mapped, then refresh the page. |
| Loading sign (three dots) | Chatbot waiting for response. Check the flow for Text node got replaced with Text Prompt node. |