Installing Sametime Community on Linux
This topic guides you through the steps for installing the Sametime 11.6 Community Server for Linux.
Before you begin
- Run commands with ROOT or SUDO access. If not running as a root user, preface commands with
sudo. - Ensure that Linux OS is installed in the en_US locale.
- If installing on Domino 11.0.1 FP3, see the staddin task fails to load when using Sametime 11.5 or higher and Domino 11.01 FP3 or later on Linux article for known problems.
About this task
Procedure
-
Extract the Sametime_11.6_CommunityServer_Linux64 archive file onto your disk.
tar -xf Sametime_11.6_CommunityServer_Linux64.tar -
The following example provides steps on how to extract the Sametime Community
installation package and make the installer file executable.
Example:
If you place the Sametime_11.6_CommunityServer_Linux64.tar file in $SOFTWARE_DIR (e.g. in the /local/software directory) then:- Extract the Sametime Community installation
package
tar -xf Sametime_11.6_CommunityServer_Linux64.tar - Change directory to the Sametime Community Server installation
files
cd $SOFTWARE_DIR/Sametime_11.6_CommunityServer_Linux64/Server - Make the installer file
executable
chmod +x install.bin
- Extract the Sametime Community installation
package
- If you plan to use TLS for your LDAP connections, you must also install the GSKit, located in the GSKit subdirectory.
-
If you installed Domino to alternate directories other than
/opt/hcl/domino, or /local/notesdata you must create/opt/hcl/dominoand/local/notesdatasoft link(s).In order to install, there are 3 options
Console Install Procedure
Use this method if graphical installers are not supported by your Linux VM.
About this task
Procedure
-
Before you install the HCL Sametime server program files on a Linux system, do the following:
- Temporarily disable any screen savers and turn off any virus-detection software.
- Complete any pending reboot actions.
- Make sure that all other applications are closed.
-
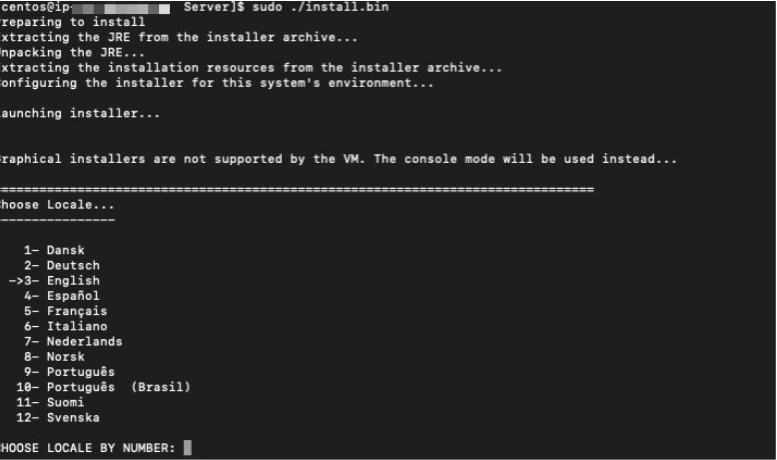
As the root user or sudo, execute the install program ./install available in the software package using the command:
sudo ./install.bin -
At the locale prompt, choose your server locale.
-
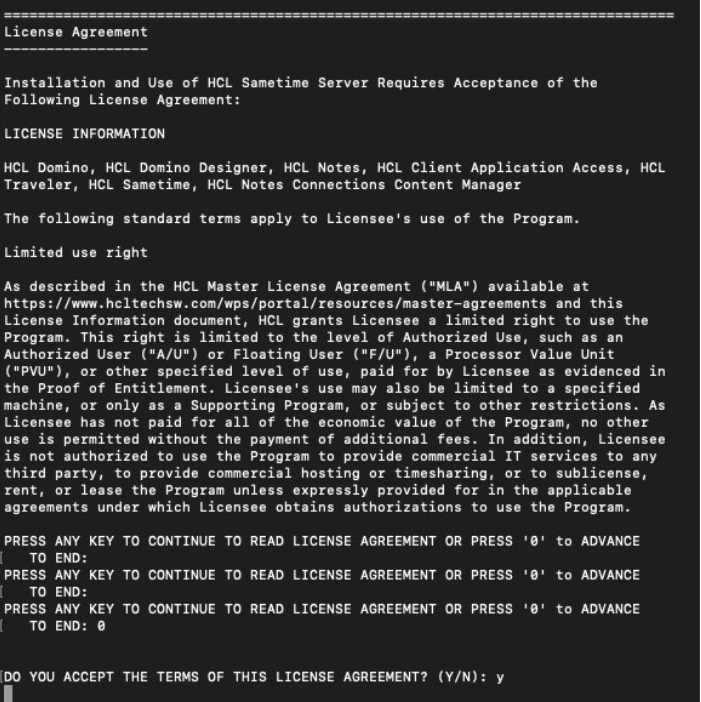
At the license agreement screen, review the terms and accept to proceed.
-
At the License Information screen, select the type of license you are installing. For HCL Sametime, choose Limited. For HCL Sametime Premium choose “Standard.” Do not choose “Dynamic”.
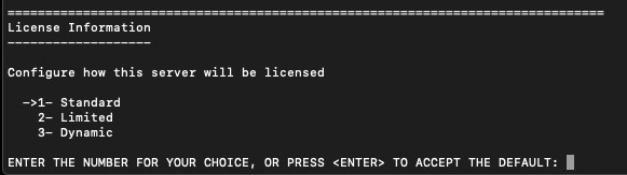
Note: If Limited is selected, the Managing Sametime Premium features must be disabled. See Managing Sametime Premium features for additional information. -
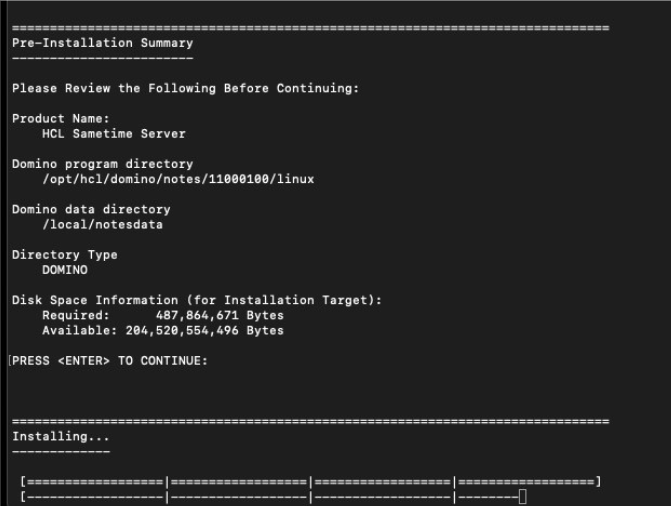
At the Pre-Installation Summary screen, review the selections and confirm they are correct.
Press enter to continue.
- At the Installation Complete screen, press enter to exit the installer.
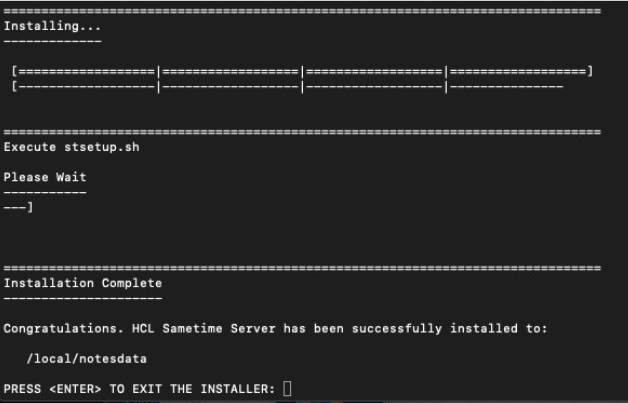
- After the installation is complete, start the server using the ./ststart script as the notes user. See the topic Starting and stopping the Community server for details.
Graphical Install
Login to the Desktop of your Linux environment and run install.bin which is located in the Server subdirectory.
About this task
If you do not have a desktop environment, use VNC to access the graphical install.
Procedure
- In a Linux SSH session, Run VNCServer (we used TigerVNC for this example).
- As root – export DISPLAY=:x – where x is the port you will connect to VNC (eg - :1 == port 5901).
- Connect to the VNCServer with VNCViewer.
- As root – execute ./install.bin - The installanywhere GUI should display in the VNCViewer window.
Silent Install
This topic guides you through the steps for silently installing the V11 Sametime Community Server for Linux.
About this task
As root:
Procedure
-
Use VI to create a file named “installer.properties” in the same directory as the ‘install.bin’ executable, with the following contents
# This file was built by the Replay feature of InstallAnywhere. # It contains variables that were set by Panels, Consoles or Custom Code. DataInstallDir=/local/notesdata UNIX_UserName=notes UNIX_GroupName=notes UNIX_ServerName= host name of the server you are installing on> #Directory Selection #------------------- DIRECTORY_TYPE_DOMINO=1 DIRECTORY_TYPE_LDAP=0 LDAP_SERVER= LDAP_PORT= ADVANCED_LDAP_CONFIG=0 ST_BRANDING_INFO=(standard) or (entry) #Install #------- -fileOverwrite_/tmp/156305.tmp/stnotesinstallutilities_linux64=Yes -fileOverwrite_/tmp/156305.tmp/stnotesinstallutilities.jar=Yes -fileOverwrite_/tmp/156305.tmp/stnotesinstallutilities.dll=Yes -fileOverwrite_/tmp/156305.tmp/stinstallutilities.dll=Yes -fileOverwrite_/tmp/156305.tmp/vcredist_x64.exe=Yes -fileOverwrite_/tmp/156305.tmp/UnixSetNotesFieldValue.sh=Yes -fileOverwrite_/local/notesdata/_HCL Sametime Server 11.0.0_installation/Change HCL Sametime Server 11.0.0 Installation.lax=Yes to AllNote:- DIRECTORY_TYPE should be set as applicable to your environment. If you set LDAP to 1, be sure to set DOMINO to 0 and add the appropriate LDAP_SERVER and LDAP_PORT information.
- ST_BRANDING_INFO should be ‘entry’ or ‘standard’ as applicable to your environment.
- All these entries are on a single line, so be sure that copy/paste does not break them.
- If you copy/paste - be sure there are no spaces at the end of the line(s).
LDAP_PORT= -
In the Server subdirectory, execute ‘./install.bin -i silent’
Note:
- If needing to specify the properties file location, use -f [filename_and_path].
- If you are attempting to do the Graphical install using VNC and you see the console option start, this means that you were not successful in exporting the display – most common reason would be that you are not running as root.
- Installing HCL Sametime version 11 on SUSE Linux 15.
Installation Steps
This topic guides you through the steps for installing the HCL Sametime Community Server.
About this task
To install HCL Sametime Community Server:
Procedure
-
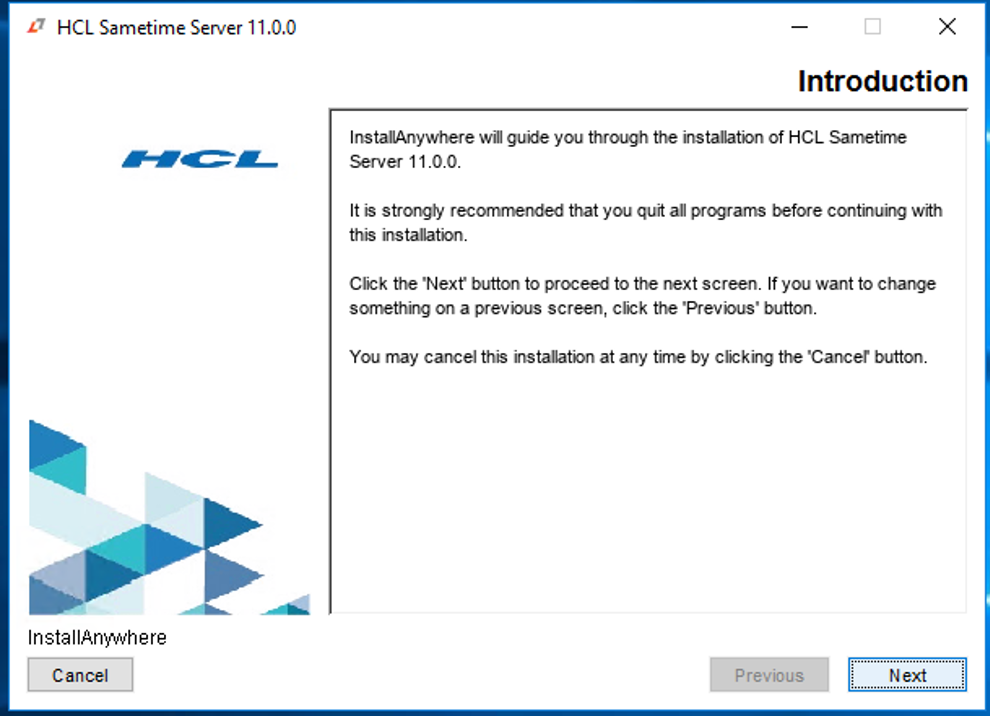
On the computer where you will install the HCL Sametime Community Server, the InstallAnywhere install shield will guide you through the installation process. Click Next.
Note: Screen shots are taken from Windows, but they be similar for Linux.
-
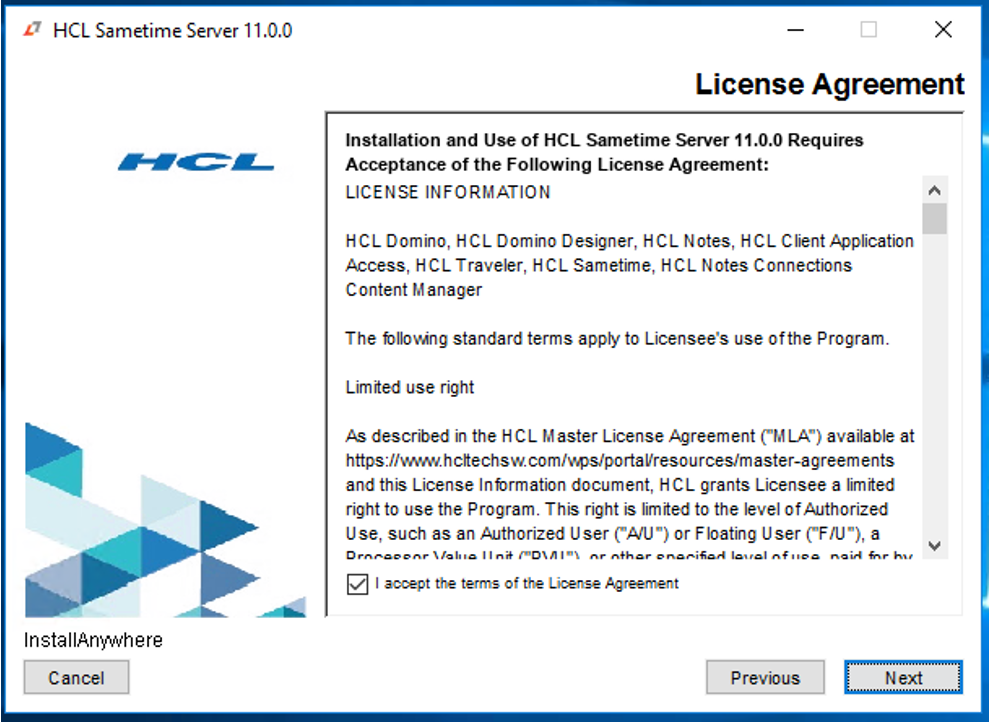
The license agreement screen displays. Click Next.
-
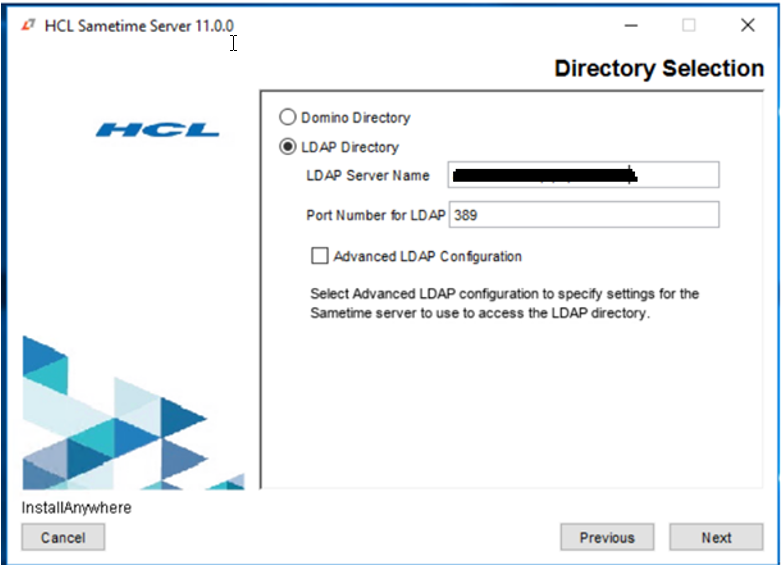
Select the Directory type you wish to use,
- If using the local Domino directory, click Next.
- If you select the LDAP Directory radio button.
- In the LDAP Server Name text box, enter the hostname of your LDAP server.
- In the Port Number for LDAP text box, enter the appropriate port for your LDAP server
- Click Next.
-
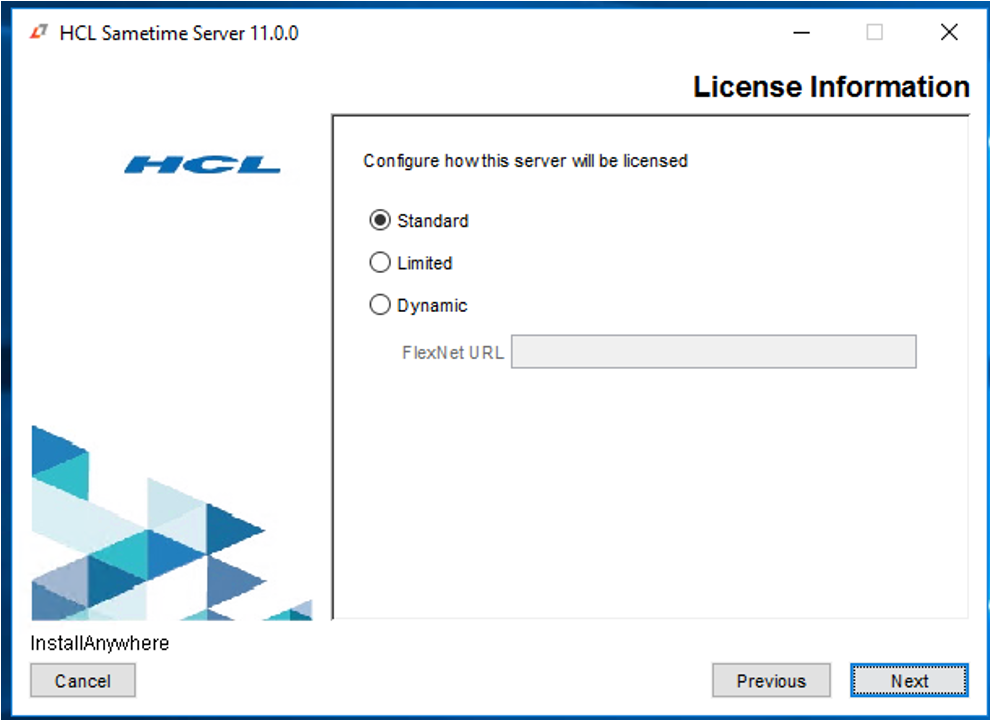
Select the radio button option in the License Information screen to configure the license. Click Next.
Note: You can choose either Standard or Limited depending on your license. Currently the Dynamic model option, where you can enter the flex net url is not supported for this release.
-
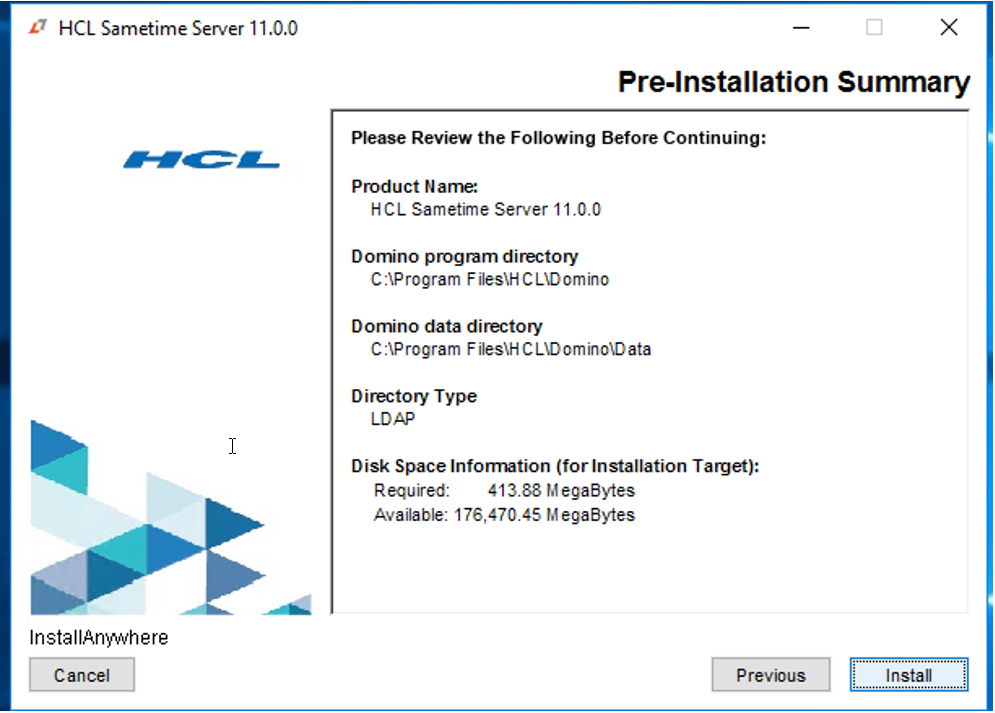
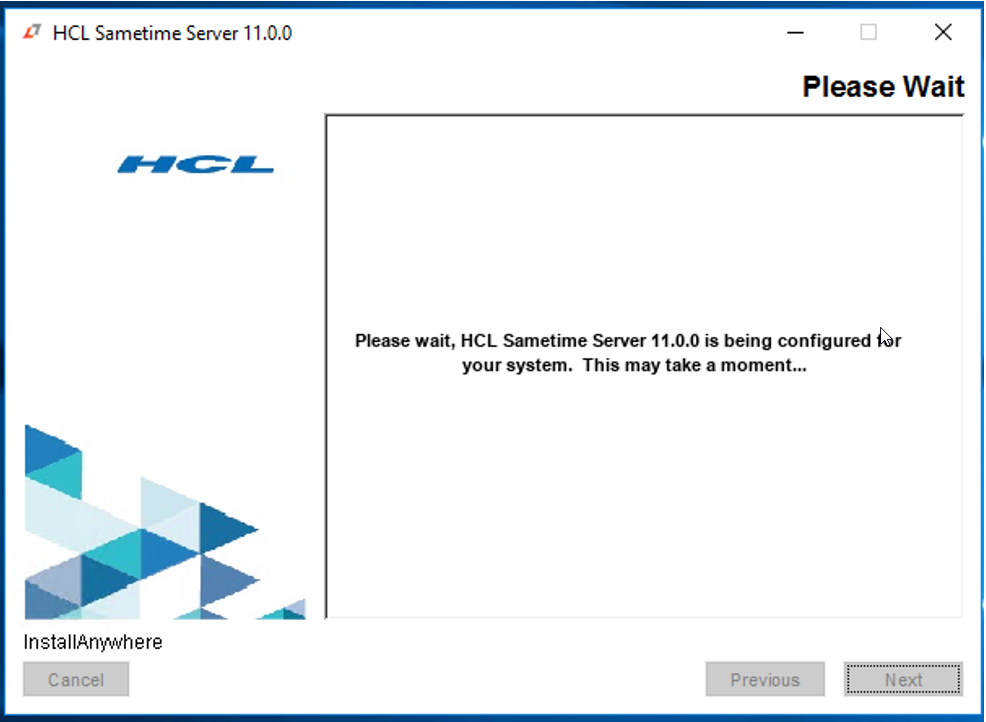
The Pre-Installation Summary displays. Click Install.
-
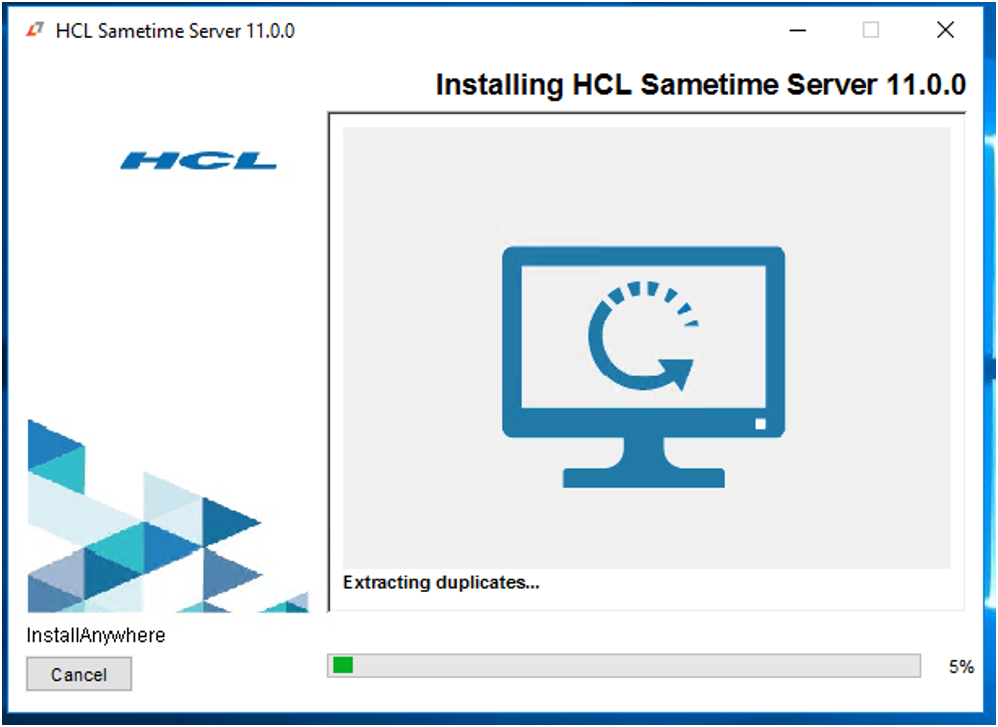
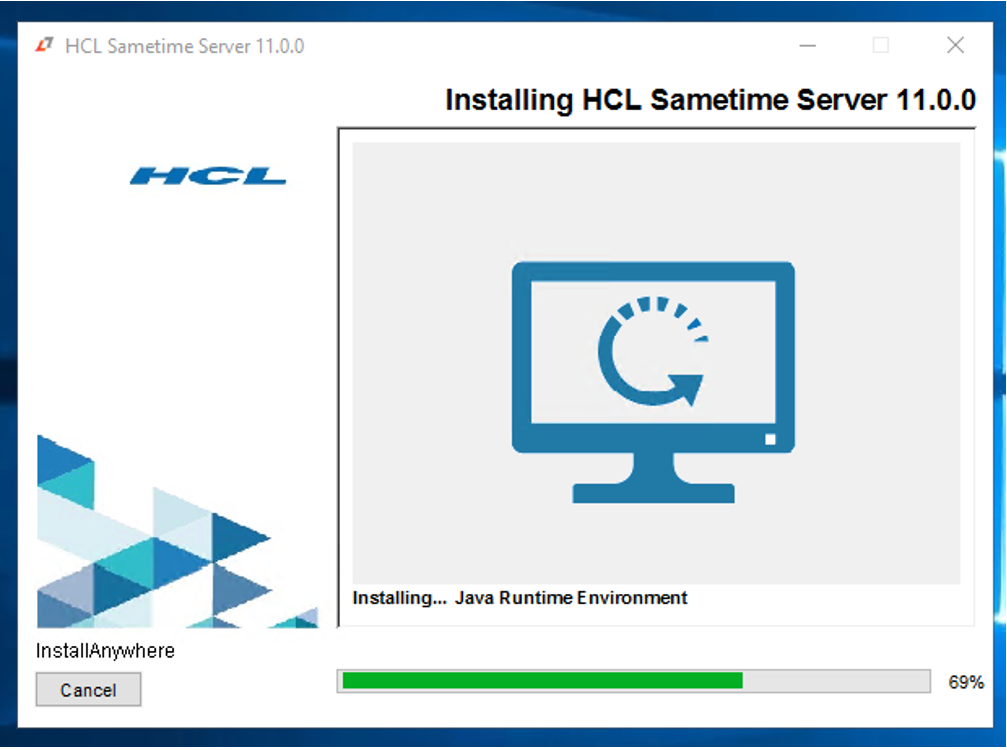
The installation begins.
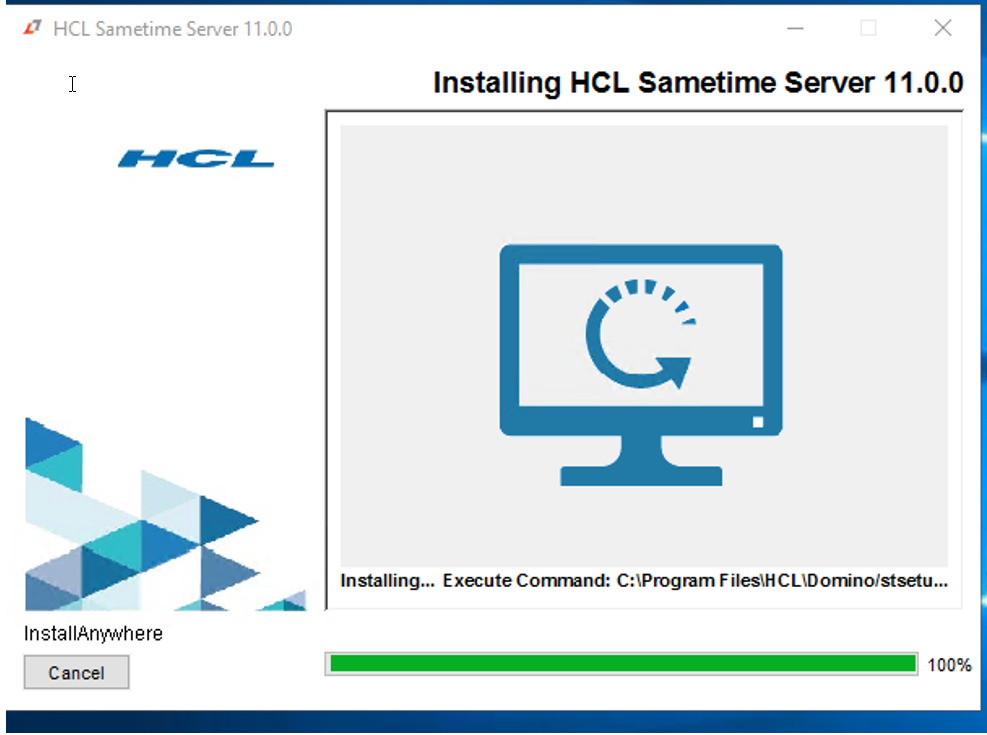
-
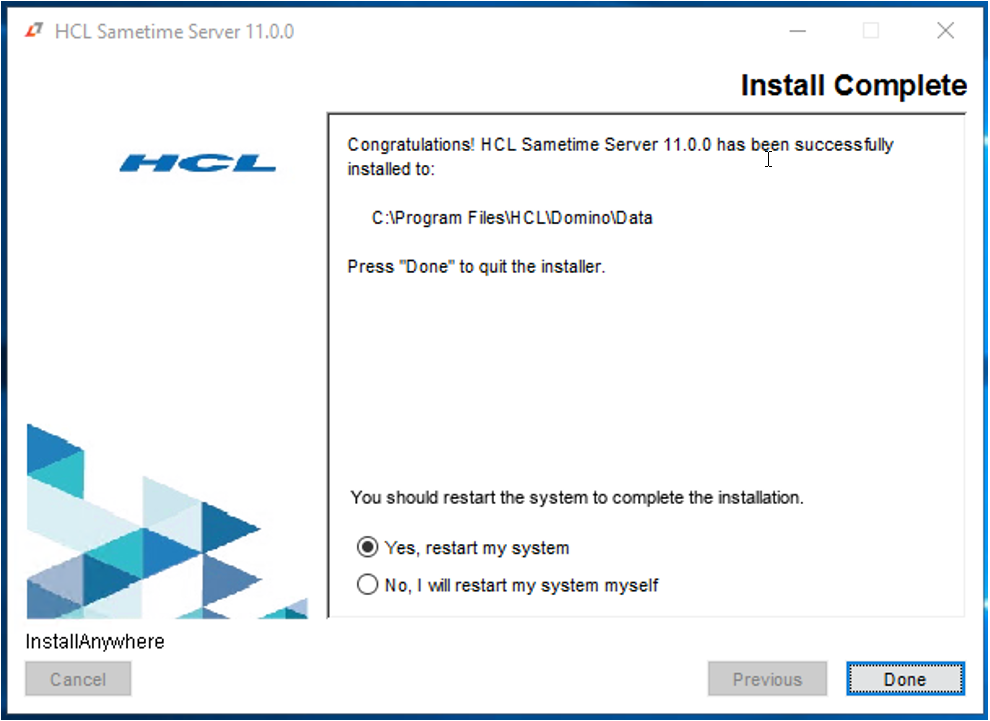
Verify that there are no installation errors.
Note: You must restart the system to complete the installation. Select the radio button Yes, restart my system and then click Done.
-
The installation is complete.
Note: To start the server as the Notes user, use the ststart script located in the Domino Data directory.For more information, see To start the Sametime Community server.
Results
Domino data directory
HCL_Sametime_Premium_Install_MM_DD_YYYY_HH_MM_SS.log
stsetup.log
stsetup_exit_status.txt
SametimeIniParser.log
This log can be in /tmp or in the Domino data directory.
Console connection log
/tmp/SSCLogs/ConsoleUtility0.logDomino data directory
 HCL_Sametime_Premium_Install_MM_DD_YYYY_HH_MM_SS.log
 stsetup.log
 stsetup_exit_status.txt
Domino program directory
stsetup_exit_code_windows.txtSametimeIniParser.log
This log can be in %TEMP%or in the Domino data directory.
Console connection log
Documents and Settings\username\Local Settings\Temp\SSCLogs\ConsoleUtility0.log