Adding pages, content, and more | HCL Digital Experience
As a content author, your goal is to visualize the best way to organize information on your site with pages and content. You might need to create a section in the site for a new product or you might want to change the arrangement of pages in the navigation based on customer feedback. Either way, you always start with a project and end with publishing your updates.
- Create a project to organize drafts and for easy publishing
-
- Projects organize your drafts in a centralized view and give you the flexibility of approving and publishing content in one step.
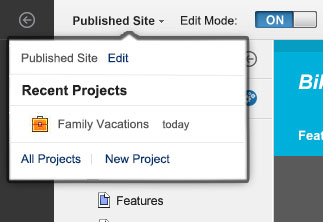
- To get started, click the project menu to create a new project or access an existing project.
- Create draft pages and content in your project. Use Site Manager to visualize how your new pages and content look in the site navigation.
-
- From Site Manager, you can see draft pages and content in the context of the site navigation. By
default, content items are hidden from the Site Manager tree view. Click
 Show content items in the tree view to display content items
in the site manager tree view.
Show content items in the tree view to display content items
in the site manager tree view. - To set up your site with new pages or content, open the site toolbar and Site Manager. Select an
existing page or content item in Site Manager, and click the context menu icon
 to access the create options. The following image shows how to access the
context menu for a page in Site Manager.
to access the create options. The following image shows how to access the
context menu for a page in Site Manager.Figure 1. Opening the context menu for a page in Site Manager 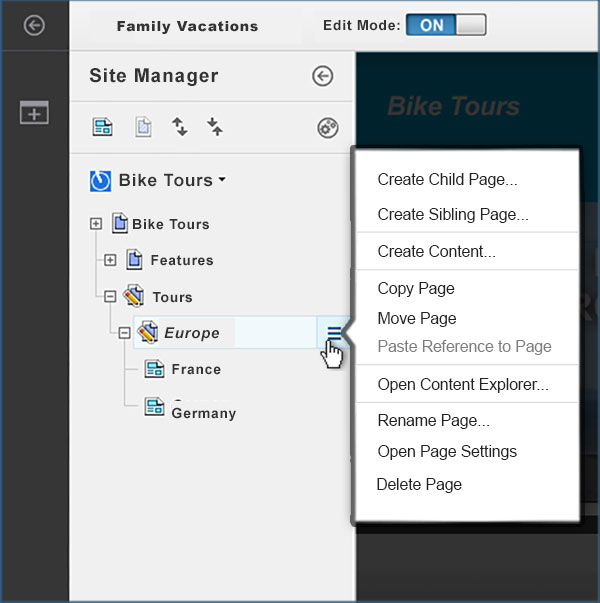
- All pages and content are created from templates in Site Manager for easy site setup. Page templates include page layout and can include content. Content templates include a default appearance and structure.
- Site Manager includes extra features that content authors frequently use while setting up the site. These features include copying and pasting areas of your navigation as the starting point for new content, changing page layout, changing style, and more.
- From Site Manager, you can see draft pages and content in the context of the site navigation. By
default, content items are hidden from the Site Manager tree view. Click
- Publish your project
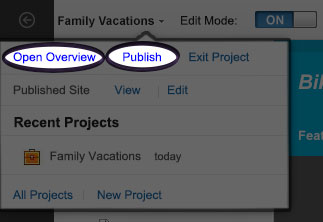
- All of your changes look great and you submit your edits for approval. After your drafts are approved, publish the project to update your site with your changes. To publish your project, open the project menu in the action bar. From the project menu, you can select Publish to publish your project immediately, or click Open Overview to view the contents of your project before you publish.
Next Steps
- Start with a tour of the site toolbar and Site Manager. Familiarize yourself with creating pages and content in the context of your site navigation in Exploring site toolbar and site manager.
- Then, learn the details of how to set up your site.