Defining icons to represent the campaign element
You can create and load three versions of a custom icon to represent your new campaign element in the Management Center user interface. These images help business users identify the element when creating activities in the Activity Builder.
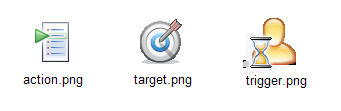
Complete this procedure only if you want to use your own custom icons to represent the campaign element. Alternatively, you can use a set of generic icons supplied with Management Center. The generic icons are shown below. To use the generic icons, you must specify the generic icon image names in the object definition for the campaign element. These steps are covered in the next procedure, Creating the object definition for the campaign element.
About this task
| Location of icon in Activity Builder | Suggested size of icon |
|---|---|
| In the palette | 20x20 pixels |
| In the work area (after a business user drags the icon from the palette onto the activity flow) | 32x32 pixels |
| In the properties view (top-left corner) below the work area | 63x60 pixels |
Procedure
- Open HCL Commerce Developer and switch to the Enterprise Explorer view.
- Copy the three image files to the following locations:
- For the icon in the
palette:
LOBTools/WebContent/images/your_company_name/marketing/resources/pal/
- For the icon in the work area:LOBTools/WebContent/images/your_company_name/marketing/resources/dgm/
- For the icon in the properties view:LOBTools/WebContent/images/your_company_name/marketing/resources/hdr/
- For the icon in the
palette:
-
Define a resource file to reference the images:
- Model your resource file after the LOBTools/WebContent/WEB-INF/src/xml/commerce/marketing/restricted/MarketingManagementResources.xml file.
- Within the resource file, list the three images and associate a resource name with each path and file name.
- Save and close the file.
-
Register the new resource file.
Create a resource bundle file similar to the file in LOBTools/WebContent/WEB-INF/src/xml/commerce/marketing/restricted/MarketingManagementResourceBundle.xml