Grouping locales by country and store
You can group your new locales by country and separate them by store. Grouping locales by country and store ensure that a store in a particular country has only the languages that it requires.
A locale that ends in _US or _CA might be the deciding factor in how a store is created. All locales that end in _US assume United States stores. All locales that end in _CA assume Canadian stores. For example, en_CA and fr_CA both apply to the same store. To do so, you publish two stores. Then, you change the profile of each store to assign storeA only United States English, and storeB only Canadian English and Canadian French.
Creating stores for each country
Procedure
- Create a second custom store to be used only for Canadian English and Canadian French.
- Open the Administration Console, selecting the Site option.
-
From the Store Archives menu, select
Publish.
The Store Archives page is displayed.
- From the list, select the ExtendedSites.sar store archive, or the store archive that you want to publish.
-
Click Next.
The Parameters page is displayed. Different parameters are displayed depending on the store archive you select.
-
Click Next.
The Summary page displays, listing the store archive and parameters that are selected, and the location to which the store archive is published.
-
After you review the summary information, click Finish.
A confirmation dialog displays with the number of the publishing job. Note the job number for future reference.
- Restart the server.
-
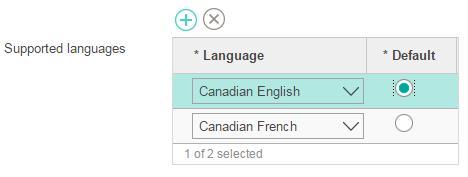
Change your second stores profiles to contain only Canadian English and Canadian French:
-
Under Supported languages, add Canadian English and Canadian French and
remove the other languages.
-
Under Supported languages, add Canadian English and Canadian French and
remove the other languages.
Mapping locales to your store
About this task
Procedure
-
Ensure that your host names can be resolved to the same IP address, which depends on your
domain registry.
However, for local testing, add the following entries in your host files:
192.168.0.1 www.storeA.com 192.168.0.2 www.storeB.ca -
Update the HTTP Server configuration:
-
Create the document root for your second store. Create a folder called
htdocs_storeB under the following directories:
 /opt/HTTPServer
-
Create an index.html file under the new directory.
This index.html file is used to redirect to a second HCL Commerce store.For example:
<HTML>
<HEAD></HEAD>
<TITLE>www.storeB.ca</TITLE>

<SCRIPT LANGUAGE="JavaScript">
function redirect() {

window.location.href="/webapp/wcs/stores/servlet/StoreB/index.jsp";
}

<BODY onLoad="redirect()"></BODY>
</HTML>
Note: The above URL might also be routed to a store that all locales share. Instead of pointing to StoreB, point to the same store and specify the language identifier to open the store with a specified language.- If the Store reference number is 10001 and the language number is -24 for Canadian English, then use the following URL: http://localhost/webapp/wcs/stores/servlet/StoreView?storeId=10001&langId=-24
- If the Store reference number is 10001 and the language number is -25 for Canadian French, then use the following URL: http://localhost/webapp/wcs/stores/servlet/StoreView?storeId=10001&langId=-25
- Optional:
Create an index.html file under the previous document root to redirect to
the first store.
For example, drive:\WebSphere\HTTPServer\htdocs for Windows.
-
Update the virtual host configuration in WebSphere Application Server.
-
Restart the HTTP Server.
The HTTP Server must be restarted to recognize the changes to the httpd.conf file and the WebSphere plug-in file. After the HTTP Server is restarted, the stores are accessible by their separate names.For example, www.storeA.com and www.storeB.ca.
Results
You grouped the locales by country and separated them by store. In turn, you added two fully functional locales to your HCL Commerce instance.