Testing the customization
In this lesson, you verify that your customization is successful by viewing and editing the new property information in the Catalogs tool.
Procedure
- Start or restart the WebSphere Commerce Test Server.
-
In a web browser, open Management Center.
Use the URL https://localhost:8000/lobtools, where localhost is your host name.
- Log on to Management Center as a Category Manager and open the Catalogs tool.
- Select your store.
-
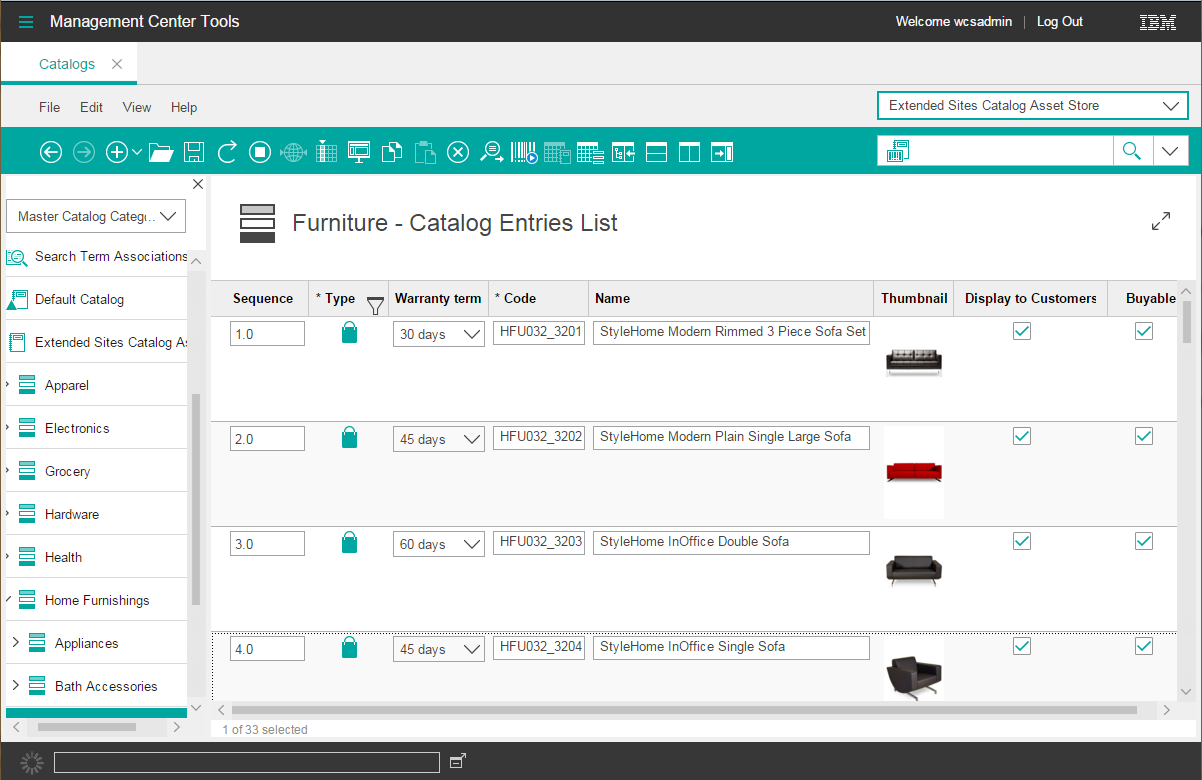
From the explorer view, browse to the catalog entries list view that contains the products that
contain warranty information. Ensure that the new warranty term column displays.
For example, the following image shows the new Warranty term column between the Type column and the Code column.
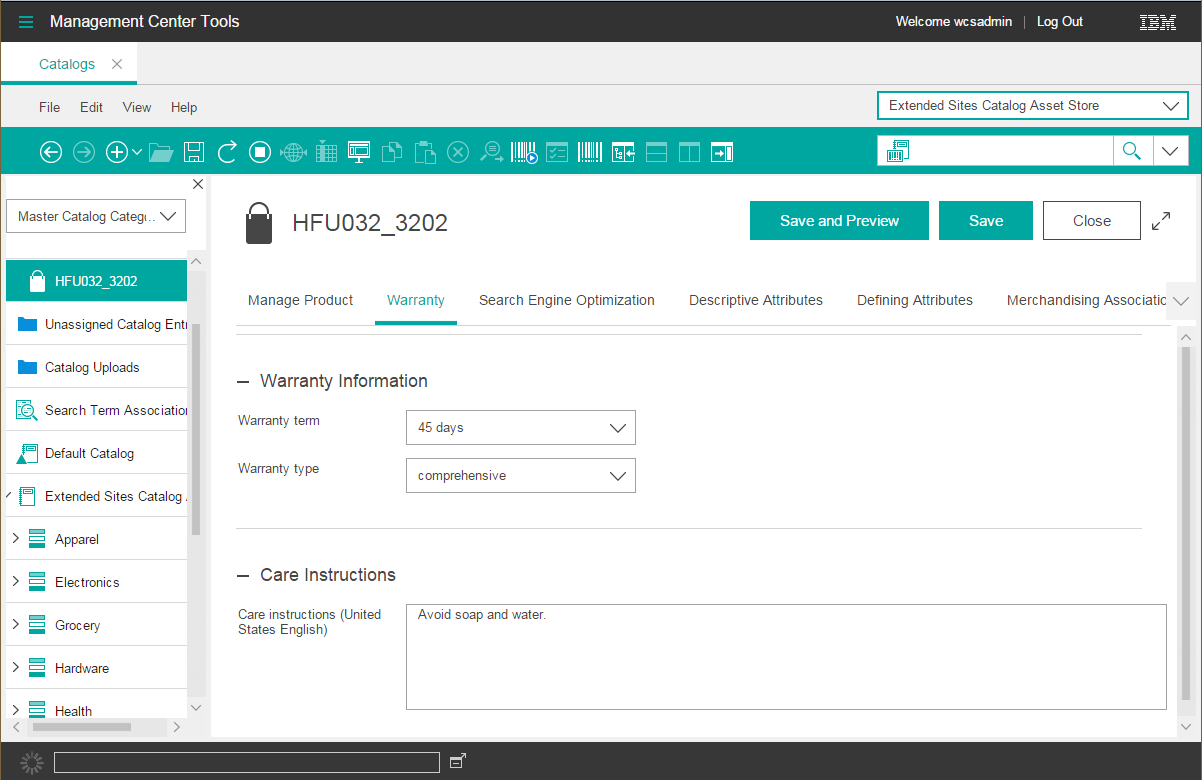
- Right-click a product that contains warranty information and select Open. The properties view for the product displays. Ensure that the new properties view tab is available in the properties view.
-
Click the new Warranty tab. Ensure that the combination box widgets for
the Warranty term and Warranty type display, and that
an editable text editor widget displays for the Care instructions.
- Test the catalog services by changing the value for the warranty term and type, and for the care instructions. Then, click .
-
Reload Management Center and then view the list view and properties view for the product
to ensure that the changes were saved.
If the information displays correctly, your customziation is complete.