WebSphere Commerce DeveloperFeature Pack 7 or later

Checkpoint 3: Validating the support for creating content pages that use the Commerce Composer framework

In this lesson, you test your customization to ensure that users can create and design static content pages with the Commerce Composer tool in the Management Center.

Procedure

  1. Start the WebSphere Commerce server.
  2. Open the Commerce Composer tool.
  3. Select your Deprecated featureMadisons store from the Store list.
  4. Create a layout for one of your new content pages.
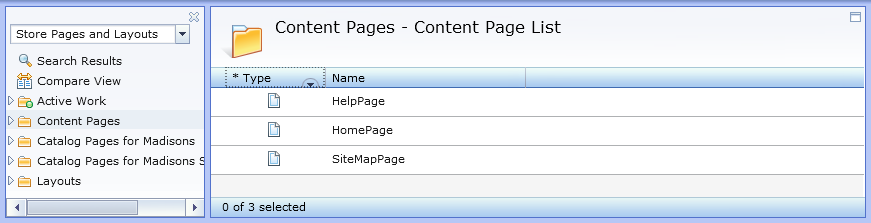
    1. In the explorer view (left pane), select Content Pages. The list of new static content pages that you loaded with the Data Load utility loads in the main work area.

      List of Commerce Composer content pages

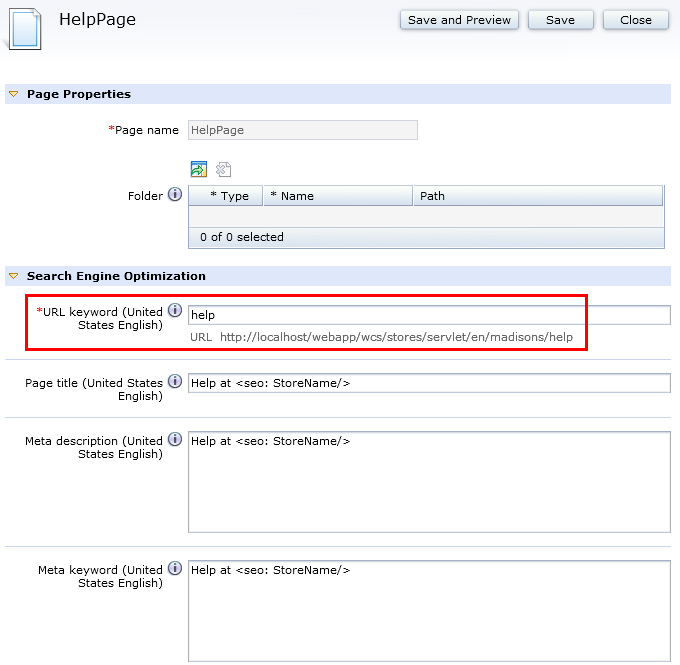
    2. Double-click the HelpPage page in the list to open the properties view for the page. The SEO URL information for the page displays in this view and can resemble the following image:

      HelpPage page with SEO URL information

    3. In the explorer view, right-click Layouts. Select New Layout. The New Layout Template Selection window opens.
    4. Select the Any page, single slot layout template. Click OK.
    5. On the Manage Layout tab, enter NewContentpage in the Layout name field.
    6. In the Layout Assignments section, use the Utilities view to add your HelpPage page to the Pages table.
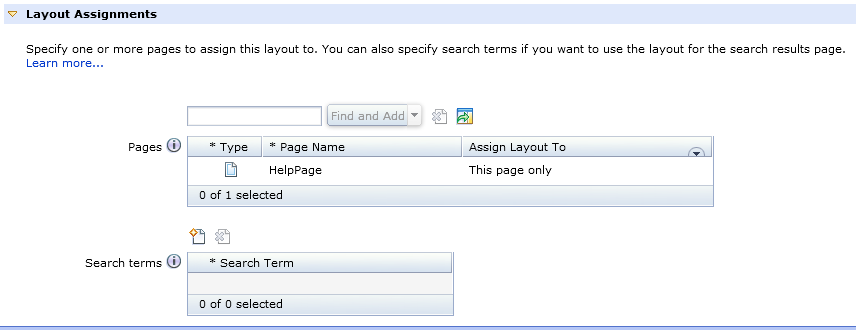
    7. In the Assign Layout To column, select the option that makes sense for your layout assignment.

      Layout Assignments section for HelpPage layout

    8. Click the Design Layout tab.
    9. In the Wireframe, click slot 1. The Add Widgets to Slots window displays.

      The wireframe shows the layout template that you selected. To add content to the layout, you must add widgets to one or more slots in the layout template. You can add more than one widget to a slot, and you can leave slots empty.

    10. Select the Text Editor Widget. Click OK.
    11. In the widget properties, enter the Display text for the widget:
      This is a test for the new content page."
    12. Click Save.
  5. Preview the layout for your new content page, to ensure the page uses the Commerce Composer framework to retrieve the correct layout.
    1. In the toolbar, click the Open Store Preview Dialog button.
    2. In the Store URL filed, if the value localhost is in the URL, replace localhost with the name of your server.
    3. Click Launch Store Preview.
      Your HelpPage page can resemble the following image.

      Test image of the HelpPage page.

      You can also preview your new static content page, HelpPage, with the new SEO URL:

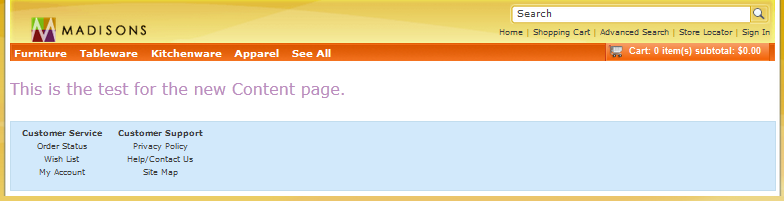
      http://localhost/webapp/wcs/stores/servlet/en/madisons/help

    4. On any page in your store within store preview, click the Help/Contact Us footer link. Ensure that your new HelpPage page displays again. If your new HelpPage page displays, the original HelpContactViewURL link is replaced with your new HelpPageViewURL link.

Results

If the text for your widget displays, business users for your site can create and design content pages for your Madisons store with the Commerce Composer tool.