

Checkpoint 2: Testing the display of a new layout for your catalog store page
In this lesson, you test that the Product Details page for your Deprecated featureMadisons store uses the getPageDesign service and the
Commerce Composer framework. You create a
custom page by using the reusable widgets that you loaded with the Data Load utility and verify that your page
displays with the widgets.
Procedure
-
In a web browser, go to your Deprecated featureMadisons store. Browse to the
Product Details page that you viewed in previous lessons to verify that the
display for the page improved.
The Product Details page can resemble the following image
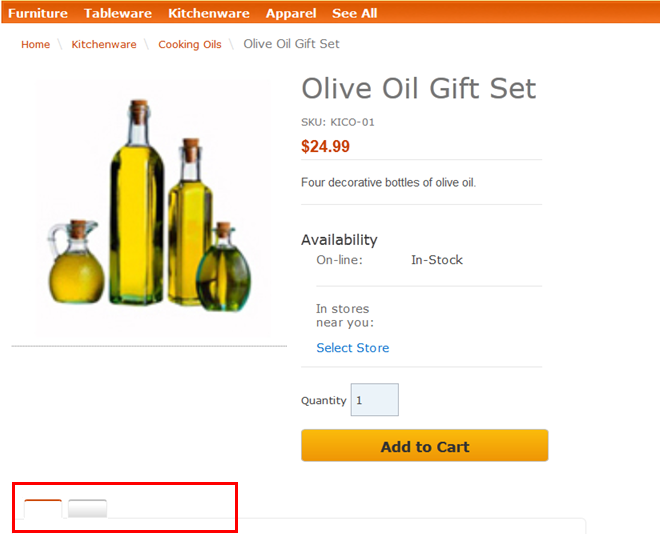
By changing the CSS for your page, you improved the display for the page. The descriptions for the tabs on the page are still missing because the e-Marketing Spot data for the tabs does not exist. In the previous lessons, you created the relationship between the Product_Page_Tab_1 and Product_Page_Tab_2 e-Marketing Spots and the DefaultProductPageLayout page layout by loading the widgetnvp.csv file with the Data Load utility. You did not however create the Product_Page_Tab_1 and Product_Page_Tab_2 e-Marketing Spots. You must manually create the e-Marketing Spots in Management Center before the tab descriptions display.
- Create the Product_Page_Tab_1 and Product_Page_Tab_2 e-Marketing
Spots.
- For the Default content table,
use the utilities view to add the Text content for Product_Page_Tab_1 content.
You updated Default content table should resemble the following image:
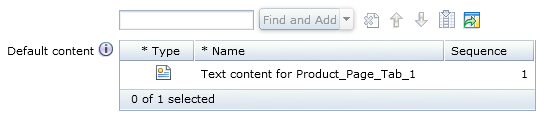
- For the Default content table,
use the utilities view to add the Text content for Product_Page_Tab_1 content.
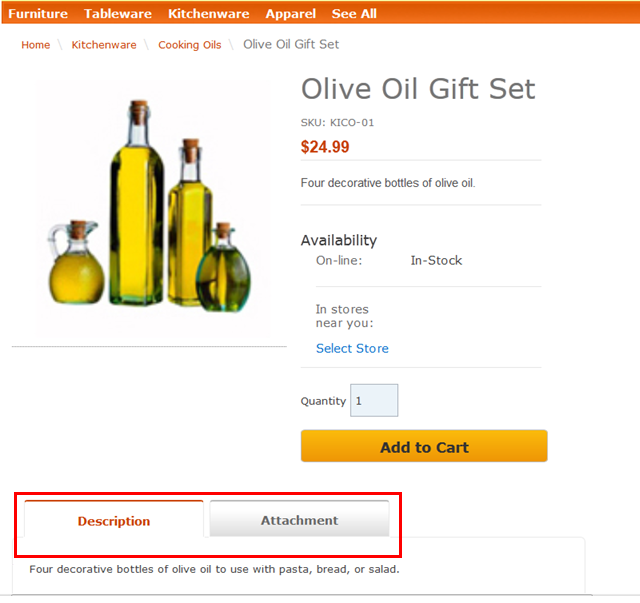
- In a web browser, go to the Product Details page
that you previously viewed. The descriptions for the tabs on the page
now display, as shown in the following image:
If you are viewing your store page with a debugging tool in your web browser, verify that your page does not display any JavaScript errors. Your page can include errors that are related missing images as shown in the following image.
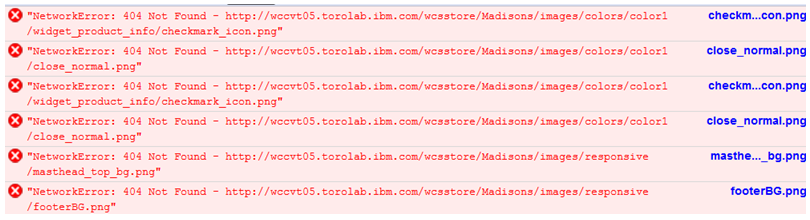
To resolve the errors, copy the image from your extracted Aurora starter store archive and add the images to the appropriate location in your Madisons store directory structure. Use the steps that you completed to fix the JavaScript errors for your page as a guide for adding the images to your store page. For example, copy the StoreAssetsDir\images\colors\color1\widget_product_info\checkmark_icon.png image file from the Aurora.sar archive you extracted. Add the file to the Stores\WebContent\Madisons\images\colors\color1\widget_product_info directory. When you refresh your page, the error for the missing image no longer displays.
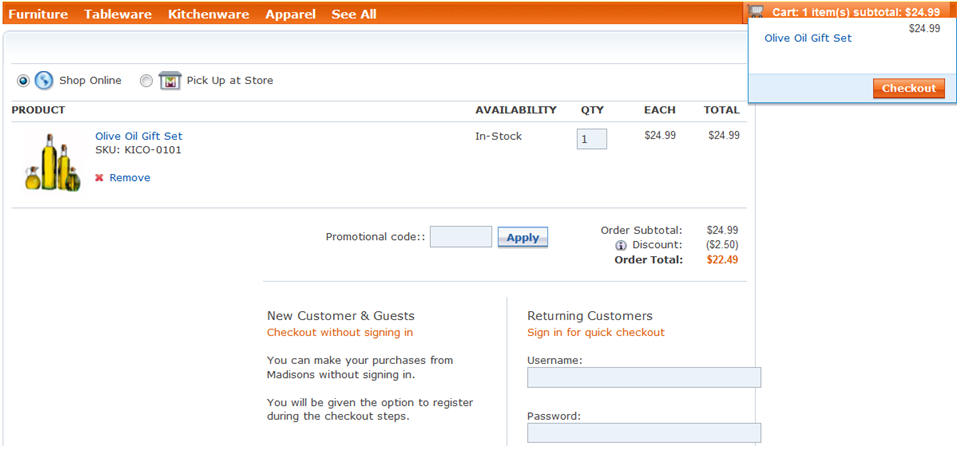
- Click the Shopping Cart tab in the
header section of your store page. Verify that the product is in your
shopping cart and that the Add to Cart function
works for your Product Details page.Your page can resemble the following image.
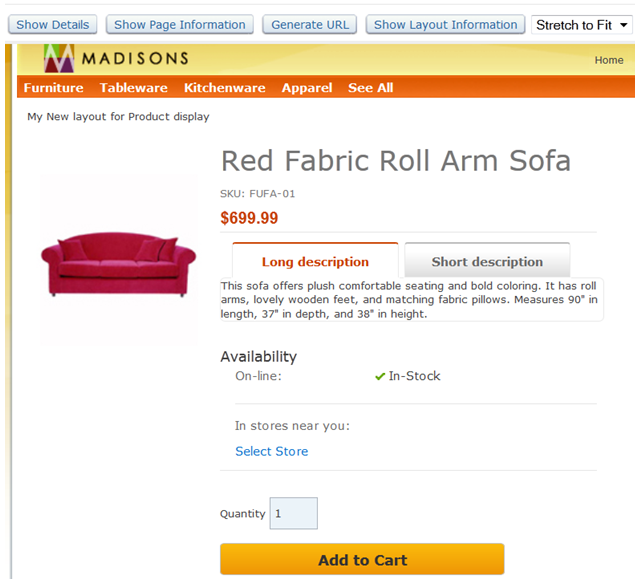
- Preview your store page to verify that the page uses the Commerce Composer framework
to retrieve the correct layout.
- Click Launch Store Preview. Your Product
Details page displays in your store preview.Your page can resemble the following image.
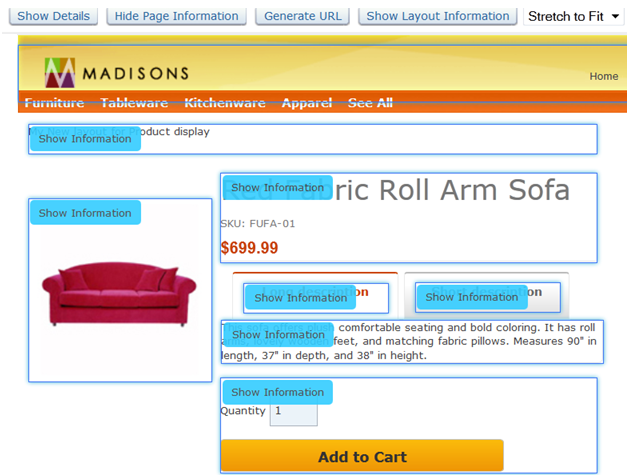
- Click the Show Page Information button
in store preview. Ensure that the Show Information button
displays for each widget on your page. If the Show Information buttons
display, your page can resemble the following image.
- Click the Show Information button
for the Full Image Widget on your Product
Details page. The Widget Information window displays.
Ensure that the correct widget information for your Product Details page displays.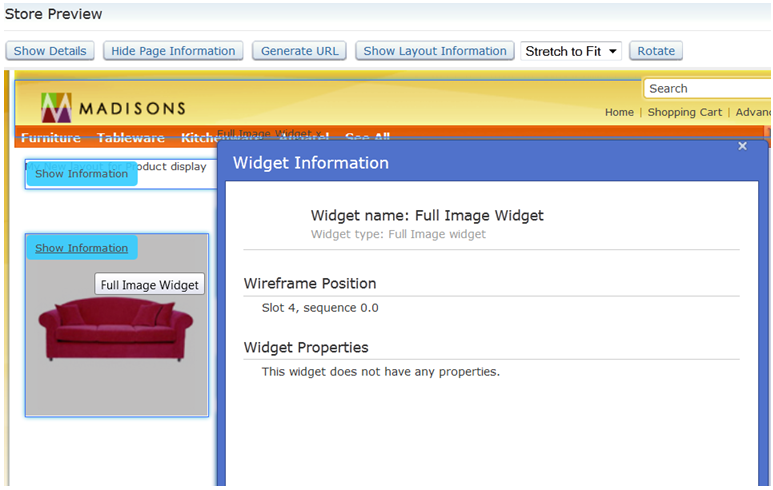
- Click the Show Layout Information button
for the page.The Page and Layout Information window displays.
Ensure that the correct page and layout information for your Product Details page displays.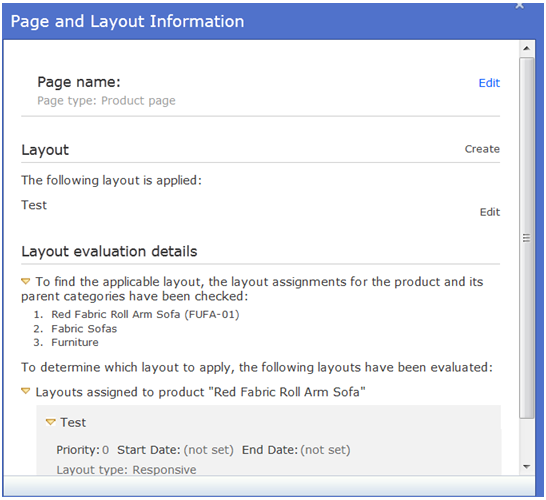
- Click Launch Store Preview. Your Product
Details page displays in your store preview.