Testing the customization
In this lesson, you verify that your customization
is successful. To verify the customization, you can test the customization
in Management Center, or by viewing the contents of a BOD message.
About this task
Procedure
- Test the customization in the Catalogs tool
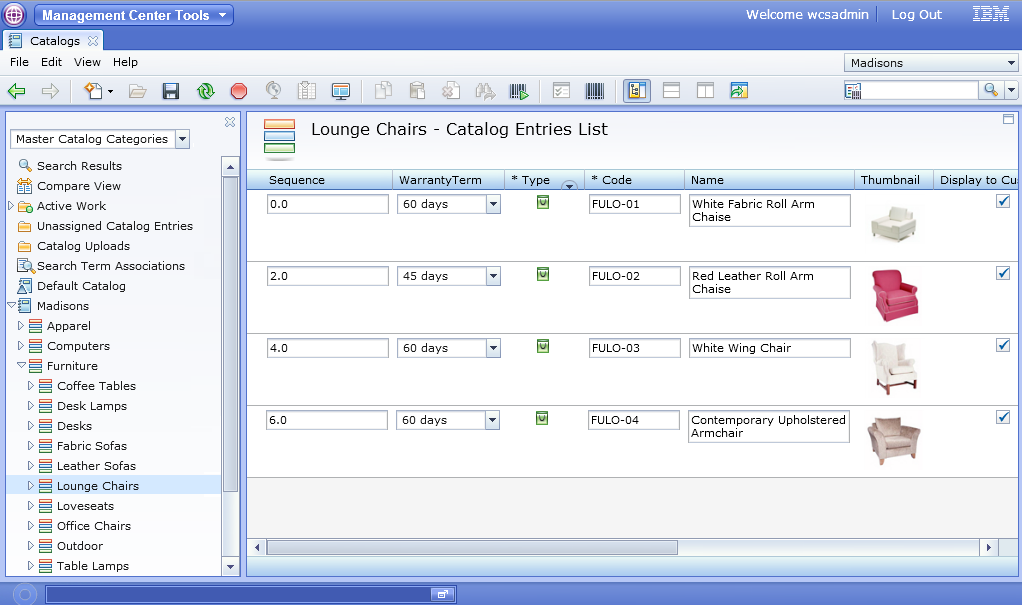
- From the explorer view, navigate to the catalog entries
list view that contains products that you added warranty information
for during the prerequisite tutorial.For example, the following screen displays the catalog entries list containing products with warranty term information:
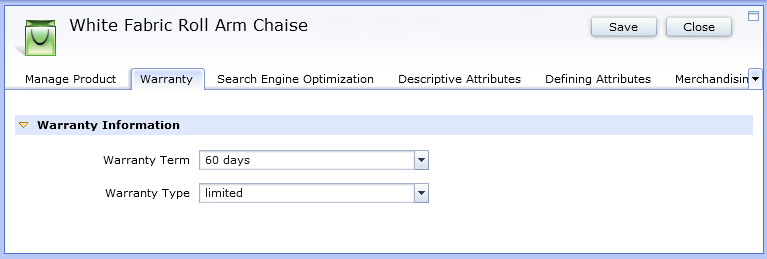
- Click the newly created Warranty tab.
The values for both warranty term and warranty type for each product
defaults to the current value that is stored in the server warranty
table.
- From the explorer view, navigate to the catalog entries
list view that contains products that you added warranty information
for during the prerequisite tutorial.
- Test the customization by viewing the BOD contents.
When passing the user data between commerce server and LOB tool client side, sometimes the data does not display as expected. Ensure that the BOD files really contain the custom data by viewing the contents of a BOD. Since BOD messages are event-driven, after each action, a BOD might be created depending on what the action entails. By default, tracing of BOD messages is turned off. To turn it on, do the following steps:
- Enable the trace
com.ibm.commerce.foundation.server.command.bod=allas shown in the following screen capture: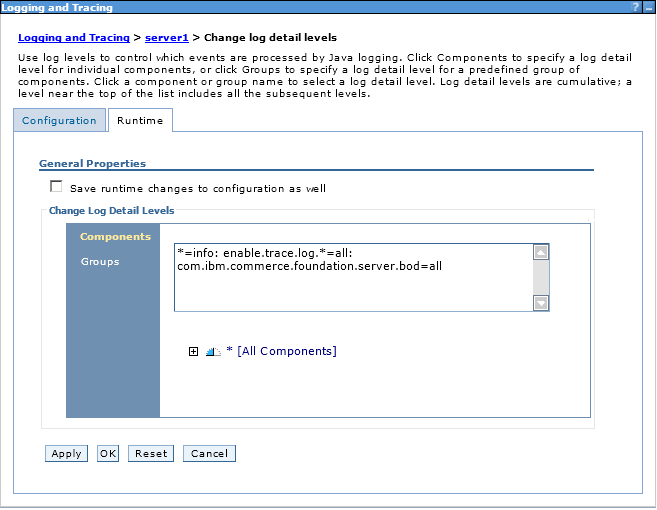 Note: If the trace is enabled in the Runtime environment, the BOD message is displayed immediately after you reproduce the scenario without restarting the server. If the server is restarted, the trace must be re-enabled, otherwise the BOD message is not shown.
 - Check the BOD message in the log file, the value for
warranty Term and warranty Type is included in the UserData section.
The following screen capture shows the UserData information that is
extracted from the trace log:

- Enable the trace
Results
- Update the WebSphere Commerce schema to store warranty information.
- Customize the Catalog service to include the warranty information as user data in the CatalogEntry noun.
- Add custom queries to a custom query template file.
- Customize the Catalogs tool
- Add new fields in the list view.
- Add a tab in the catalog entry properties view.
- Add new fields in the new tab.
- Create an extension property file.
- Create combination boxes with for the new data fields.