In this lesson, you update the product display page to
include a warranty tab. When shoppers click the warranty tab, a new
page opens with the warranty information of the product.
About this task
In the Android native application, the page layout is specified
in an XML file and the logic is provided by a Java Activity class.
Layouts are stored in the resource folder and activities are in the com.ibm.commerce.android.nativeapp.mobile.activity package.
Procedure
- In the Package Explorer view, navigate
to .
- Open the file strings.xml. This file
is the main file for store labels. Translated versions of this file
can be found in the corresponding locale-specific values folders.
For example, values-fr.
- Append the following string resource to the end of the
file, right before
</resources>:<!-- Warranty -->
<string name="Warranty">Warranty</string>
<string name="WarrantyTerm">WarrantyTerm</string>
<string name="WarrantyType">WarrantyType</string>
<string name="Warranty1">WarrantyTerm: </string>
<string name="Warranty2">WarrantyType: </string>
- Save your changes and close the file.
- Navigate to .
- Open the file strings.xml.
- Append the same piece of code to the end of the file:
<!-- Warranty -->
	<string name="Warranty">Warranty</string>
	<string name="WarrantyTerm">WarrantyTerm</string>
	<string name="WarrantyType">WarrantyType</string>
	<string name="Warranty1">WarrantyTerm: </string>
<string name="Warranty2">WarrantyType: </string>
Note: You
must include the code in values/strings.xml irrespective
of whether you have it in any language-specific files. If you have
different string in values-en, they override
the default values. It is the same as the resource bundle principle.
- Navigate to .
- Open the file catalog_product_details.xml.
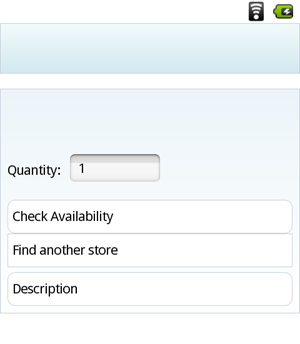
Layout files can be viewed in a graphical editor or in XML format.
In the graphical view, you can see the three existing table rows on
the page for check availability, find another store and description.
- Switch to the XML view of the file and locate the code
<TableRow
android:id="@+id/storeRow"
, which displays the table row
for Store. Add the following code before that
line you located:<!-- Add a new table row for Warranty -->
<TableRow android:id="@+id/warrantyRow"
android:layout_height="wrap_content"
android:layout_width="match_parent"
android:background="@drawable/simple_box">
<TextView android:id="@+id/warranty"
android:layout_height="36dp"
android:layout_width="match_parent"
android:gravity="center_vertical"
android:padding="5dp"
android:text="@string/Warranty"
android:textColor="@android:color/black"
style="@style/NormalText"/>
</TableRow>
- New table row ID: warrantyRow
- Text string for the warranty row: String name Warranty is
defined in the strings.xml previously. If you
want, you can make text changes.
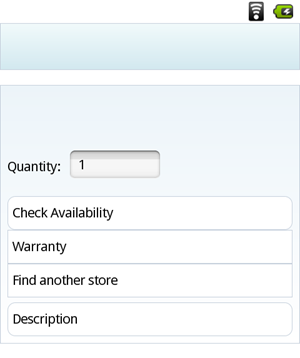
- Switch to the graphical editor to see that a new Warranty table
row is added to the Product details page, right before the row Find
another store.
- Next, you must add the logic to the tab to display the
related product warranty information.
- Using the Package Explorer, Navigate to .
- Open Productdetails.java. This
class implements an Android activity that provides the product details
that are displayed on the page and defines the page interactions.
- Find the displayExtendedProductDetails() method.
This method shows extended information of the product or related information.
Within the displayExtendedProductDetails() method,
add the following code after the // Display store details listener
method. This code adds a listener to the new table row you just added
to the page layout.
// Display warranty details
				TableRow warrantyRow = (TableRow)view.findViewById(R.id.warrantyRow);
				//Register a callback to be invoked when this view is clicked
				warrantyRow.setOnClickListener(new OnClickListener() {
				@Override
				public void onClick(View v) {
				Product p = products[currentIndex];
				showWarranty(p);
								}
							});
- Create the method showWarranty at
the bottom of the ProductDetails.java. When
a shopper clicks the related products button, a new intent is created.
The intent specifies the action to take (the activity class) and also
stores data that is available to the activity.
private void showWarranty(Product p){
		Intent intent = new Intent();

		//Get user data from Product noun
		String warrantyTerm = p.getWarrantyTerm();
		String warrantyType = p.getWarrantyType();


		intent.putExtra("warrantyTerm", warrantyTerm);
		intent.putExtra("warrantyType", warrantyType );
		intent.setClass(getApplicationContext(), WarrantyActivity.class);
		startActivity(intent);
Intent is used to call one
activity from another and putExtra are parameters
that you want to pass from one to another in name-value pairs. You
can pass any values, even objects, as parameters. With warrantyTerm and warrantytype,
they can be passed as strings as additional parameters.
- Save and close the file. You can ignore the error about
the WarrantyActivity class. You will create
this class in the next lesson.