Manage Existing Groups
For an individual group, this section provides the following information as shown in the following figure.
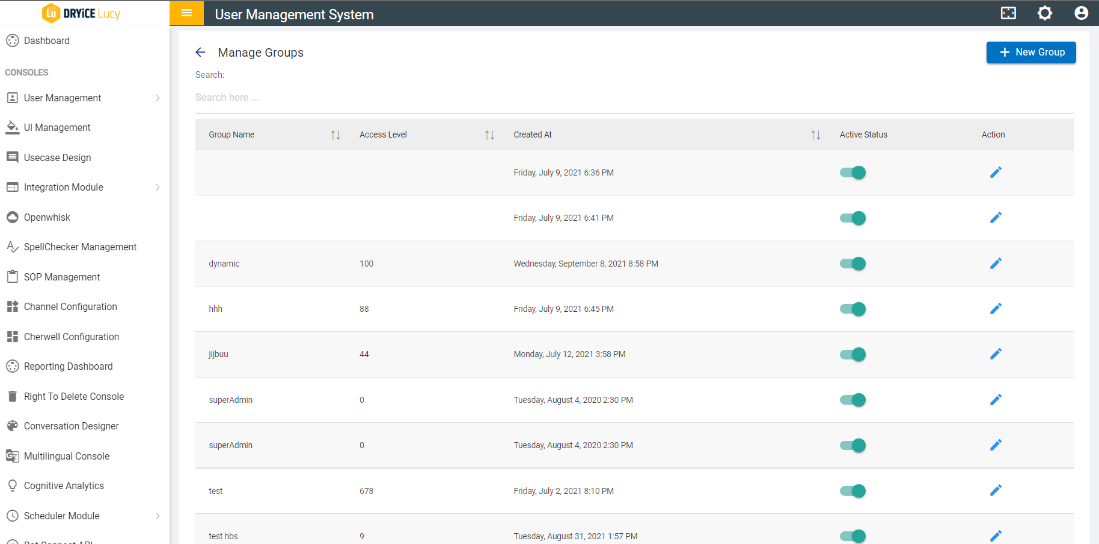
- Group Name - Name of the group
- Access Level - Access level the users in that group will have
- Created At - Date when the group was created
- Action - Edit group details
- Status - whether the group and the users in that group are active or not
Follow the set of instructions mentioned below to edit the details of existing group:
- Click on Edit (
.png) ) button to
edit the details of the corresponding group.
) button to
edit the details of the corresponding group.
- To delete a group member, click on
 icon corresponding to the group
member.
icon corresponding to the group
member. - To add a user, search for the user and click on Add User button
 .
.
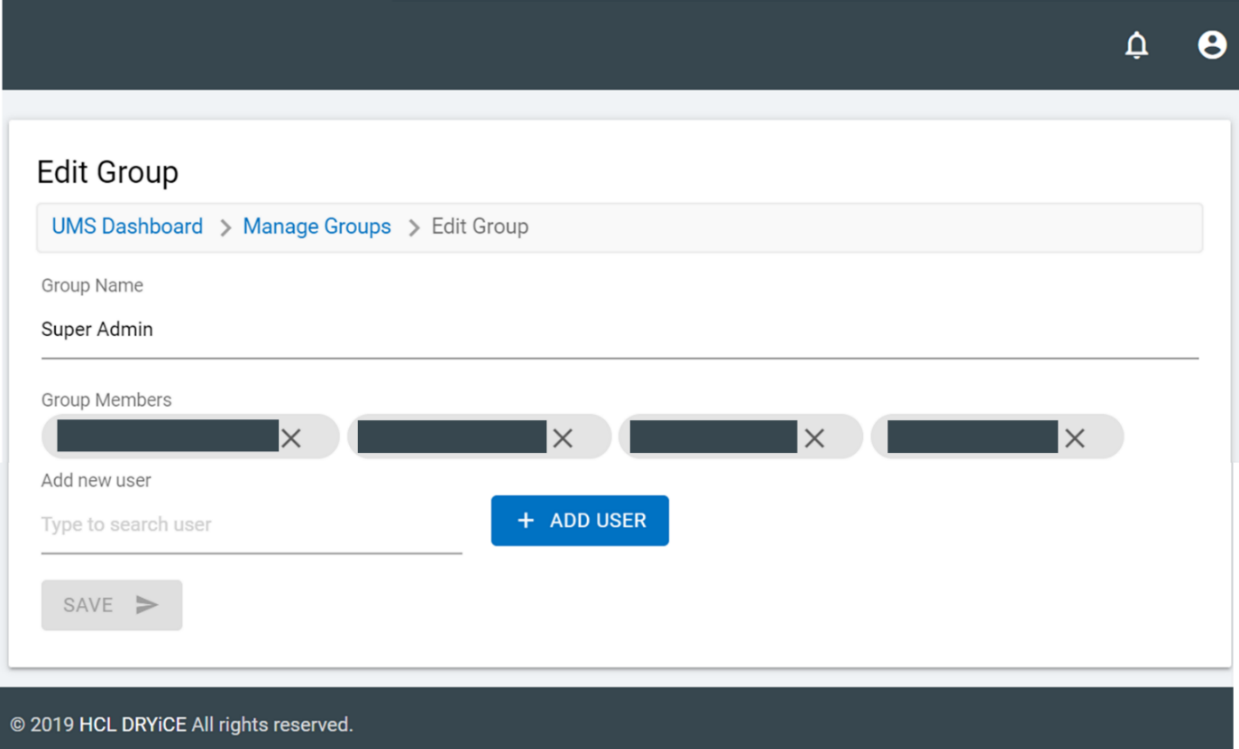
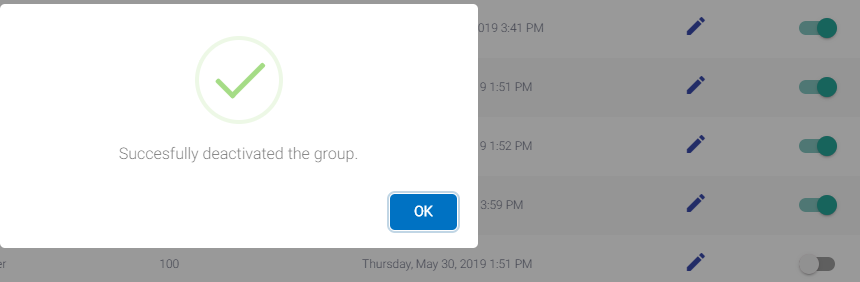
- Use the toggle button (
.png) ) next
to a group to change the status to active/inactive.
) next
to a group to change the status to active/inactive.
- Add a New Group (For detailed step by step instructions on how to add a group, click Add New Group .