Lab Exercise 6 – Deployment of BigFix Runbook AI components in a secure mode by changing HTTP to HTTPS
In this lab exercise, the main focus is on deploying BigFix Runbook AI components in a secure mode by changing HTTP to HTTPS. The text provides step-by-step instructions on how to enable secure communication for various components of BigFix Runbook AI.
Scenario
An organization has asked for deployment of BigFix Runbook AI with all its features and functionalities in a secure mode. This entails conversion of all the components from HTTP to HTTPS.
In this lab, we will showcase the detailed procedure for converting all the components from HTTP to HTTPS.
Prerequisites
Availability of servers with all components installed
Database credentials should be available
Solution
Enable Secure Communication (Changing HTTP to HTTPS)
This section describes how to enable the secure communication by changing HTTP to HTTPS. It can be enabled for both the BigFix Runbook AI website and the deployed components.
Website Only
This section describes how to enable the secure communication by changing HTTP to HTTPS for the BigFix Runbook AI website.
Following changes are required in the underlying components to achieve the same.
Key Rotation Service (KRS)
To change the hosting of KRS from HTTP to HTTPS using the existing certificate, for e.g. 'HCL.iAutomate', please follow the below steps:
- Press Win+R and type inetmgr.
- Click OK to open IIS.
.png)
- Expand Sites and click HCLiAutomateKRS.
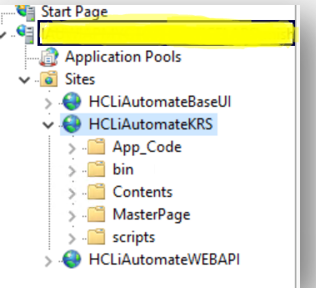
Figure 79 - Hosting KRS from HTTP to HTTPS (cont.)
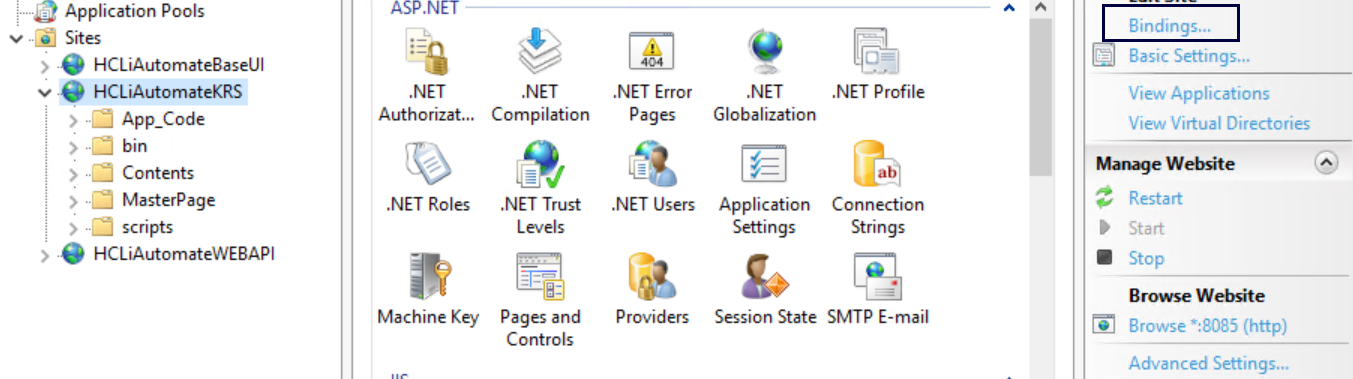
- Click Bindings in the Edit Site section.
.png)
- Click Add New.
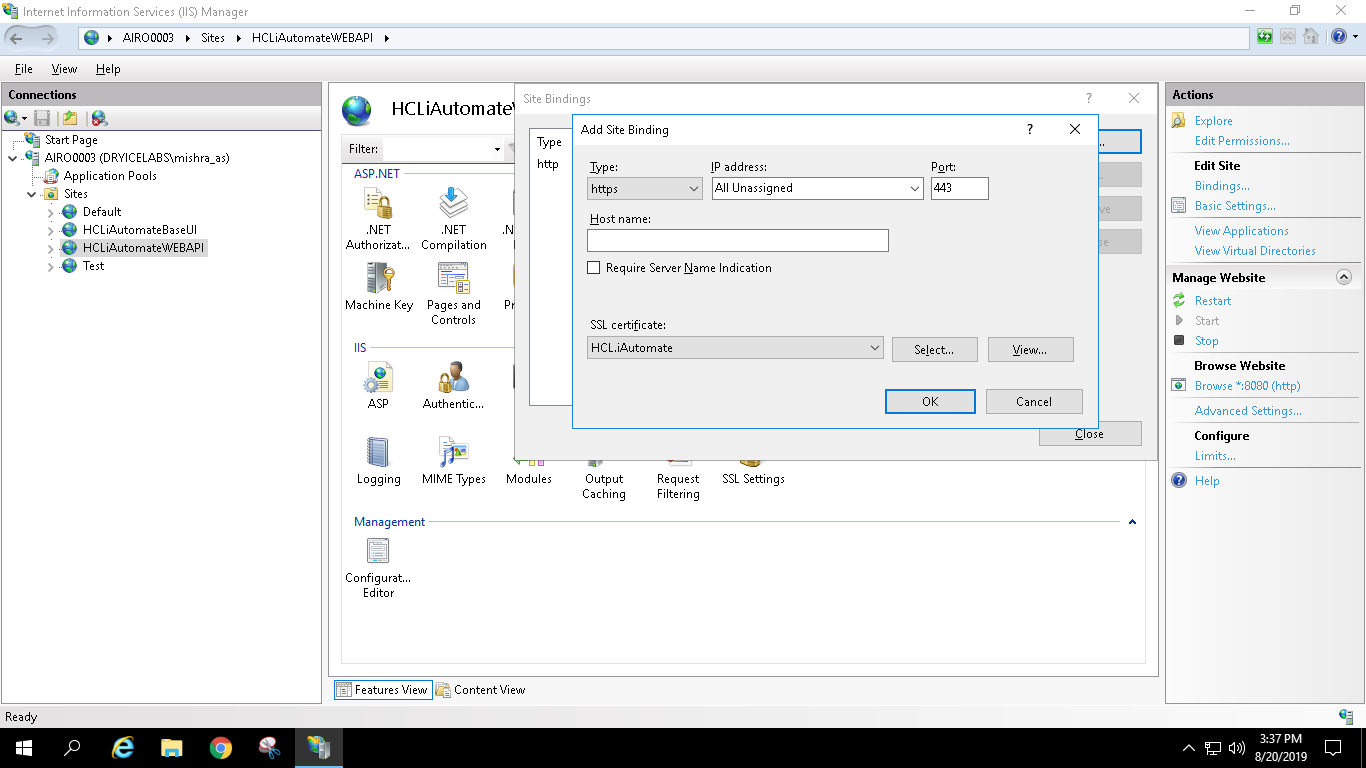
- Select Type as ‘https’. Port information is automatically populated. Select the SSL Certificate.
- Click OK.
- Select HCLiAutomateKRS
- Right-click and select Explore.
- Find Web.config file and open it in a Notepad.
.png)
- Within the Web.config file, find the tag <security> and change it to <security mode= "TransportWithMessageCredential">.

- If the certificate is self-signed, find the key IsSelfSigned and change its value to Y. Else, the value will be N.

- Save the file for changes to be reflected.
- Select the service and click Restart to restart the services.
Base User interface
To change the hosting of BaseUI from HTTP to HTTPS using the existing certificate, for e.g. 'HCL.iAutomate', please follow the below steps:
- Press Win+R and type inetmgr.
- Click OK to open IIS.
.png)
- Expand Sites and click HCLiAutomateBaseUI.
.png)
- Click Bindings in the Edit Site section.
.png)
.png)
- Click Add New.
- Select Type as https. Port information gets populated automatically. Select the SSL Certificate.
- Click OK.
.png)
- Right-click HCLiAutomateBaseUI and click Explore.
- Find Web.config file and open it in a Notepad.
.png)
- Within the Web.config file, find the key URL and change its value from HTTP to HTTPS.

- If the certificate is self-signed, find the key IsSelfSigned and change its value to ‘Y’. Else, the value will be ‘N’.
.png)
- Save the file for changes to be reflected.
- Select the service and click Restart to restart the services.
Web API
To change the hosting of Web API from HTTP to HTTPS using the existing certificate, for e.g. 'HCL.iAutomate', please follow the below steps:
- Press Win+R and type inetmgr.
- Click OK to open IIS.
.png)
- Expand Sites and right-click HCLiAutomateWEBAPI.
- Click Explore.
.png)
Figure 95 - Hosting Web API from HTTP to HTTPS (Cont.)
- Find Web.config file and open it in a Notepad.
.png)
- Within the Web.config file, find the key ‘URL’ and change its value from HTTP to HTTPS.
.png)
- If the certificate is self-signed, find the key IsSelfSigned and change its value to ‘Y’. Else, the value will be ‘N’.
.png)
- Save the file for changes to be reflected.
- Select the service and click Restart to restart the services.
Listener
To change the configuration of the Listener from HTTP to HTTPS, please follow the below steps:
- Press Win+R and type services.msc.
.png)
- Click OK to open the Windows Services.
.png)
- Search for HCL.iAutomate.Listener.
- Right-click HCL.iAutomate.Listener service and click Properties.
.png)
- Copy the value mentioned in Path to executable field as shown in the image below.
.png)
- Open File Explorer, then paste the copied path and press Enter to open the desired folder.
- Search for HCL.iAutomate.Listner.Service.Host config file and open it in a Notepad.

- Within the HCL.iAutomate.Listner.Service.Host config file, find the key URL and change its value from HTTP to HTTPS.

- If the certificate is self-signed, find the key IsSelfSigned and change its value to ‘Y’. Else, the value will be ‘N’.
-
.png)
Figure 105- Hosting Web API from HTTP to HTTPS (Cont.)
- Save the file for changes to be reflected.
- Select the service and click Restart to restart the services.
Configuration Changes via GUI
To change the configuration of Screen from HTTP to HTTPS, please follow the below steps:
- Login to BigFix Runbook AI using the Super Admin credentials.
- Roll-over to the Environment and clickConfiguration.
- Select Component Name as Web API and KRS.
- Change the Load Balancer URL from HTTP to HTTPS.
.png)
- Click Update to save the changes.
Components
This section describes how to enable the secure communication by changing HTTP to HTTPS for the BigFix Runbook AI Components.
As a prerequisite, user needs to have the Thumbprint of the certificate which can be identified using the below steps:
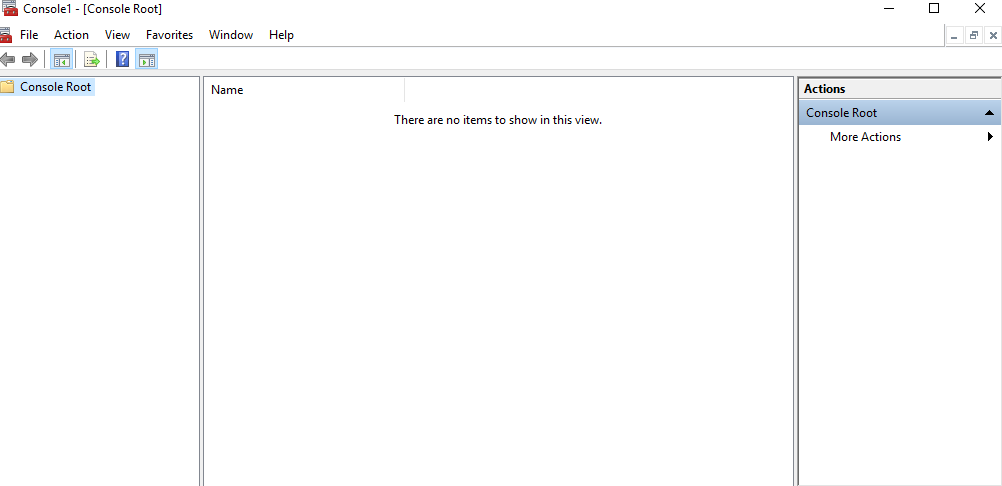
- Press Win+R and type mmc.
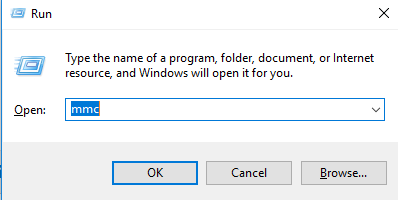
- Click OK to open the Microsoft Management Console.
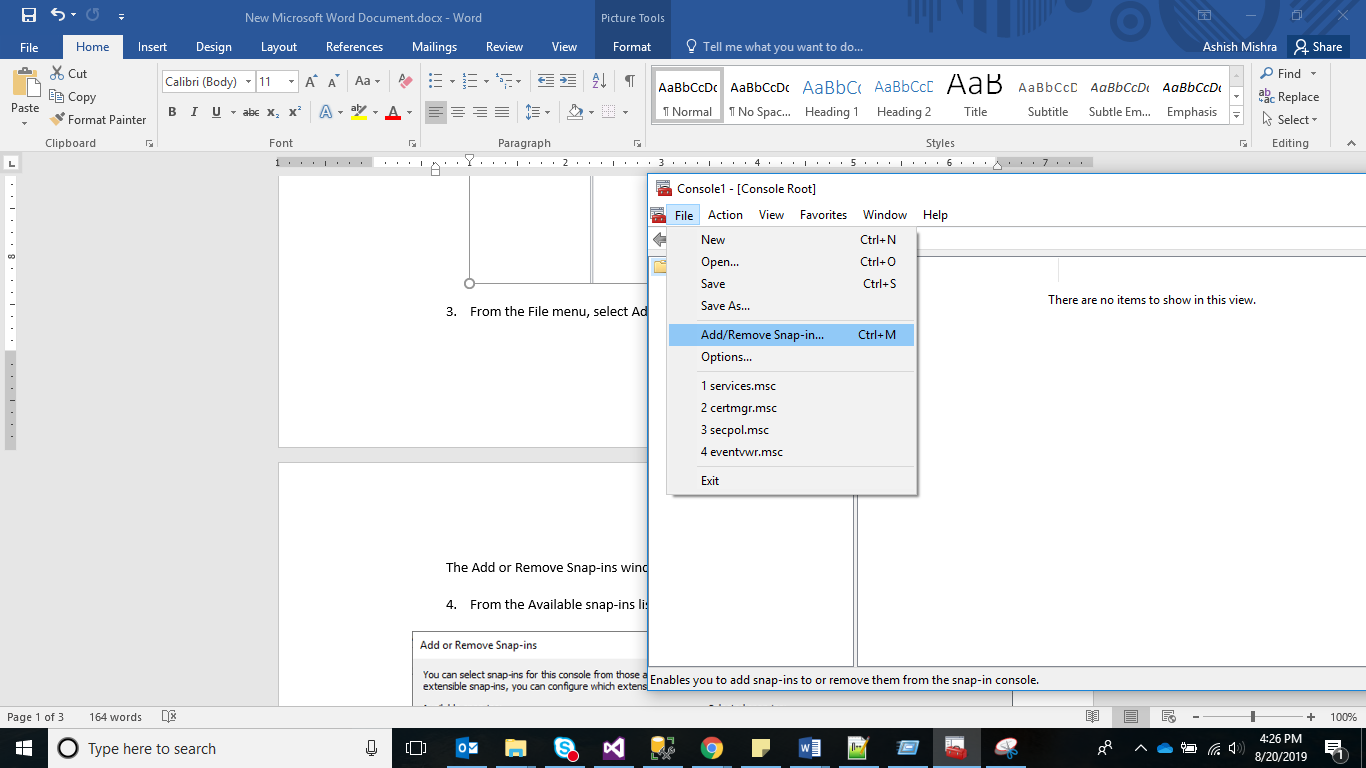
- From the File menu, select Add / Remove Snap-in.
- From the Available snap-ins list, select Certificates, then click Add.
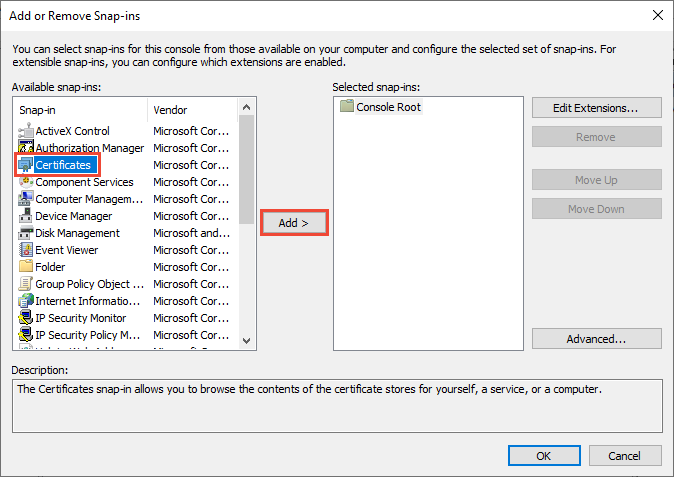
- Click OK.
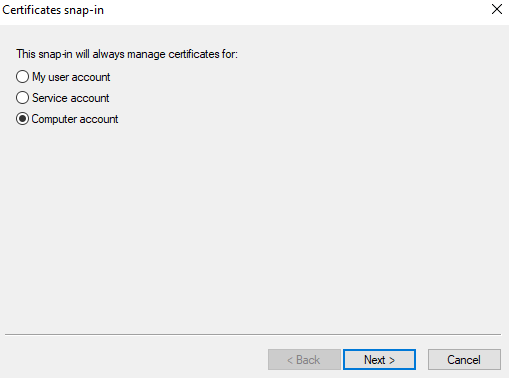
- From the Certificates Snap-In window, select Computer Account and click Next.
- In the left pane, under Console Root, click Certificates (Local Computer).
- Click Personal folder to expand it and then click Certificates folder to expand it.
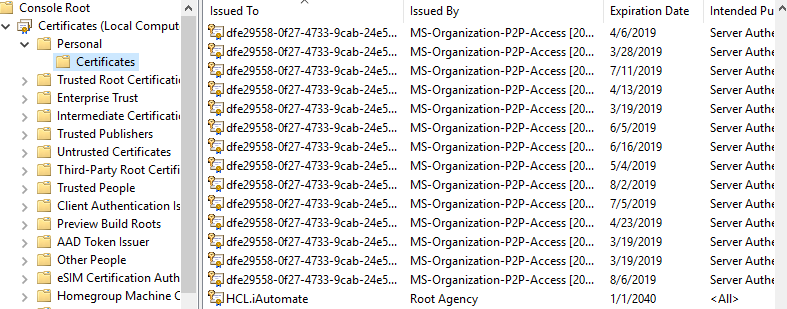
- In the list of certificates, find certificate HCLTech.iautomate.Web.
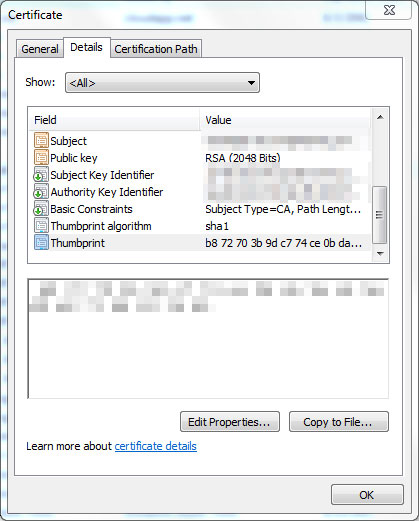
- Double-click the certificate to open the Certificate dialog box.
- Scroll through the list of fields and click Thumbprint to display the value.
Following changes are required in the underlying components:
Listener
To change the configuration of Listener from HTTP to HTTPS, please follow the below steps:
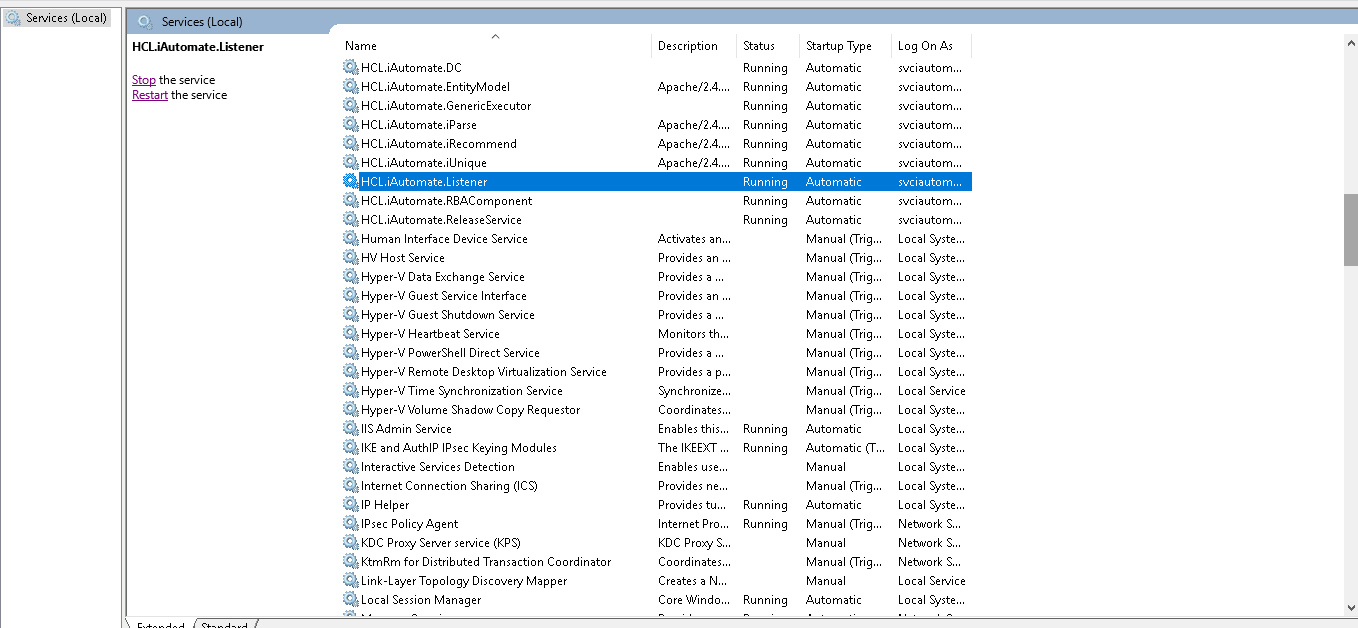
- Press Win+R and type services.msc.
.png)
- Click OK to open Windows Services.
.png)
- Search for HCL.iAutomate.Listener.
- Right-click HCL.iAutomate.Listener service and click Properties.
.png)
- Copy the value mentioned in Path to executable as shown in the image below.
.png)
- Open File Explorer and paste the copied path and press Enter to open the desired folder.
- Search for HCL.iAutomate.Listner.Service.Host config file and open it in a Notepad.

- Within the HCL.iAutomate.Listner.Service.Host config file, find the key URL and change its value from HTTP to HTTPS.
.png)
- Within the HCL.iAutomate.Listner.Service.Host config file, find the key ‘securityMode’ and change its value from 2 to 3.

- Within the HCL.iAutomate.Listner.Service.Host config file, find the key ‘IsSelfSigned’ and change its value from N to Y.
.png)
- Save the file for changes to be reflected.
- Open the Command Prompt as Administrator and run the following command.
netsh http add sslcert ipport=<ip>:<port on which service is running> appid={fa605232-f580-4d28-895e-3e021ffed82d} certhash="<Thumbprint of the certificate>"
Replace the < Thumbprint of the certificate> with the GUID identified earlier.
- Select HCL.iAutomate.Listener service and click Restart to restart the service.
Data Collector
To change the configuration of Data Collector from HTTP to HTTPS, please follow the below steps:
- Press Win+R and type services.msc.
.png)
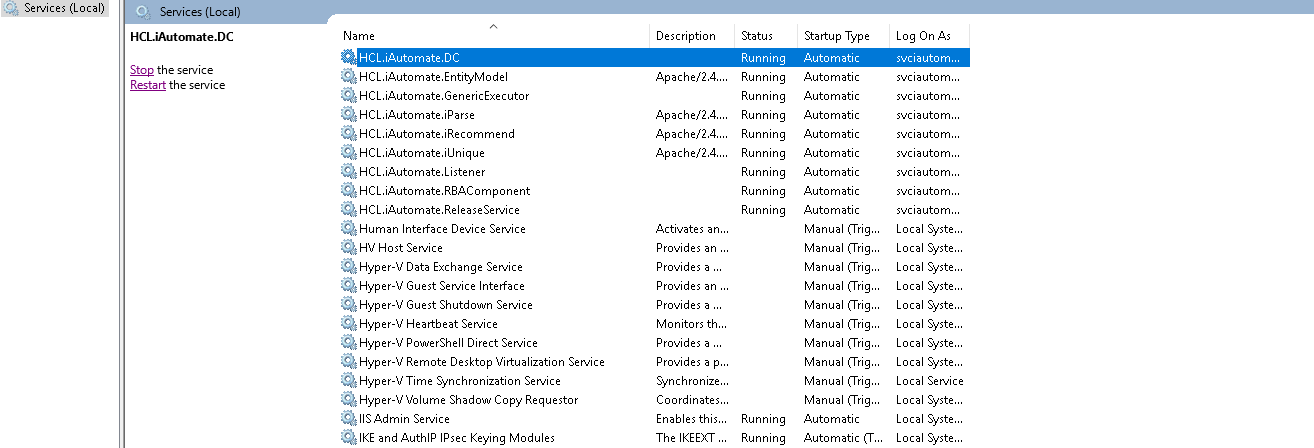
- Click OK to open Windows Services.
.png)
- Search for HCL.iAutomate.DC.
- Right-click HCL.iAutomate.DC service and click Properties.
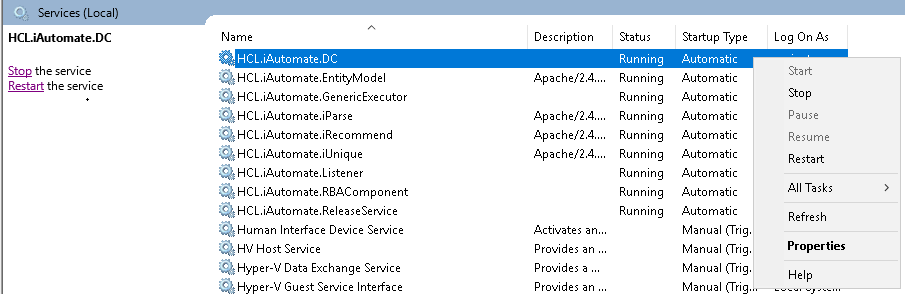
- Copy the value mentioned in ‘Path to executable’ as shown in the image below.
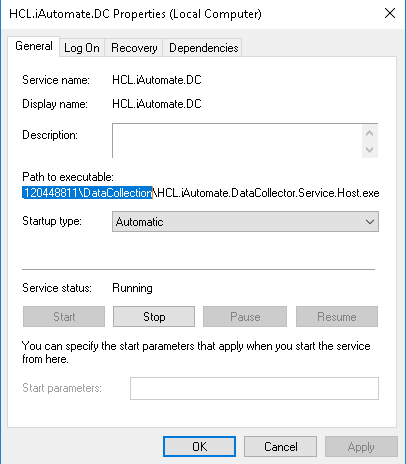
- Open File Explorer and paste the copied path and press Enter to open the desired folder.
- Search for HCL.iAutomate.DataCollector.Service.Host.exe config file and open it in a Notepad.

- Within the HCL.iAutomate.DataCollector.Service.Host.exe config file, find the key ‘ServiceHostURL’ and change its value from HTTP to HTTPS.

- Within the HCL.iAutomate.DataCollector.Service.Host.exe config file, find the key ‘securityMode’ and change its value from 2 to 3.
.png)
- Within the HCL.iAutomate.DataCollector.Service.Host.exe config file, find the key ‘IsSelfSigned’ and change its value from N to Y.
.png)

Figure 130 - Hosting Data Collector from HTTP to HTTPS (cont.)
- Save the file for changes to be reflected.
- Open the Command Prompt as Administrator and run the following command.
netsh http add sslcert ipport=<ip>:<port on which service is running> appid={dcd67c7b-c67a-4956-b4cc-6545ace1d2e9} certhash="<Thumbprint of the certificate>"
Replace the < Thumbprint of the certificate> with the GUID identified earlier.
- Select HCL.iAutomate.DC service and click Restart to restart the service.
Generic Service
To change the configuration of Generic Service from HTTP to HTTPS, please follow the below steps:
- Press Win+R and type services.msc.
.png)
- Click OK to open Windows Services.
.png)
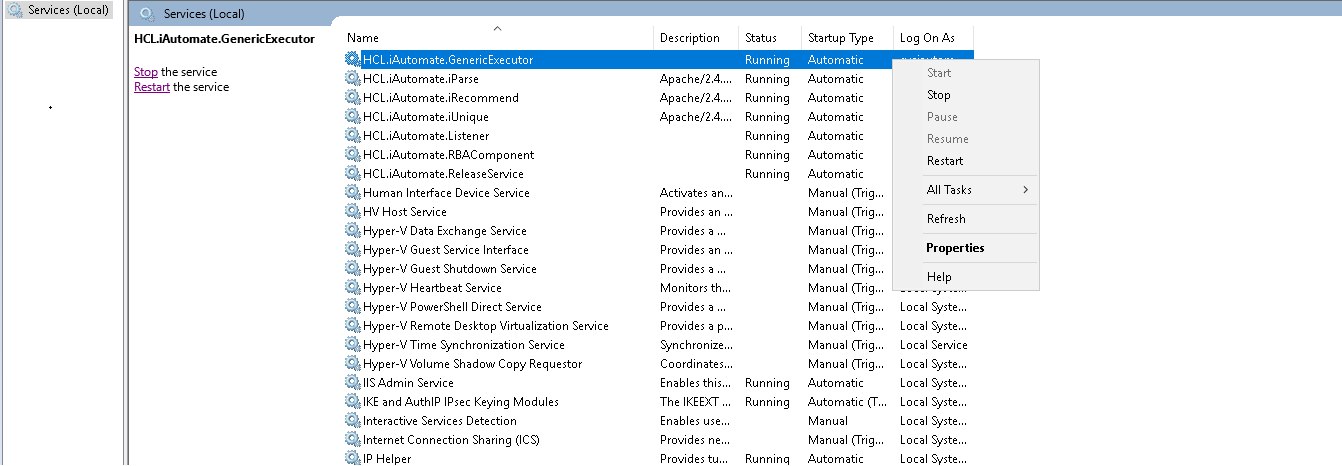
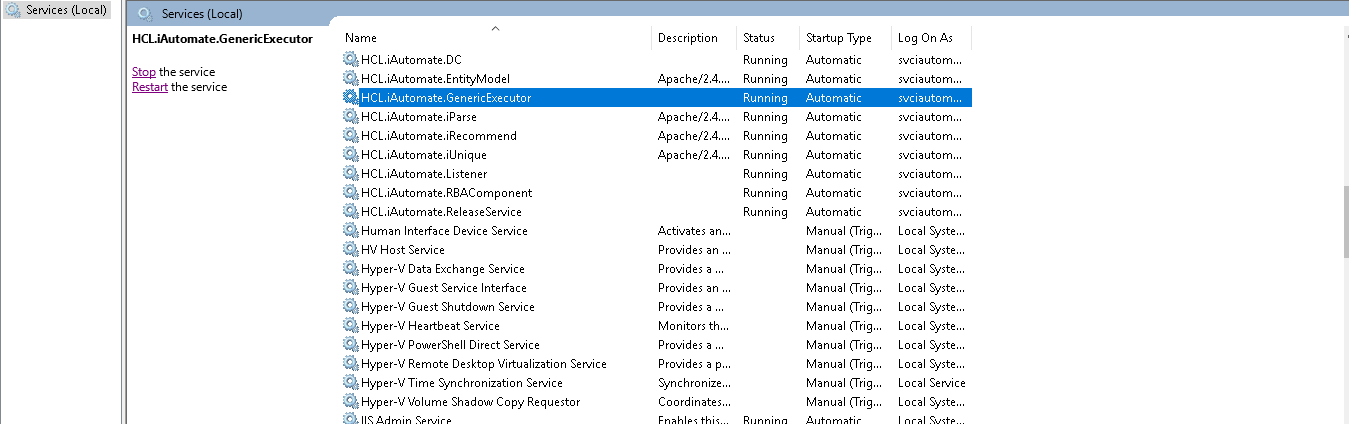
- Search for HCL.iAutomate.GenericExecutor.
- Right-click HCL.iAutomate.GenericExecutor service and click Properties.
- Copy the value mentioned in Path to executable as shown in the image below.
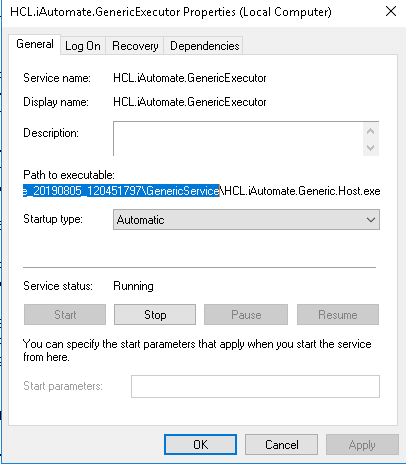
- Open File Explorer and then paste the copied path and press Enter to open the desired folder.
- Search for HCL.iAutomate.Generic.Host.exe config file and open it in a Notepad.

- Within the HCL.iAutomate.Generic.Host.exe config file, find the key ‘iAutomate.Generic.ServiceHostURL’’ and change its value from HTTP to HTTPS.

- Within the HCL.iAutomate.Generic.Host.exe config file, find the key ‘securityMode’ and change its value from 2 to 3.
.png)
- Within the HCL.iAutomate.Generic.Host.exe config file, find the key ‘IsSelfSigned’ and change its value from N to Y.
.png)
.png)
- Save the file for changes to be reflected.
- Open the Command Prompt as Administrator and run the following command.
netsh http add sslcert ipport=<ip>:<port on which service is running> appid={c60c3690-7b58-4c68-8590-e2fd061edd23} certhash="<Thumbprint of the certificate>"
Replace the < Thumbprint of the certificate> with the GUID identified earlier.
- Select HCL.iAutomate.GenericExecutor service and click Restart to restart the service.
RBA Component
To change the configuration of RBA Component from HTTP to HTTPS, please follow the below steps:
- Press Win+R and type services.msc.
.png)
- Click OK to open Windows Services.
.png)
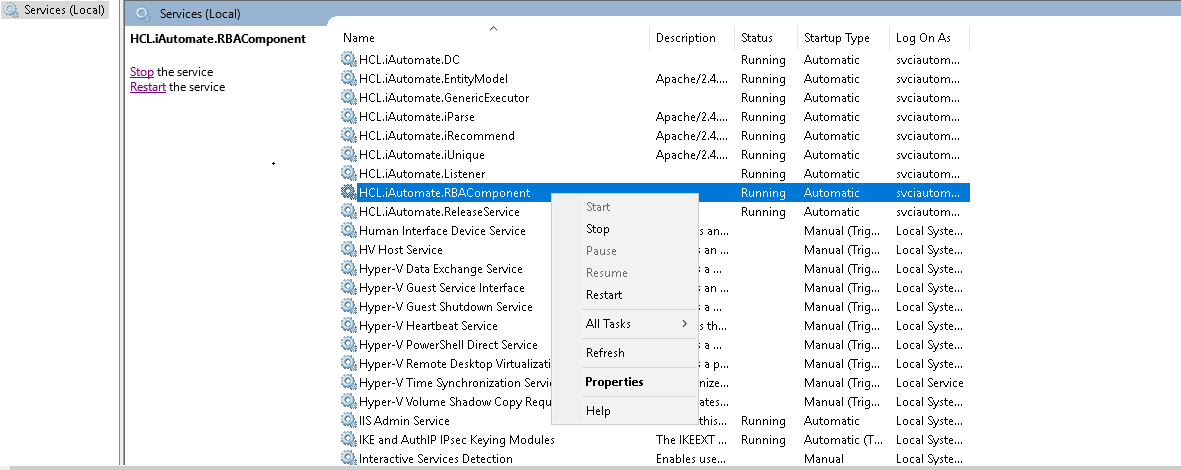
- Search for HCL.iAutomate.RBAComponent.
- Right-click HCL.iAutomate.RBAComponent service and click Properties.
- Copy the value mentioned in Path to executable as shown in the image below.
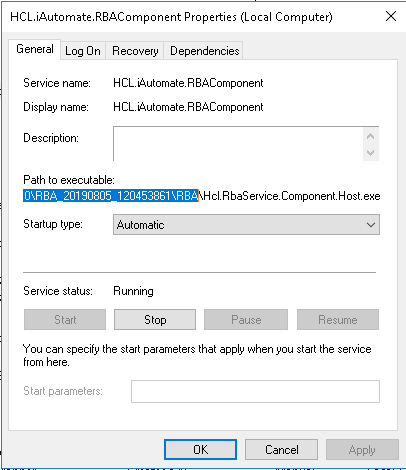
- Open File Explorer and then paste the copied path and press Enter to open the desired folder.
- Search for HCL.RbaService.Component.Host.exe config file and open it in a Notepad.

- Within the HCL.RbaService.Component.Host.exe config file, find the key ‘ServiceHostURL’ and change its value from HTTP to HTTPS.

- Within the HCL.RbaService.Component.Host.exe config file, find the key ‘securityMode’ and change its value from 2 to 3.
.png)
- Within the HCL.RbaService.Component.Host.exe config file, find the key ‘IsSelfSigned’ and change its value from N to Y.
.png)
.png)
- Save the file for changes to be reflected.
- Open the Command Prompt as Administrator and run the following command.
netsh http add sslcert ipport=<ip>:<port on which service is running> appid={11f43d84-3d5c-47cf-b29e-0dd38c0e8f85} certhash="<Thumbprint of the certificate>"
Replace the < Thumbprint of the certificate> with the GUID identified earlier.
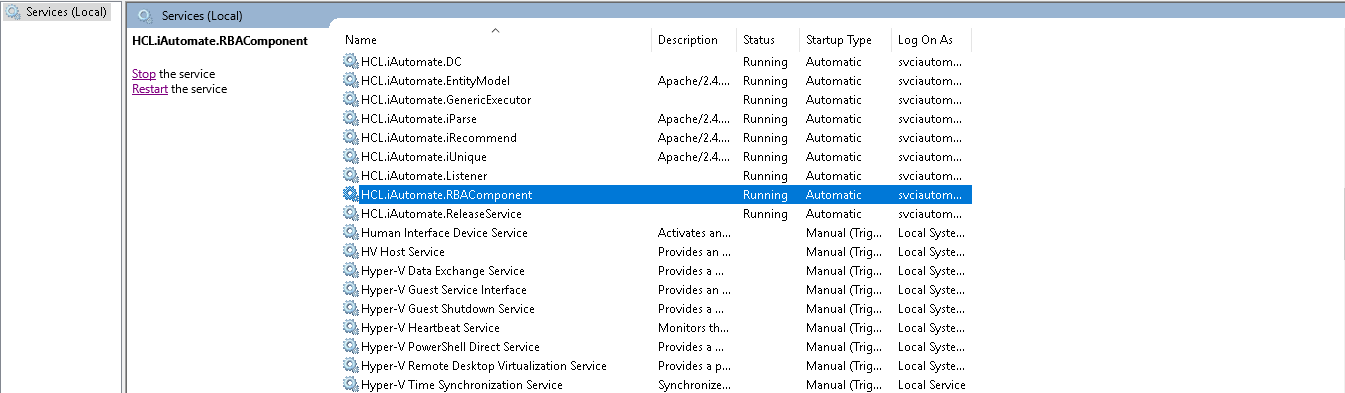
- Select HCL.iAutomate.RBAComponent service and click Restart to restart the service.
Release Service
To change the configuration of Release Service from HTTP to HTTPS, please follow the below steps:
- Press Win+R and type services.msc.
.png)
- Click OK to open Windows Services.
.png)
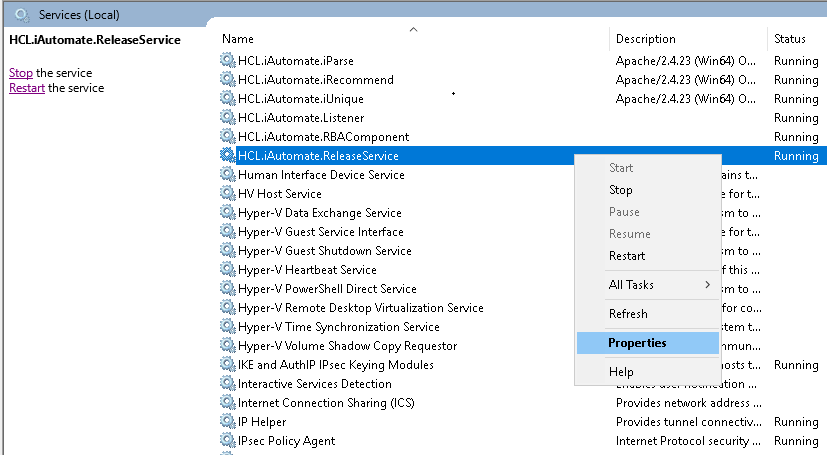
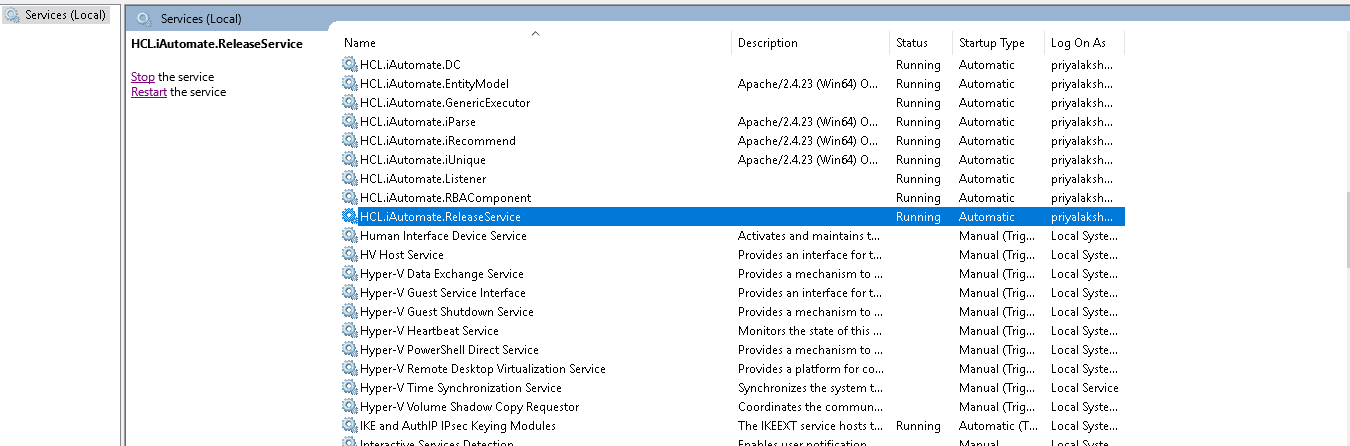
- Search for HCL.iAutomate.ReleaseService.
- Right-click HCL.iAutomate.ReleaseService service and click on Properties.
- Copy the value mentioned in Path to executable as shown in the image below.
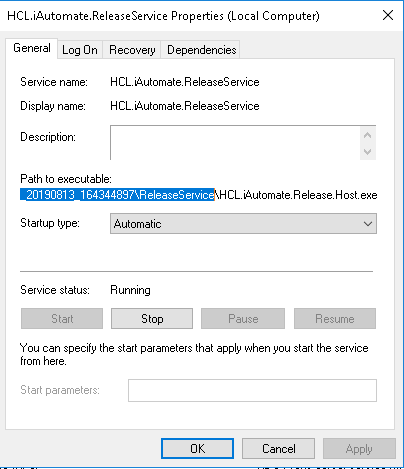
- Open File Explorer, then paste the copied path and press Enter to open the desired folder.
- Search for HCL.iAutomate.Release.Host.exe config file and open it in a Notepad.

- Within the HCL.iAutomate.Release.Host.exe config file, find the key ‘iAutomate.Release.ServiceHostURL’ and change its value from HTTP to HTTPS.

- Within the HCL.iAutomate.Release.Host.exe config file, find the key ‘securityMode’ and change its value from 2 to 3.
.png)
- Within the HCL.iAutomate.Release.Host.exe config file, find the key ‘IsSelfSigned’ and change its value from N to Y.
.png)
.png)
- Save the file for changes to be reflected.
- Open the Command Prompt as Administrator and run the following command.
netsh http add sslcert ipport=<ip>:<port on which service is running> appid={d32cb30c-7e1a-4549-a2e2-32bf01a1d345} certhash="<Thumbprint of the certificate>"
Replace the < Thumbprint of the certificate> with the GUID identified earlier.
- Select HCL.iAutomate.ReleaseService service and click Restart to restart the service.
AD Sync
To change the configuration of AD Sync from HTTP to HTTPS, please follow the below steps:
- Press Win+R and type services.msc.
.png)
-
- Click OK to open Windows Services.
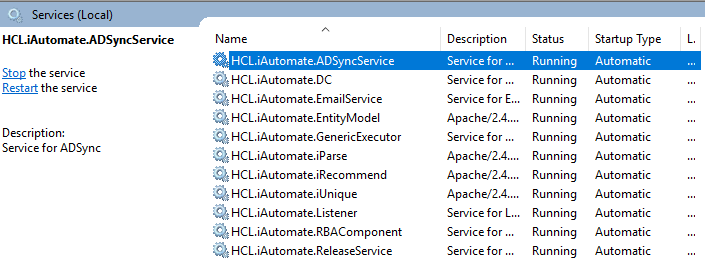
Figure 79. Figure 160 - Hosting AD Sync from HTTP to HTTPS (cont.) .png)
- Search for HCL.iAutomate.ADSyncService.
- Right Click HCL.iAutomate.ADSyncService service and click Properties.
Figure 80. Figure 161 - Hosting AD Sync from HTTP to HTTPS (cont.) 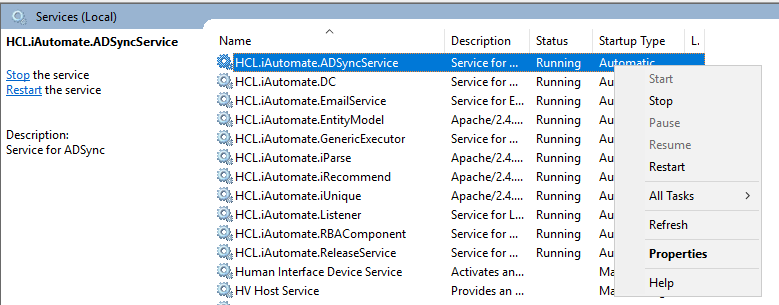
- Copy the value mentioned in ‘Path to executable’ as shown in the image below.
Figure 81. Figure 162 - Hosting AD Sync from HTTP to HTTPS (cont.) 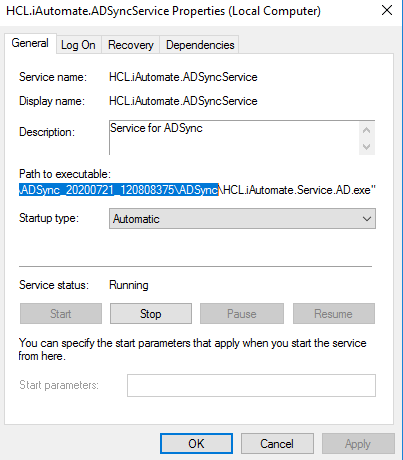
- Open File Explorer and paste the copied path and press Enter to open the desired folder.
- Search for HCL.iAutomate.Service.AD.exe config file and open it in a Notepad.
Figure 82. Figure 163 - Hosting AD Sync from HTTP to HTTPS (cont.) 
-
- Within the HCL.iAutomate.Service.AD.exe config file, find the key ‘ServiceHostURL’ and change its value from HTTP to HTTPS.
Figure 83. Figure 164 - Hosting AD Sync from HTTP to HTTPS (cont.) 
-
- Within the HCL.iAutomate.Service.AD.exe config file, find the key ‘securityMode’ and change its value from 2 to 3.
Figure 84. Figure 165 - Hosting AD Sync from HTTP to HTTPS (cont.) .png)
-
- Within the HCL.iAutomate.Service.AD.exe config file, find the key ‘IsSelfSigned’ and change its value from N to Y.
.png)
Figure 85. Figure 166 - Hosting AD Sync from HTTP to HTTPS (cont.) .png)
- Save the file for changes to be reflected.
- Open the command prompt as administrator and run the following command.
netsh http add sslcert ipport=<ip>:<port on which service is running> appid={8c00e29d-1a3e-439b-a449-7e26b64b9d27} certhash="<Thumbprint of the certificate>"
Replace the < Thumbprint of the certificate> with the GUID identified earlier.
- Select HCL.iAutomate.ADSyncService service and click Restart to restart the service.
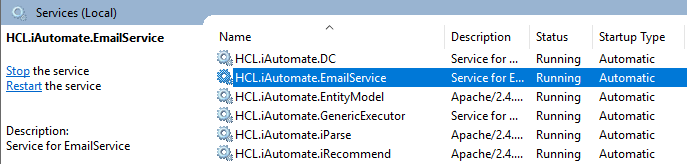
Email Service
To change the configuration of Email Service from HTTP to HTTPS, please follow the below steps:
- Press Win+R and type services.msc.
-
.png)
Figure 168 - Hosting Email Service from HTTP to HTTPS
- Click OK to open Windows Services.
Figure 87. Figure 169 - Hosting Email Service from HTTP to HTTPS (cont.) .png)
- Search for HCL.iAutomate.EmailService.
- Right click HCL.iAutomate.EmailService service and click Properties.
Figure 88. Figure 170 - Hosting Email Service from HTTP to HTTPS (cont.) 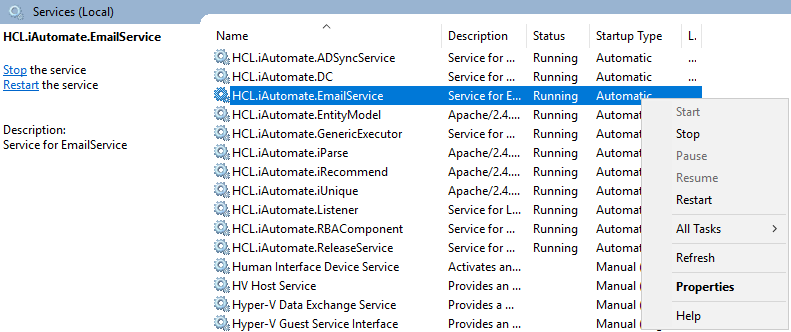
- Copy the value mentioned in ‘Path to executable’ as shown in the image below.
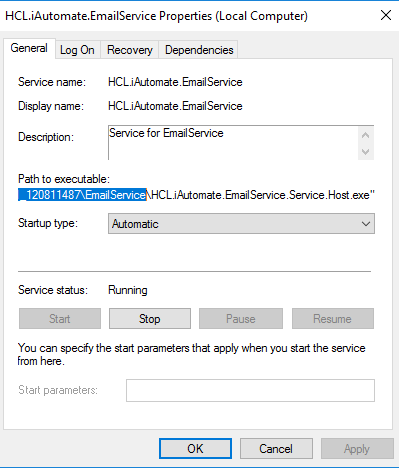
- Open File Explorer and paste the copied path and press Enter to open the desired folder.
- Search for HCL.iAutomate.EmailService.Service.Host.exe config file and open it in a Notepad.

- Within the HCL.iAutomate.EmailService.Service.Host.exe config file, find the key ‘ServiceHostURL’ and change its value from HTTP to HTTPS.

- Within HCL.iAutomate.EmailService.Service.Host.exe config file, find the key ‘securityMode’ and change its value from 2 to 3.
.png)
- Within the HCL.iAutomate.EmailService.Service.Host.exe config file, find the key ‘IsSelfSigned’ and change its value from N to Y.
.png)
.png)
- Save the file for changes to be reflected.
- Open the command prompt as administrator and run the following command.
netsh http add sslcert ipport=<ip>:<port on which service is running> appid={21fa9088-0c69-479e-8fdc-a81eb836e264} certhash="<Thumbprint of the certificate>"
Replace the < Thumbprint of the certificate> with the GUID identified earlier.
- Select HCL.iAutomate.EmailService service service and click Restart to restart the service.
Configuration Changes via GUI
To change the configuration for various components via GUI from HTTP to HTTPS, please follow the below steps:
- Login to BigFix Runbook AI using the Super Admin credentials.
- Roll-over to the Advance Configuration and click Product Configuration.
- Select Component Name as Web API.
- Change the Load Balancer URL from HTTP to HTTPS.

- Click Update to save the changes.
- Select Component Name as ‘Data Collector’.
- Change the Load Balancer URL from HTTP to HTTPS.

- Click Update to save the changes.
- Select Component Name as ‘Generic Service’.
- Change the Load Balancer URL from HTTP to HTTPS.

- Click Update to save the changes.
- Select Component Name as ‘Release Service’.
- Change the Load Balancer URL from HTTP to HTTPS.

- Click Update to save the changes.
- Select Component Name as ‘RBA Service’.
- Change the Load Balancer URL from HTTP to HTTPS.

- Click Update to save the changes.
- Select Component Name as ‘Active Directory’.
- Change the Load Balancer URL from HTTP to HTTPS.

- Click Update to save the changes.
- Select Component Name as ‘Email Service’.
- Change the Load Balancer URL from HTTP to HTTPS.

- Click Update to save the changes
Conclusion
After the conclusion of this exercise, you will have a thorough understanding of deployment of BigFix Runbook AI components in a secure mode.
Now, let’s discuss the configuration of BigFix Runbook AI in the next module.
Related Documentation
BigFix Runbook AI Prerequisites Guide
BigFix Runbook AI Installation