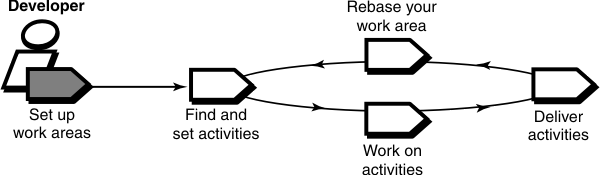
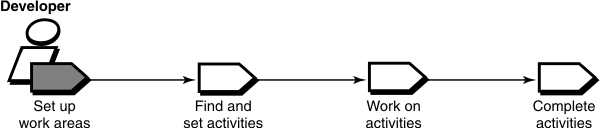
Workflow for setting up work areas
To contribute work to a UCM project, you must first set up your work areas.
Setting up work areas
To set up work areas for a UCM project that uses multiple streams, you join a project and create your work areas: a development area for working on activities in isolation and an integration area for testing the activities you deliver. Each work area consists of a view and a stream.
If you work in a single-stream project, you set up only one work area: a view attached to an integration stream.
On the Windows® system, you can customize your HCL VersionVault Windows Explorer environment.
- Adjusting your umask (Linux and UNIX only)
- Starting the Join Project Wizard
- Choosing a project
- Verifying stream names
- Setting up views
- Choosing components to load in to snapshot views
- Accessing your development view
About setting up work areas in a single-stream project
The tasks that you perform while setting up work areas in a single-stream project are similar to those for a multiple-stream project. However, there are a few differences in the details.
- You do not verify stream names.
You cannot create development streams in a single-stream project. Therefore, you create only one view that is attached to the integration stream, the only stream in the project.
- You create only an integration view when you run the Join Project wizard.
In single-stream projects, the integration stream is the sole project work area. Each developer has a view (an integration view) in which to work privately. Your integration view is attached to the integration stream, the shared work area for the project.
- You access your integration view rather than your development view.
In a single-stream project, you have no development views. However, to access your integration view, you follow the same steps as you would to access development views.
Associating additional views with a development stream
To maintain the isolated nature of a development work area in a multiple-stream project, you usually associate only a single view with a single development stream. However, if you and a team member need to develop a single activity or set of closely related activities together, each of you might need to create a separate view and associate it with a single development stream. You can attach a new view to an existing development stream.
Check with your project manager to determine whether associating multiple views with a single development stream is the best way to complete your task.