In Architecture School create
a service component - named SC1. Then, within SC1,
create an IBM CICS region - named CR1.
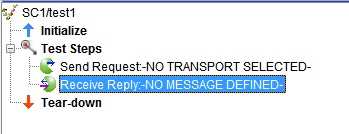
In Test Factory, under service
component SC1, create a new test, named test1.
Add a Send Request action
to the Test Steps phase of the test. A Receive
Reply action is also created automatically.
Open the Send Request action
for editing.
For Transport, browse
to CR1.
For Message Type, Commarea is selected
automatically.
Select the data row and double-click
the Value column. Enter the following string: F1F0F0F0F0F0F0F0F0F2F3
This
string represents compressed data that has not yet been formatted
by a PL/I source file schema.
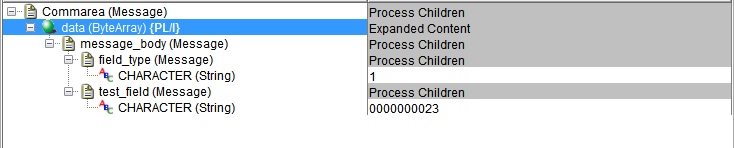
Right-click the data element
and select Schema.
In the Schema Selector window, Schema
Type field, select Mainframe > PL/I and select the schema that
you imported into the HCL OneTest™ API Schema
Library.
In the pane below the Schema Type, select a copybook and
root.
This example uses a PL/I source with a char(1) and
a char(10) variable. A sample message is displayed.
In the Formatter Properties section,
select a value for the Encoding field.
In this example, the default values are acceptable for the other
fields.
Accept the default values for the Content Options section
and click OK.
Results
The schema is applied to the original message, expanding the data field
as defined in the schema.