Configuring Traveler trial
The HCL Domino® 12.0 trial server comes with HCL Traveler 12.0 installed on it. Complete the following steps if you want to configure Traveler.
Before you begin
About this task
- HCL Verse for iOS requires a 3rd party TLS certificate. This is the default configuration described in this trial documentation.
- This trial version cannot be configured to use an enterprise database or be joined to a high availability pool.
Procedure
-
Set the external URL for the Traveler server:
-
In the External Server URL field, change the
host name in the default server URL to the fully qualified host name of
the docker host system, which is the host name that is registered with
the DNS. Also be sure that the URL includes the HTTPS used for TLS.
The following example shows a URL for use the server Domino/Renovations with the docker host name
docker.renovations.com: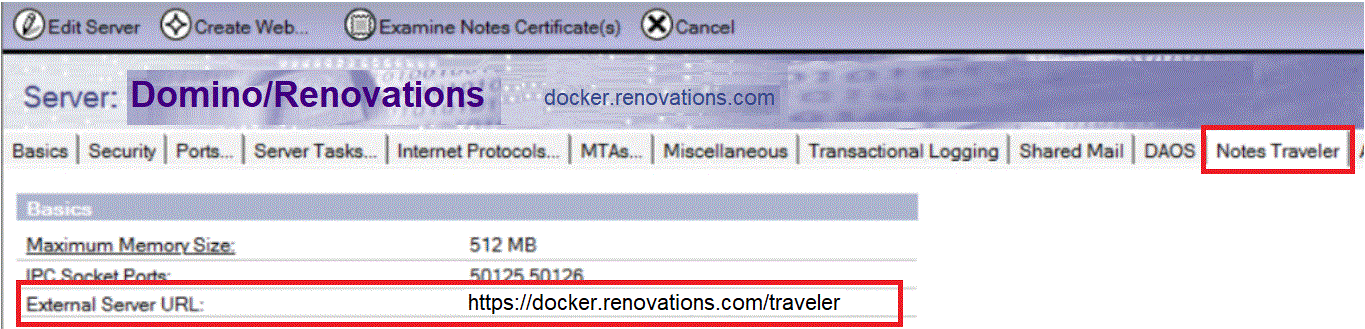
-
In the External Server URL field, change the
host name in the default server URL to the fully qualified host name of
the docker host system, which is the host name that is registered with
the DNS. Also be sure that the URL includes the HTTPS used for TLS.
-
To ensure that Traveler starts automatically any time the Domino server is
started, use the following Domino console commands to add Traveler to the
ServerTasks list in the Domino notes.ini file:
-
Show the current list of tasks:
The output can vary depending on configuration but might look like this:show config servertasks
-
Show the current list of tasks again to verify that Traveler is
added:
For example:show config servertasks
-
Show the current list of tasks:
- If you haven’t already, register some users. Ensure that the internet password is set. The process of registering users for Traveler use is similar to registering users for Verse and iNotes. See the topic Registering iNotes users.
-
Issue the following Domino console command to restart the server:
restart server -
Validate Traveler user access. Open a browser and log in to the Traveler
external URL configured in Step 1, for example,
https://docker.renovations.com/traveler. Log in using a user’s email address and internet password. -
Validate Traveler administrator access. Open a browser and using the email
address and internet password of user with the Administrator role, log in to
https://docker.renovations.com/LotusTraveler.nsf. Until a device has contacted the server, the Traveler Administrator views are empty.
What to do next
Client setup
You are now ready to set up a client to connect to the trial Traveler server. Traveler supports the Apple iOS Mail client, and the HCL Verse mobile clients for both Android and iOS.
From a
device, open the device browser and log in to the Traveler external URL configured
in Step 1, for example, https://docker.renovations.com/traveler.
The Traveler home page opens. The page provides links to download the HCL Verse clients, from the Google Play store for Android and from the Apple application store for iOS. For the Apple iOS Mail client, the home page provides an option to generate the Traveler mail profile on the device.
/traveler at the
end.