Installing the Unica Discover module for Digital Experience integration
Learn how to install the Unica Discover module for HCL Digital Experience integration.
Prerequisites
- HCL Utica Discover
- HCL Digital Experience 9.5 Container Update CF192 and later
- Option 1 – Integration without a proxy
For this option, you set up a theme module that uses a JavaScript file that posts all the needed data on an HCL DX page to Unica Discover.
- Option 2 – Integration using a proxy
For this option, a proxy between the HCL Digital Experience and Unica Discover servers is established. This uses the HCL DX Discover.ear as well as the additional theme module. You also need to set up a proxy in HCL Digital Experience, follow the instructions in the HCL Digital Experience Help Center topic: Outbound HTTP connection.
Install the HCL Discover.ear file
You would install the HCL DX Discover.ear only if you want to set up a proxy between HCL DX and Unica Discover. Follow these steps to install the HCL Discover.ear file.
- From an HCL Digital Experience 9.5 Container Update CF192 and later, get the Discover.ear file from the PortalServer/doc/discover folder and install it using the HCL Digital Experience WebSphere Application Server console. The Unica Discover.ear file contains the application that installs the DiscoverUIPost.JSP file required by Unica Discover for the proxy architecture.
- After getting the Discover.ear file, upload the file
and install it using the WebSphere Application Server console:
- Navigate to the WebSphere Application Server console.
- Navigate to .
- Click install, and select and open the
Discover.ear file. Follow the prompts to
complete the installation.
Figure 1. Select and install the HCL DX Discover.ear file 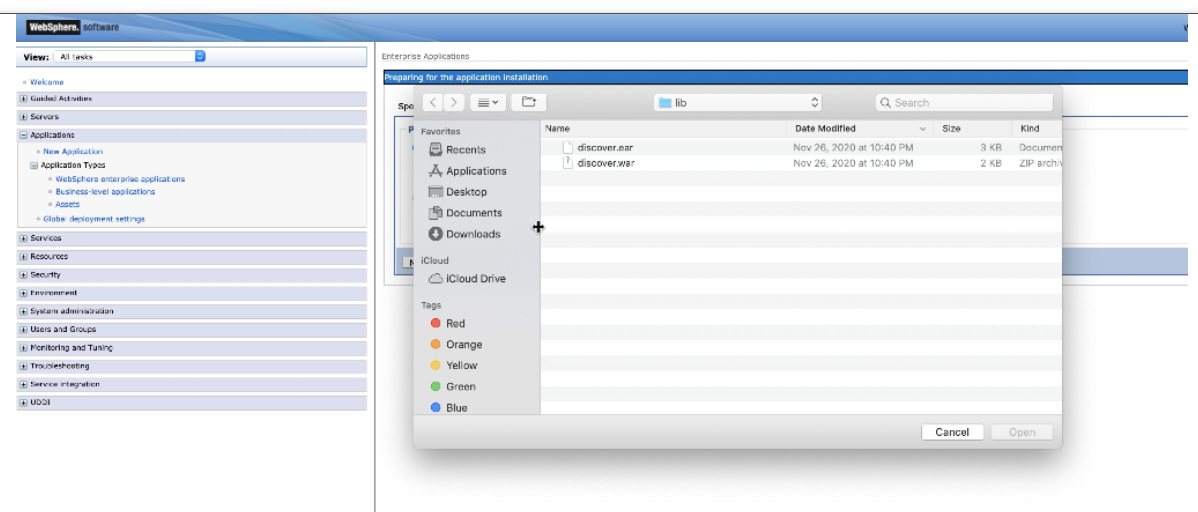
- When completed, select the Discover module and start it from the
WebSphere Application Server console.
Figure 2. Select and start the Discover module from the administration panel 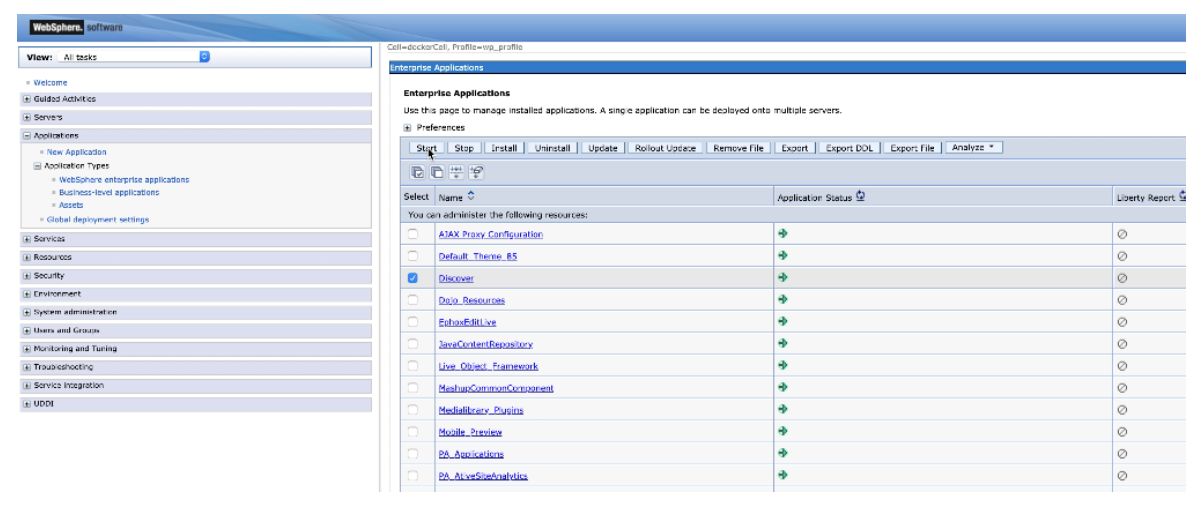
Enable HCL Unica Discover integration in the Digital Experience Theme
- Copy the discover and pako simple modules
from PortalServer_root/doc/Discover folder to the
theme modules. For WebDAV-based themes:
Mycontenthandler/dav/fs-type1/theme/{custom-theme]/modulesExample:
Figure 3. Copy the Discover integration modules to the DX theme modules 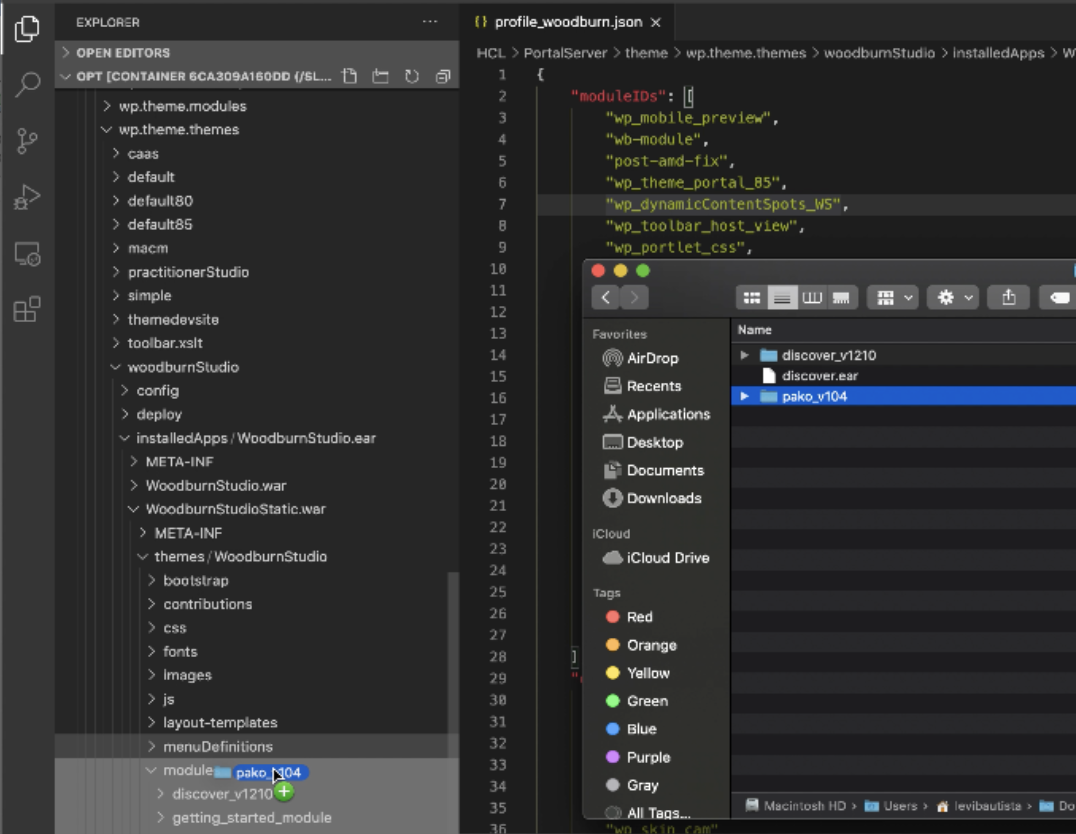
For WAR-based themes:
Include it in the WAR file. Restart the server after installation.
- After copying the folder with the JS files, update the Theme profile JSON
file as follows:Add the
Unica Discover_[versionnumber]inmodulesIDs. It should be the first item. You can find the Unica Discover release version number by finding theDiscover_v.xxmodule in the PortalServer/doc/Discover folder.- Tip: Open the Discover.js file and
search for
“getLibraryVersion”.
Figure 4. Add the Unica Discover version number to the DX Theme profile 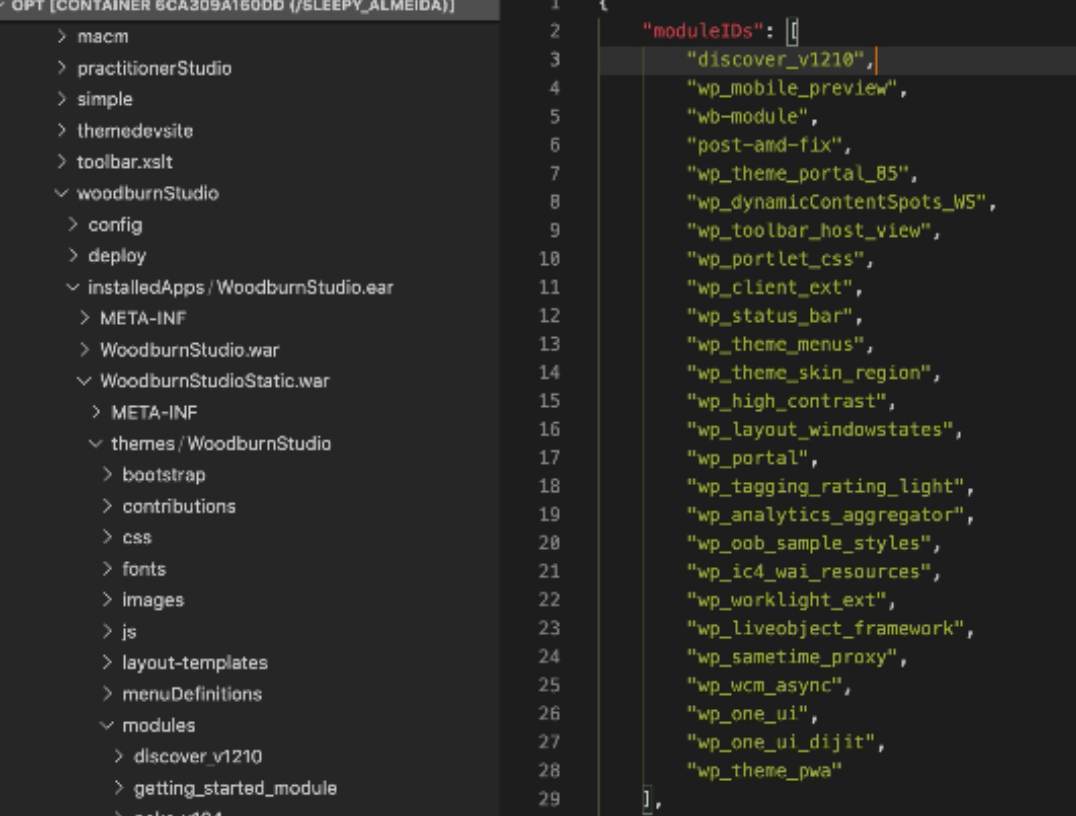
- Tip: Open the Discover.js file and
search for
- After adding the HCL Unica Discover version number ID to the profile JSON
file, proceed to invalidate the theme cache.
Go to the Practitioner Studio menu and navigate to page in Practitioner Studio as shown below. Select the Click to invalidate link under Invalidate Cache.
Figure 5. Invalidate the Theme Cache using Practitioner Studio 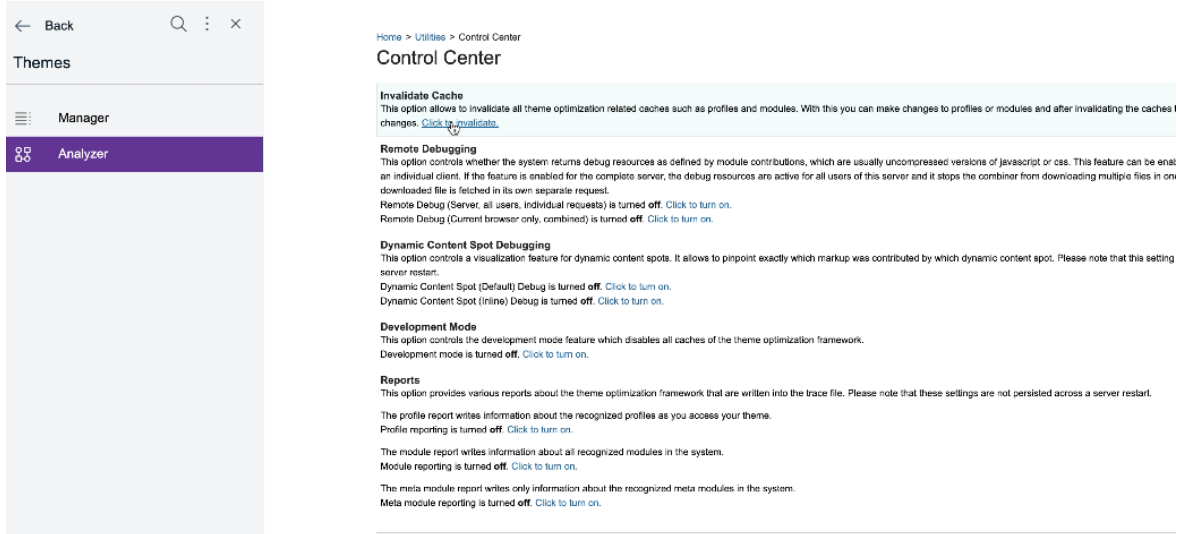
Troubleshooting
- After you execute the Invalidate Cache step outlined in the previous section, proceed to turn on Remote Debugging. Refer to the previous figure example for the Remote Debugging command interface.
- Go to the HCL Digital Experience Theme and open a Google Chrome browser
Network tab.Example:
Figure 6. Open a browser Network tab to view activity 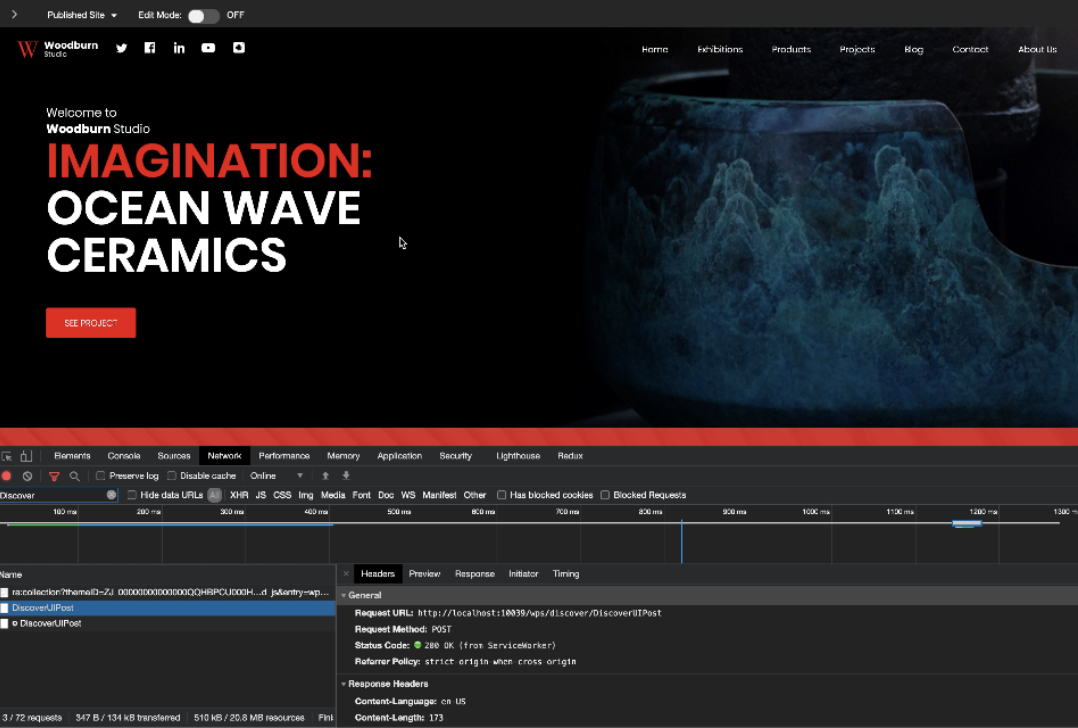
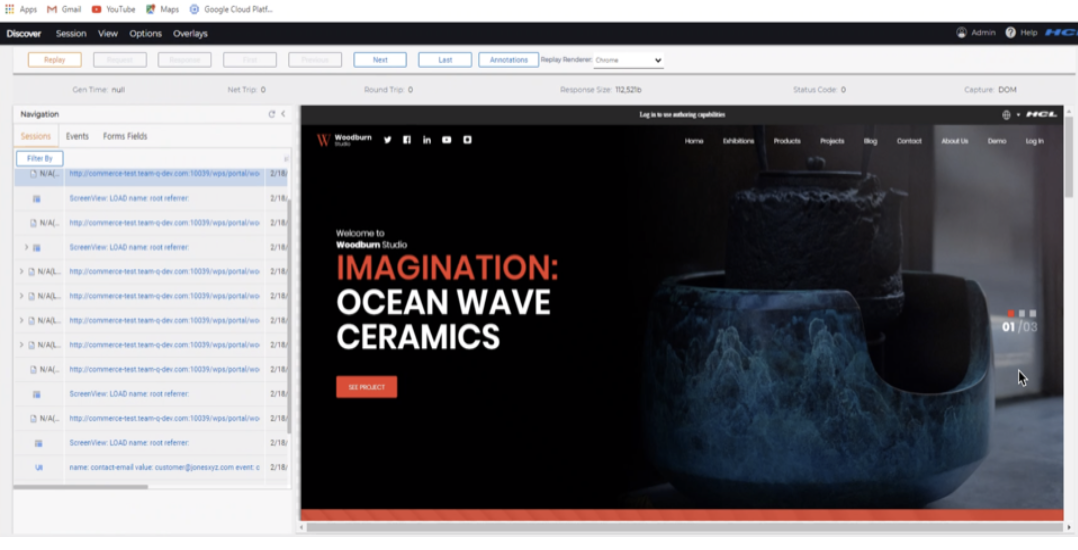
Any event or DOM changes made sends a network request to the DiscoverUIPost.jsp (if using proxy) or the configured endpoint in the Discover.js. This means the HCL DX Discover module is installed successfully and is sending data to the configured endpoint.
Additional Setup Considerations
Additional information and modifications to the HCL Digital Experience Discover.js file may be required depending on the environment setup for the HCL DX site and the Unica Discover server communications.
As noted in Option 2, for example, you may need to add a proxy in the HCL DX environment to connect to the Unica Discover server. To set up a proxy in HCL Digital Experience, follow the instructions in the HCL Digital Experience Help Center topic: Outbound HTTP connection.
Additional configuration for appropriate HCL Unica Discover capture and replay may also be required.
See the HCL Unica Discover Help Center for information on Unica Discover services, including session replay to assess the effectiveness of your DX site pages with end user audiences.