Tunable Parameters in the setup of NiFi and Elasticsearch
How you can modify the values for the tunable parameters, and some default values and how they can be improved in different circumstances.
System resources, memory footprint, and CPU allocation
The environment (recommended or minimal) will constitute of several nodes that will host the NiFi and Elasticsearch pods. In general, you will have after the initial installation, three pods for Elasticsearch and one NiFi.
In the minimal configuration, each of the pods is allocated six vCPUs and 10GB of memory.
In the recommended configuration, each of the pods is allocated sixteen vCPUs and a minimum of sixteen GB of memory.
Adjustment or increase of the allocated resources is possible. In these cases, however, additional testing to validate such configuration changes is nessessary, to ensure stability and operability.
Disk space per node
The amount of disk space you require is strongly dependent on the size of your index. Since this varies widely from installation to installation, there is no single recommended figure. To estimate, consider that an index of one million catalog items running on the recommended system configuration generates an index about six gigabytes in size.
This number does not reflect your actual requirements, however. Index files are dated and with time will accumulate on the disk. As a general rule, provide at least ten times the disk space of the anticipated index size to reflect this variability, and clean up old index files on a daily basis. In the case of the six gigabyte index, this would mean allocating at least sixty gigabytes and running a regular job to delete stale files.
NiFi
The processing speed of the data set, and the resulting speed of the search index creation is the result of the throughput one can achieve in the NiFi and Elasticsearch cluster. There are several parameters that would improve and optimize the throughput for a given hardware footprint; NiFi processors threads and bucket size.
Threads
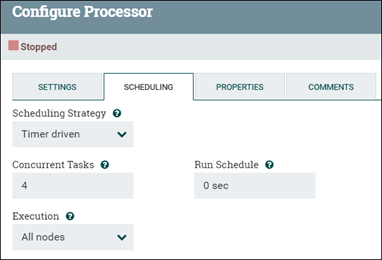
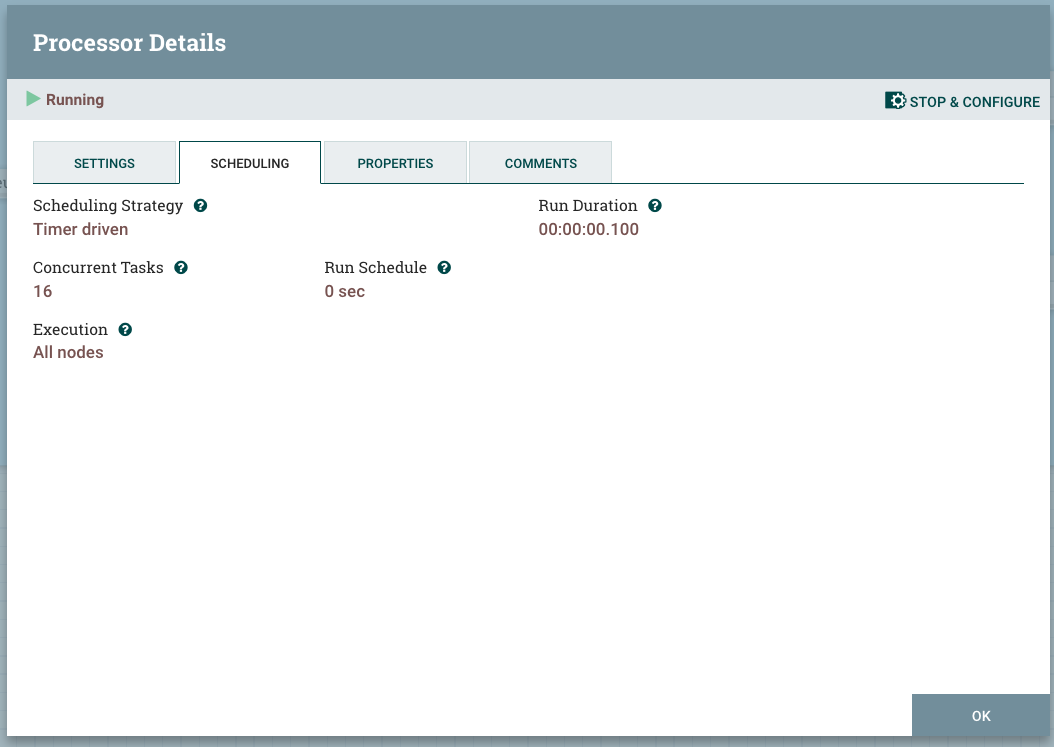
The default processor runs on a single thread, processing just one flow file at a time. If you use concurrent processing, the number of concurrent tasks that it can do can be adjusted. Set the number of threads for the process group by changing the processor Concurrent Tasks value (under Processor configuration or SCHEDULING tab).
When the processor can process flow files at the same rate as they come, the Concurrent Tasks value is ideal, preventing large pileups of flow files in the processor's wait queue.
Additional threads increase the processor bandwidth by the factor of the number of threads, if the processor is doing computational processing (that is, you can experience linear scaling). In the case of the I/O operations, the processor will experience some improvement that would start to diminish after certain level of threads is set (such as nonlinear scalability that would end in saturation).
In the case of the NLP Processor, the processor is purely computational, and the thread limit is considered to be the same number of vCPUs that are available for the NiFi Pod.
Bucket size
Bucket size (scroll.bucket.size) is another parameter you can change to improve a processor bandwidth. It changes the size of the flowfile that is processed. By increasing the bucket size you are increasing the size of data that will be processed by a single processor as a group.
Bucket size changes are a bit more difficult to implement. The location of the variable is on the second level parameters of the processor group.
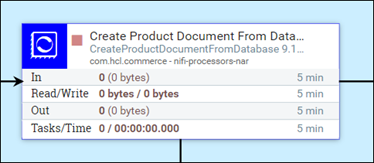
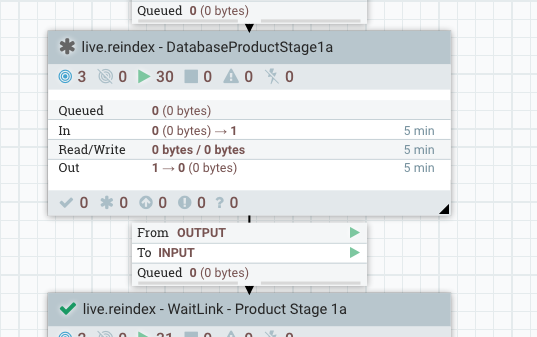
For example, for DataBaseProductStage1a:
The top level appears like this:
Drill down one level, right-click on Create Product Document and select variables.
The Bucket Size is optimal when you see that the flow file is easily processed through the system (including Elasticsearch upload). Increasing the size (number of documents in the flow file) increases the throughput. However, when increased to very high size, the throughput tapers off and gradually decreases. Simultaneously, the resources requirements of the system (NiFi and Elasticsearch) increase, leading to lower throughput.
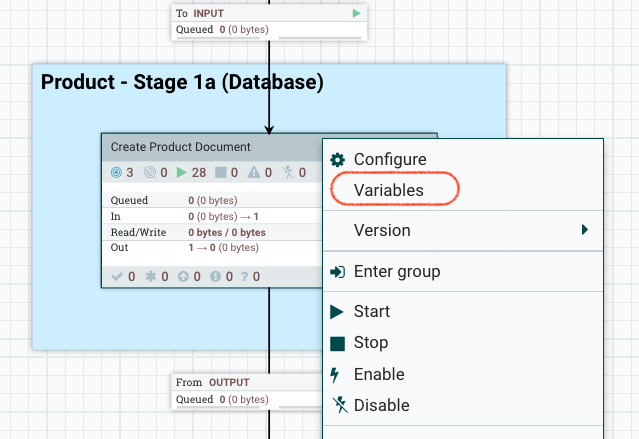
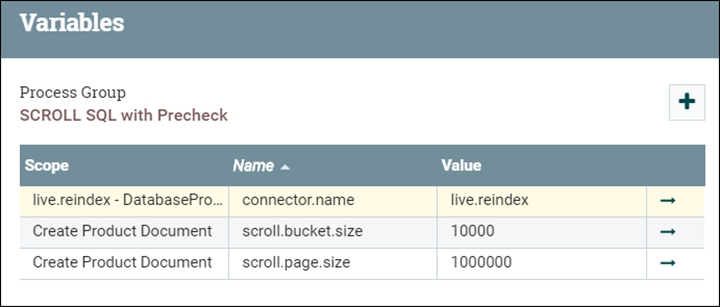
The Variables window opens. Here you can change the bucket size value.
Scroll page size (scroll.page.size)
- scroll.page.size
- The scroll.page.size parameter contains the number of rows fetched from database by the SQL. SQL runs several times (once with each page turn) if the retrieved row count is smaller than the total row count in the table.
When the time it takes to process the data is evenly matched with the time it takes for the next SQL scroll to receive its data, the scroll settings are optimal. This improvement eliminates needless processing and I/O time. Additional factors to consider include the memory space available in NiFi to hold the result set while parsing and splitting this into flowfiles, and the total number of flow files that would be created in NiFi at once. If the scroll page size is larger, you should expect an impact on NiFi operations. When you reach this limit, you can increase the resources allocated to NiFi, or limit the scroll page size to reduce the impact to performance.
- The scroll.page.size is the number of documents that are fetched from Elasticsearch. If the number is too small, NiFi must make more connections to Elasticsearch.
- The scroll.bucket.size is the number of documents included from the fetched data that are processed in each bucket. The bucket.size determines the size of the flow files (and the number of documents that are contained within each file).
LISTAGG() and Serialize
In the ingest pipeline, most SQLs are using the aggregate to combine multiple rows together. Due to a limitation of the database (especially with Oracle), and the size of the data, LISTAGG can exceed the limits in place during the live.reindex and auth.reindex index builds. To resolve the issue, you can disable the LISTAGG.
You can set LISTAGG locally or globally. To set it locally, change the attribute flow.database.listagg.
UpdateAttribute processors, which
update the attributes of the flow files. For example, if you want to set
flow.database.listagg="false" for AttributeStage1b
in auth.reindex, set it in the Properties as
follows: .- Go to .
- Double-click on the Define scroll offset and page size processor.
- Click STOP & CONFIGURE in the upper right-hand corner of the processor to stop the processor.
- Click the Properties tab of the processor and
then click the + icon to add the
flow.database.listaggproperty and set its value tofalse. - Restart the processor.
 For versions 9.1.11 and up, use the following
endpoint:
For versions 9.1.11 and up, use the following
endpoint:
https://data-query/search/resources/api/v2/configuration?nodeName=ingest&envType=auth{
"global": {
"connector": [
{
"name": "attribute",
"property": [
{
"name": "flow.database.listagg",
"value": "false"
}
]
}
]
}
}You can make make global changes using Ingest profiles. For more
information and an example of how to change LISTAGG using an Ingest profile, see
Ingest configuration via REST.
When the list aggregate is disabled, the SQL proccess will return more rows and NiFi will use the Serialize process to handle the returned data. In the case, the duration for processing the data will be much longer. To account for this, the page.size and bucket.size for the SQL process, and thread number for the Serialize process must be increased.
Elasticsearch
The following section will discuss a few improvements that can be made to the Elasticsearch configuration to increase the overall throughput and speed of index building.
- Indices Refresh Rate
- By default, Elasticsearch periodically refreshes indices every second,
but only on indices that have received one search request or more in the
last 30 seconds. The HCL Commerce index schema is setting this
interval to 10 sec by default.
However, if it is viable, disable this behavior by setting its value to -1. If disabling this is not viable, a longer time interval, such as 60 seconds will also make an impact. By increasing the refresh rate to longer periods, the updated documents from the memory buffer are less frequently written into the indices (and eventually written to disk). This improves the processing speed on Elasticsearch, as fewer refresh events will result in more resource bandwidth to receive data. In addition, bulk updates to the file system are always more desirable. On the other side of the equation, the longer refresh intervals will cause the memory buffer to inflate while trying to accommodate for all of the incoming data.
For more information on the index refesh interval setting, see the Elasticsearch documentation.
To set a custom value:Ensure that you stop the processor. Select and edit the json object, replacing the refresh_interval value with the value that you want.
- Indexing Buffer Sizes
-
Increasing indexing buffer sizes will help to speed up the indexing operation and will improve the overall index building speed.
The value is set in the indices.memory.index_buffer_size variable and is most commonly set to 10% of the heap size by default.
Set this value higher, to 20% of the heap size.
- Elasticsearch funnel configuration
- The Elasticsearch cluster has complicated funnel requirements. In
general, for ordinary use the Elasticsearch cluster will determine the
initial sizes for the threads on each server according to the number of
available CPUs for that pod. In simple terms, if the pod is configured
to allow up to six CPUs, the worker threads will be constrained at the
same number as well.
However, this may not be sufficient when dealing with large catalogs and large bucketsizes. In the case of the index build, a bulk update request is issued from NiFi to Elasticsearch. The Elasticsearch master node receives the request body, which is comprised of multiple documents, and for each document, it determines the shard it should be stored in. A connection is opened to the appropriate node/shard so that the document can be processed.
Thus, the bulk update ends up using multiple connections, and it is quite possible to run out of threads as well as connections. If Elasticsearch runs out of connections, a response code,
429, is returned. This will interrupt the index build process, and the index build fails.To accommodate the needs for more connections and threads, the Elasticsearch server can be configured to start with more threads and a deeper connection queue on each node. The following file describes the key Elasticsearch configurations (contents are set within thees-config.yamlconfiguration file):replicas: 3 minimumMasterNodes: 2 ingress: enabled: true path: / hosts: - es.andon.svt.hcl.com tls: [] volumeClaimTemplate: accessModes: [ "ReadWriteOnce" ] storageClassName: local-storage-es resources: requests: storage: 15Gi esJavaOpts: "-Xmx12g -Xms12g" resources: requests: cpu: 2 memory: "14Gi" limits: cpu: 14 memory: "14Gi" esConfig: elasticsearch.yml: | indices.fielddata.cache.size: "20%" indices.queries.cache.size: "30%" indices.memory.index_buffer_size: "20%" node.processors: 12 thread_pool: search: size: 100 queue_size: 10000 min_queue_size: 100 max_queue_size: 10000 auto_queue_frame_size: 10000 target_response_time: 30s thread_pool: write: size: 100 queue_size: 10000The file defines two threadpools, write and search.
For each threadpool we can define the following parameters:- size – the number of worker threads per node.
- queue_size – the number of connections that can be received and tracked in the connection queue
- min_queue_size – the minimum size of the connection queue.
- max_queue_size – the maximum queue size, beyond which Elasticsearch will send the 429 response code.
The actual values must be specific to the environment and its configuration.
Increasing the worker threads to 100, and the connections pool to 10000 will suffice for catalogs of 1M items on an Elasticsearch cluster of 3 nodes and 3 shards with the default configurations in place.
To apply the changes, the Elasticsearch cluster should be reinstalled using the new configuration file.
The following steps describe the process:- Delete the existing Elasticsearch
cluster.
helm delete -n elastic elasticsearch - Reinstall the Elasticsearch cluster using the modified
configuration file.
helm install elasticsearch elastic/elasticsearch -f es_es_config.yaml -n elastic
Sharding
- An index shard should not not exceed 40% of the total available storage of its node cluster.
- An index shard size should not exceed 50 GB; generally the index performs best when its size is less than 25 GB per shard.
- The document counts and sizes across shards should be similar.