In this lesson, you learn how to expose an XML schema as
a Web service. To expose the XML schemas you created in the previous
two lessons, you must define the WSDL for the Web service. By defining
the WSDL you are defining the functionality of the service, how to
call the service, what parameters it expects, and what data structures
it returns.
About this task
WSDL is an XML-based specification for describing networked
services as a set of endpoints that operate on messages that contain
either document-oriented or procedure-oriented information. In this
lesson, you are defining the messages and endpoints for the Web service.
The Web service you define in this lesson creates customer information
and is represented by the SyncCustomer message. This Web service responds
with an OAGIS ConfirmBOD that contains an acknowledgement that a customer
was created.
Procedure
- Create the directory to contain the WSDL document.
- In the Enterprise Explorer view,
navigate to WebServiceRouter/WebContent/wsdl
- Right-click the wsdl directory;
select .
- In the Folder name field, enter MyCompany:
Click Finish.
- Create a WSDL file:
- Right-click the MyCompany directory;
select .
- In the Select a wizard dialog, navigate to Web
Services/WSDL; select WSDL. Click Next.
- In the New WSDL File dialog, select the MyCompany folder.
- In the File name field, enter MyCompany-CustomerServices.wsdl;
click Next.
- In the Options dialog, for the Target namespace field,
enter http://www.mycompany.com/.
- In the Prefix field, enter myco.
- Do not change the other default values. Click Finish to
create the WSDL file. The WSDL editor opens.
- Delete the default schema before defining the WSDL file
contents:
- Select to open the Outline view.
- In the WSDL editor, select the Outline tab.
- Expand the Types folder.
- Right-click the default http://www.mycompany.com/ schema;
click Delete.
- Edit the port settings for the WSDL file:
- Click the Design tab.
- In the drop-down menu for the View: options
select Advanced.
- In the outline, expand Services/MyCompany-CustomerServices/;
select MyCompany-CustomerServicesSOAP
- Click the Properties tab.
- For the port name, rename the port CustomerServices.
- For the port address, change the address to http://localhost/webapp/wcs/services/CustomerServices.
This URL is used to access the services defined by this WSDL document.
The name of the binding in step 2b defines this URL which connects
to the Web service.
- Edit the bindings settings for the WSDL file:
- In the outline, expand Bindings/MyCompany-CustomerServicesSOAP;
select NewOperation. Click the Properties tab.
- Change the value of the Name field from NewOperation to SyncCustomer.
- Edit the Port Type settings for the WSDL file:
- In the outline, expand Port Type;
select MyCompany-CustomerServices.
- Click the Properties tab.
- For the Port Type name, rename the Port Type MyCompany-CustomerServicesPortType
- Select input in the editor window.
In the Name field, type SyncCustomer.
- For the message, select New...;
enter SyncCustomer. Click OK.
- Select output in the editor window.
In the Name field, type ConfirmBOD.
- For the message, select New...;
enter ConfirmBOD. Click OK.
- Edit the Messages settings for the WSDL file:
- In the outline expand Messages;
delete NewOperationResponse and NewOperationRequest by
right-clicking and selecting Delete.
- Expand Messages/ConfirmBOD; select NewPart.
- Click the Properties tab.
- Rename the part ConfirmBOD
- Ensure that Element is selected
in the Reference kind field.
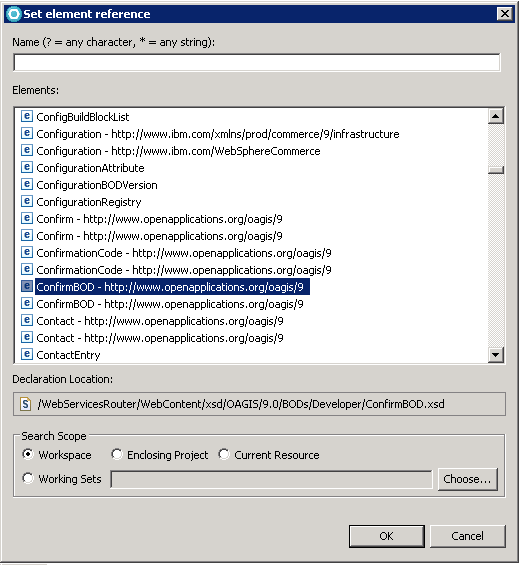
- For the Type, select Browse... in
the set element reference dialog select the Workspace radio
button.
- Select ConfirmBOD - http://www.openapplications.org/oagis/9;
ensure that the Declaration Location for this reference is /WebServicesRouter/WebContent/xsd/OAGIS/9.0/BODs/Developer/ConfirmBOD/xsd
- Click OK.
- Expand Messages/SyncCustomer; select NewPart.
- Click the Properties tab.
- Rename the part SyncCustomer
- Ensure that Element is selected
in the Reference kind field.
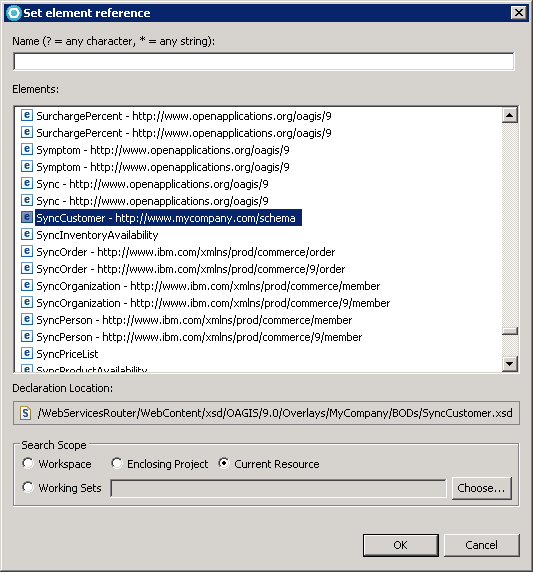
- For the Type, select Browse... in
the set element reference dialog select the Current Resource radio
button.
- Select SyncCustomer - http://www.mycompany/schema;
ensure that the Declaration Location for this reference is /WebServicesRouter/WebContent/xsd/OAGIS/9.0/Overlays/MyCompany/BODs/SyncCustomer.xsd
- Click OK.
- Save your work and close the WSDL Editor.
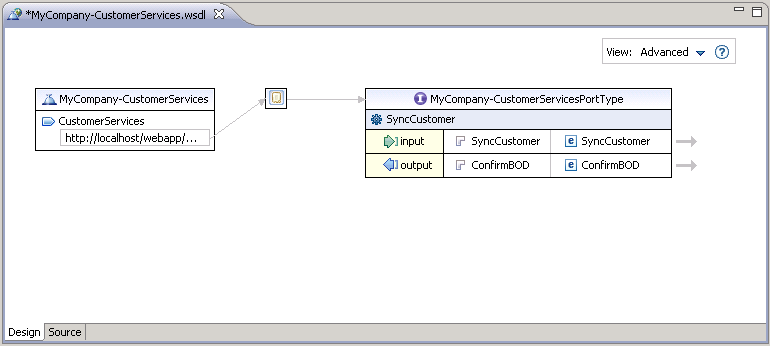
After
the preceding steps are complete, the WSDL Editor shows a Web Service
definition similar to the one found in the following screen capture.
Note the arrows which indicate how the differ parts of the Web Service
definition are associated.