Manually deploying a new BigFix Virtual Relay instance
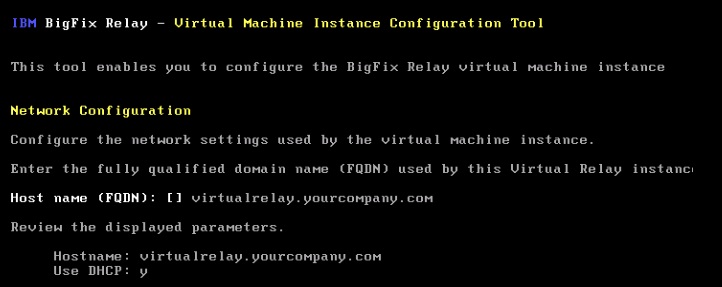
In case of manual deployment, the network parameters request is automatically displayed.
If you specified "y" (yes) to the DHCP mode when creating the template, you are required to enter the host name used by the virtual machine instance and review the displayed DHCP information.
If you specified "n" (no) to the DHCP mode when creating the template, you are required to enter the host name used by the virtual machine instance and all the related network parameters.

Enter the static IP parameters of your network.
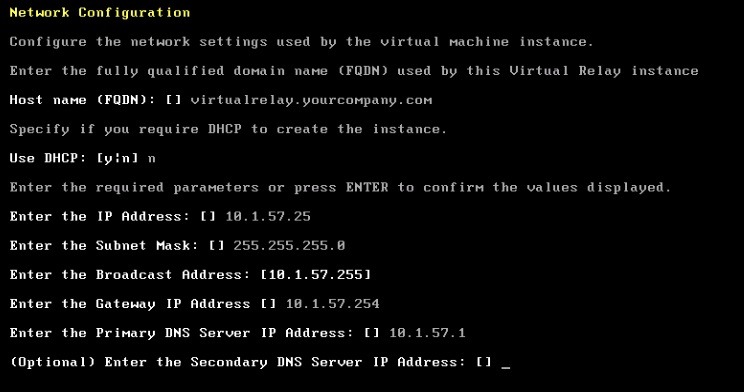
Review or confirm that the displayed parameters are correct by pressing ENTER.

Confirm that the network configuration is correct by entering "y" (yes).
If during the template creation you specified "n" (no) for the masthead setup, the following panel is displayed:

Enter the BigFix server parameters, IP address and port number.
The instance was configured successfully and the BESClient and the BESRelay services begin to start.

Log in as tc user.
- The Virtual Relay name.
- The BigFix server IP address.
- The VMware Tools status (Running, Not running, Not installed).

You can check the status of the BESClient and the BESRelay services as follows:

The Virtual Relay instance is ready to use.